
List events with their date, start time, end time and description. Events drop off the screen on their own once they are over, which suits event centers, churches and venues with several events a day.
What you’ll need
- The Pro plan or higher.
- A multizone layout. The event list fills the screen below its top margin; use the space above it for a clock, your logo or a header.
Steps
-
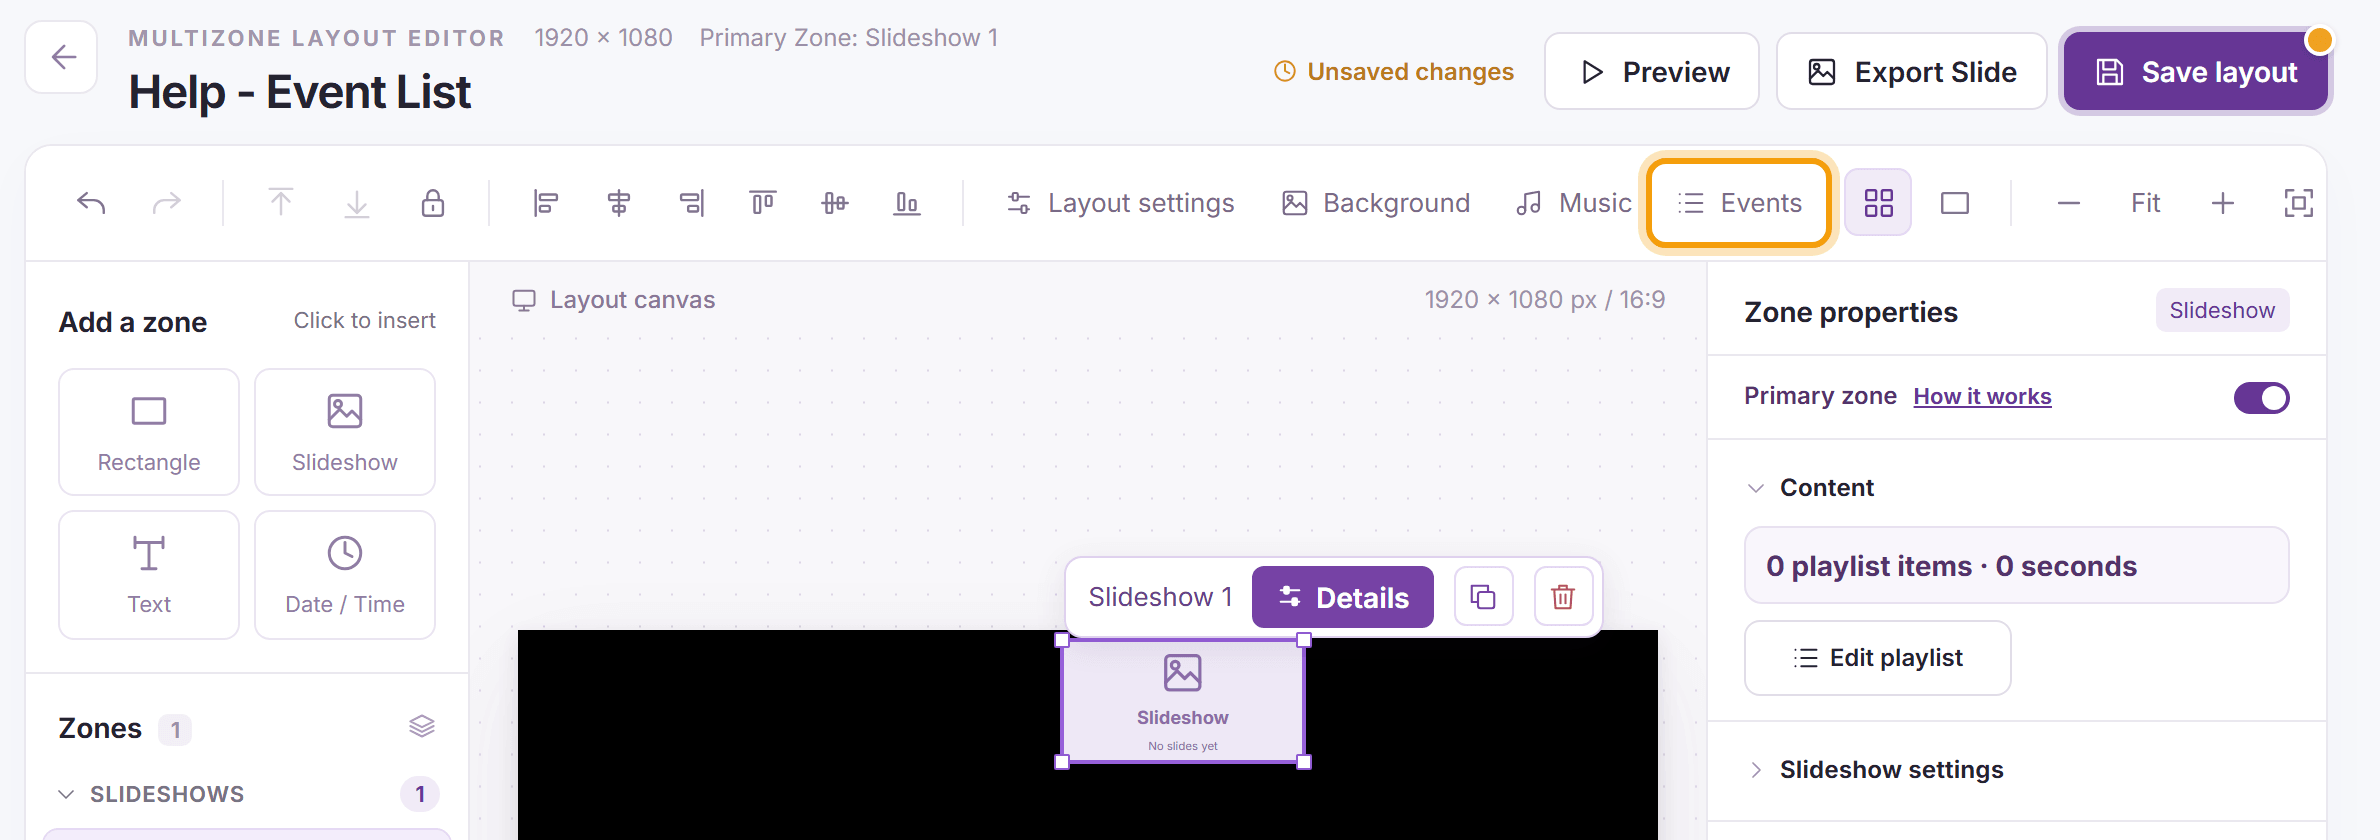
Open the multizone layout and click Events in the toolbar. Once the layout has an event list, you can also click Edit events at the top of the list on the canvas.
-
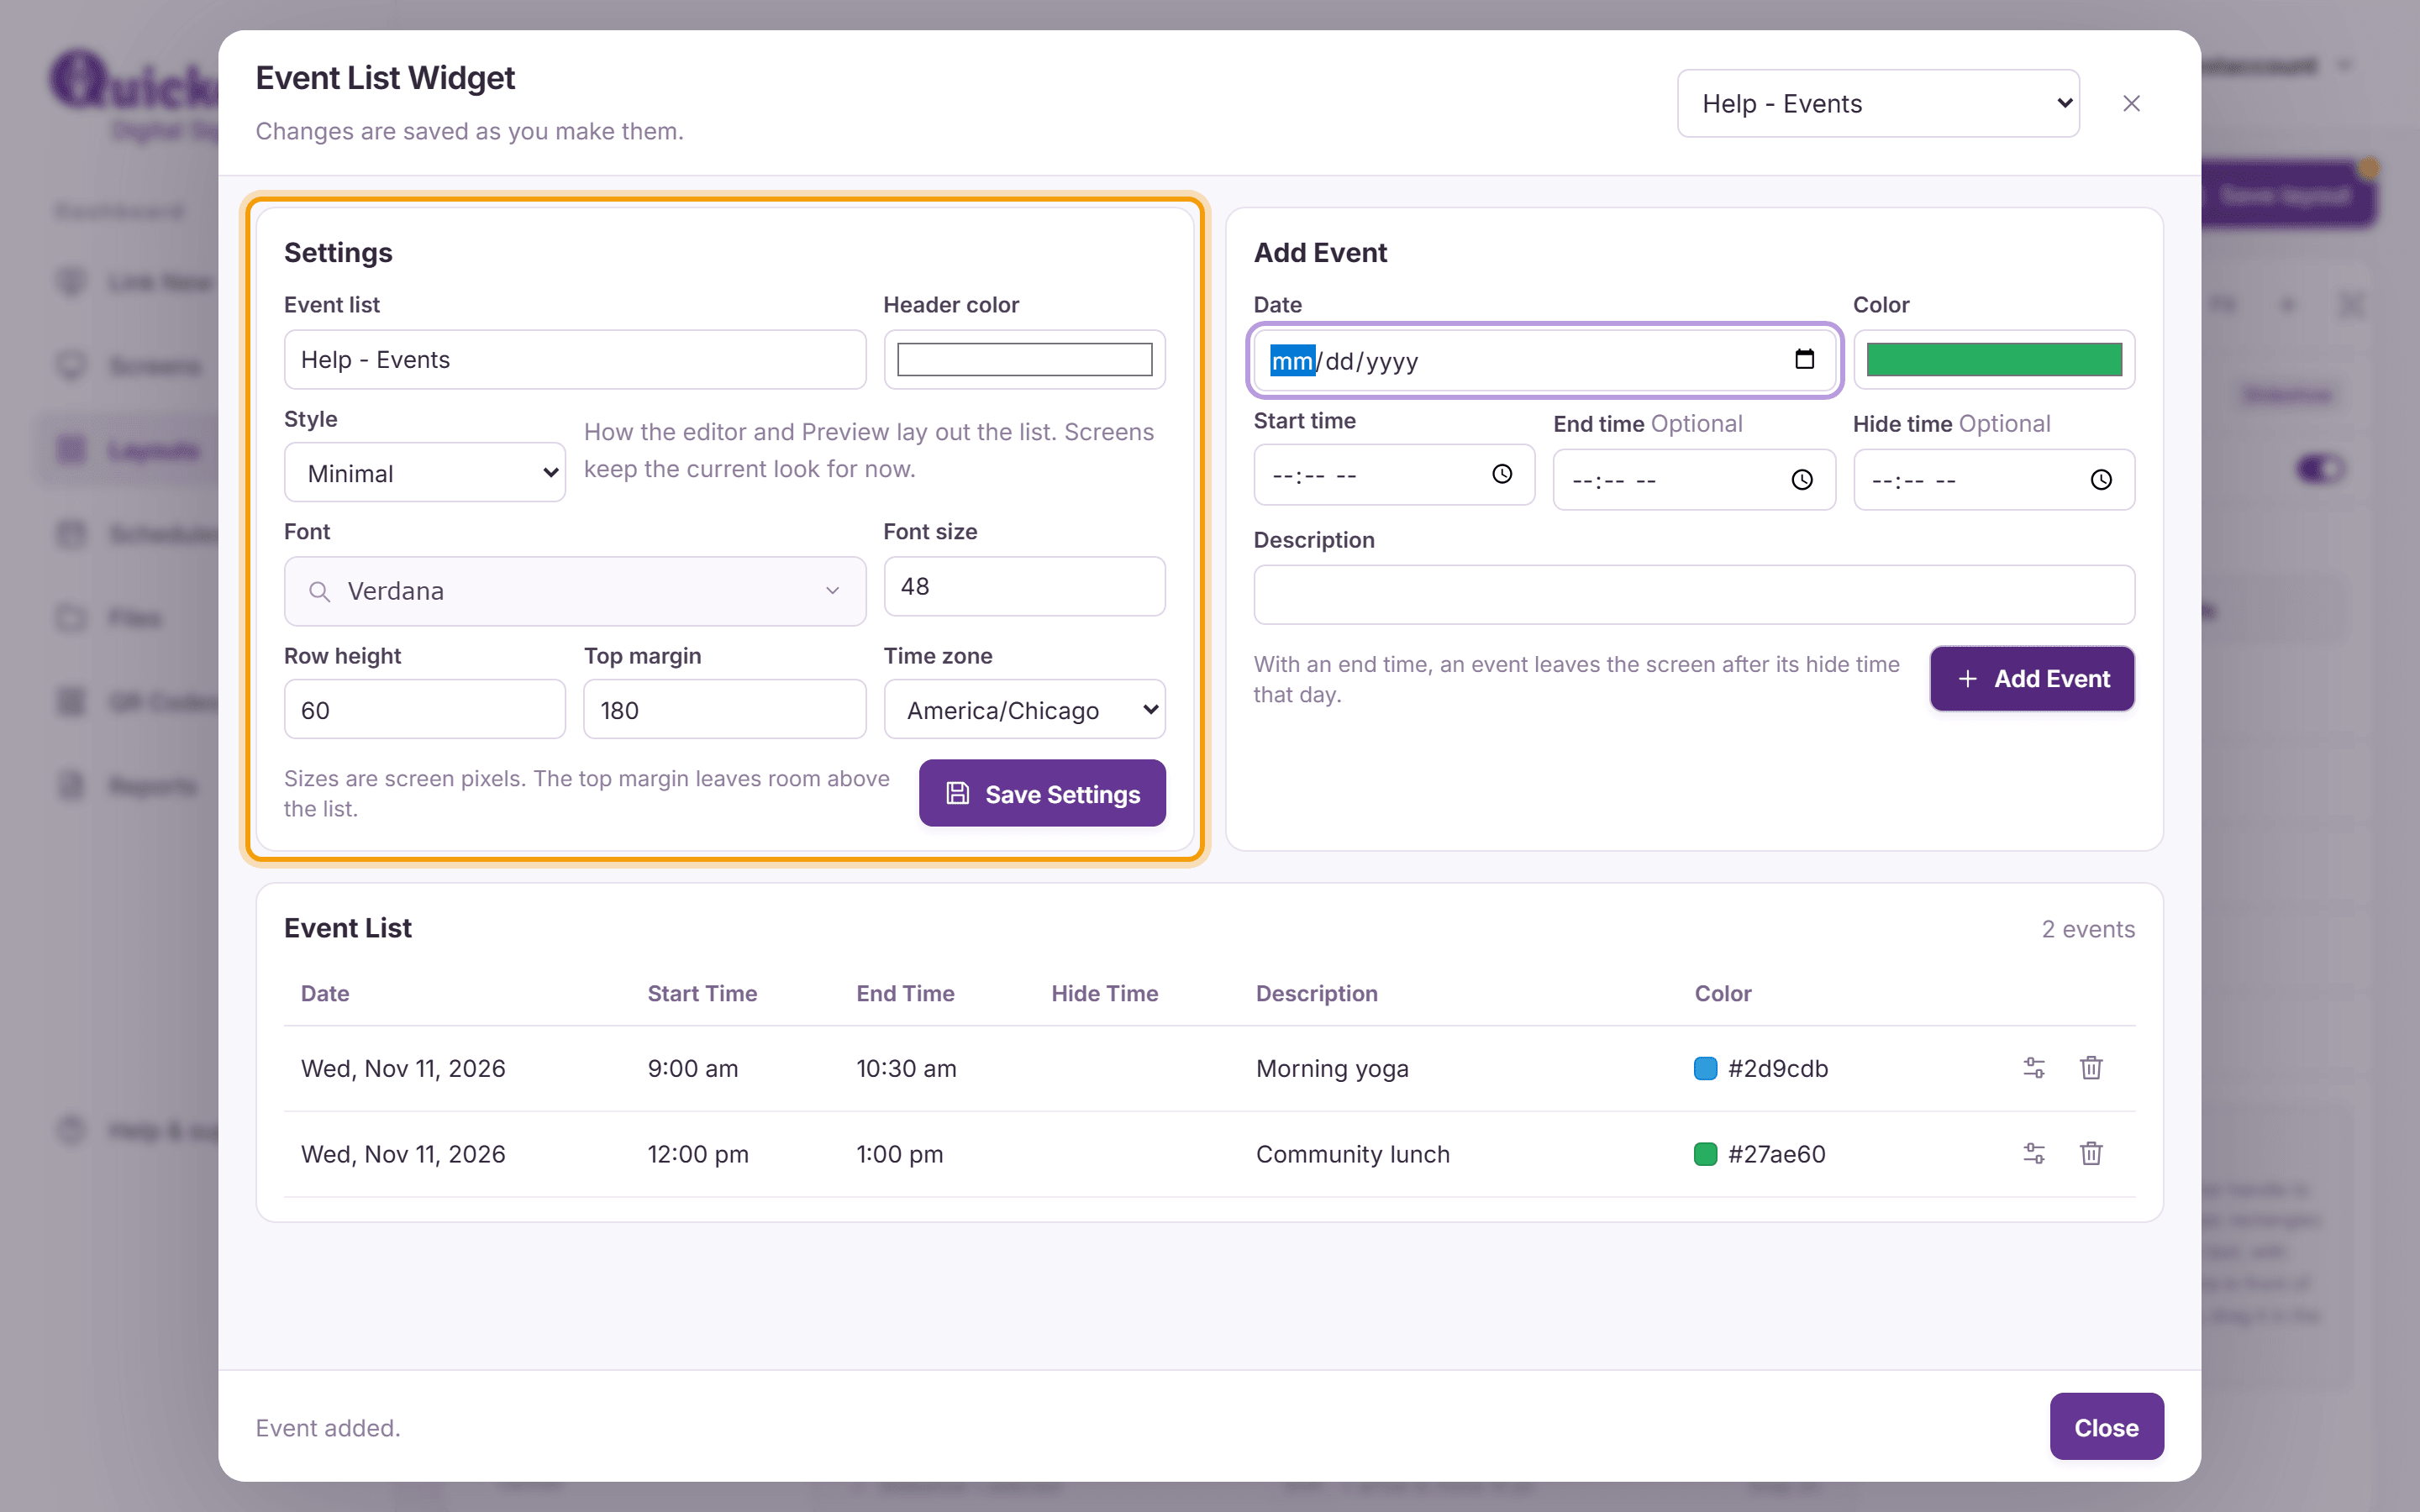
In the Event List Widget window, choose Add New Event List from the menu at the top to start a list, or choose a list you already have. Under Settings, set:
- Event list: the list’s name, and its Header color.
- Style: Minimal (the default), one panel with each date as a heading over its events, or Columns, a card for each date, three across.
- Font, Row height and Top margin (in screen pixels; the top margin leaves room above the list), and the Time zone the events are in.
Click Save Settings.
-
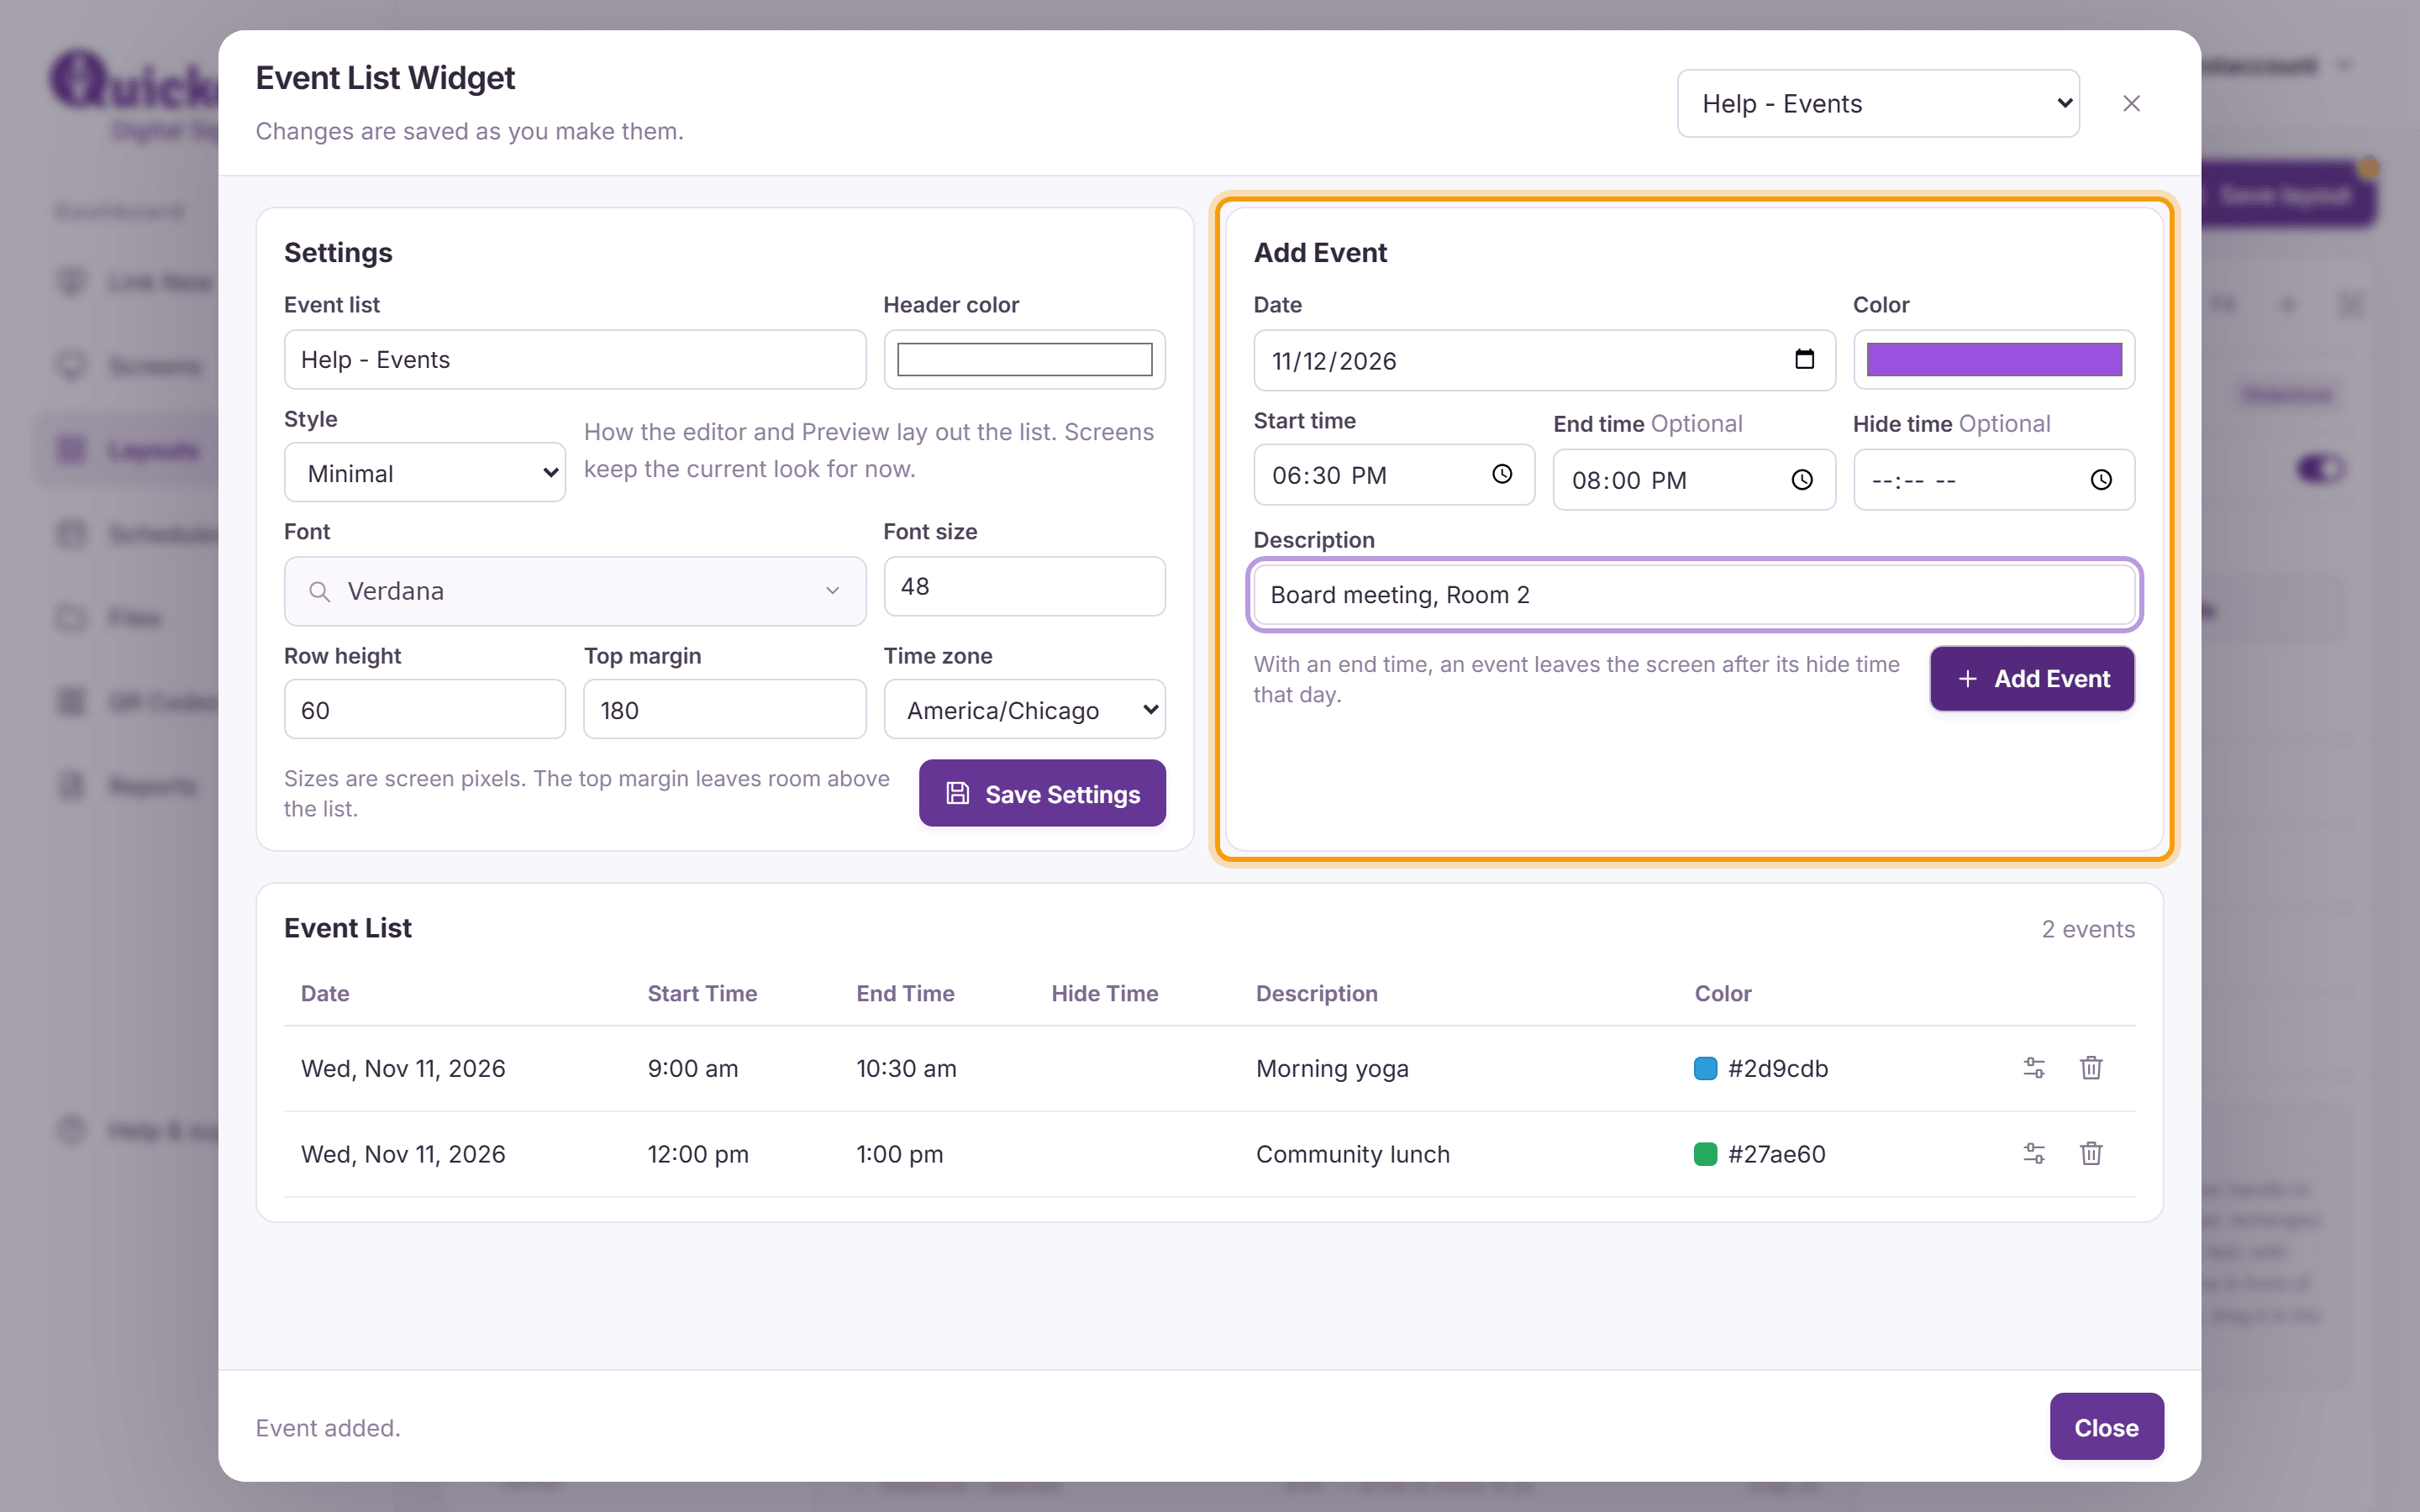
Under Add Event, enter the Date, Start time and Description, and if you like an End time and a Hide time. With an end time, the event leaves the screen after its hide time that day. Choose a Color for the event (a new event starts with the color of the last one you added), then click Add Event. Events appear under Event List, where the pencil edits one and the trash button deletes it.
-
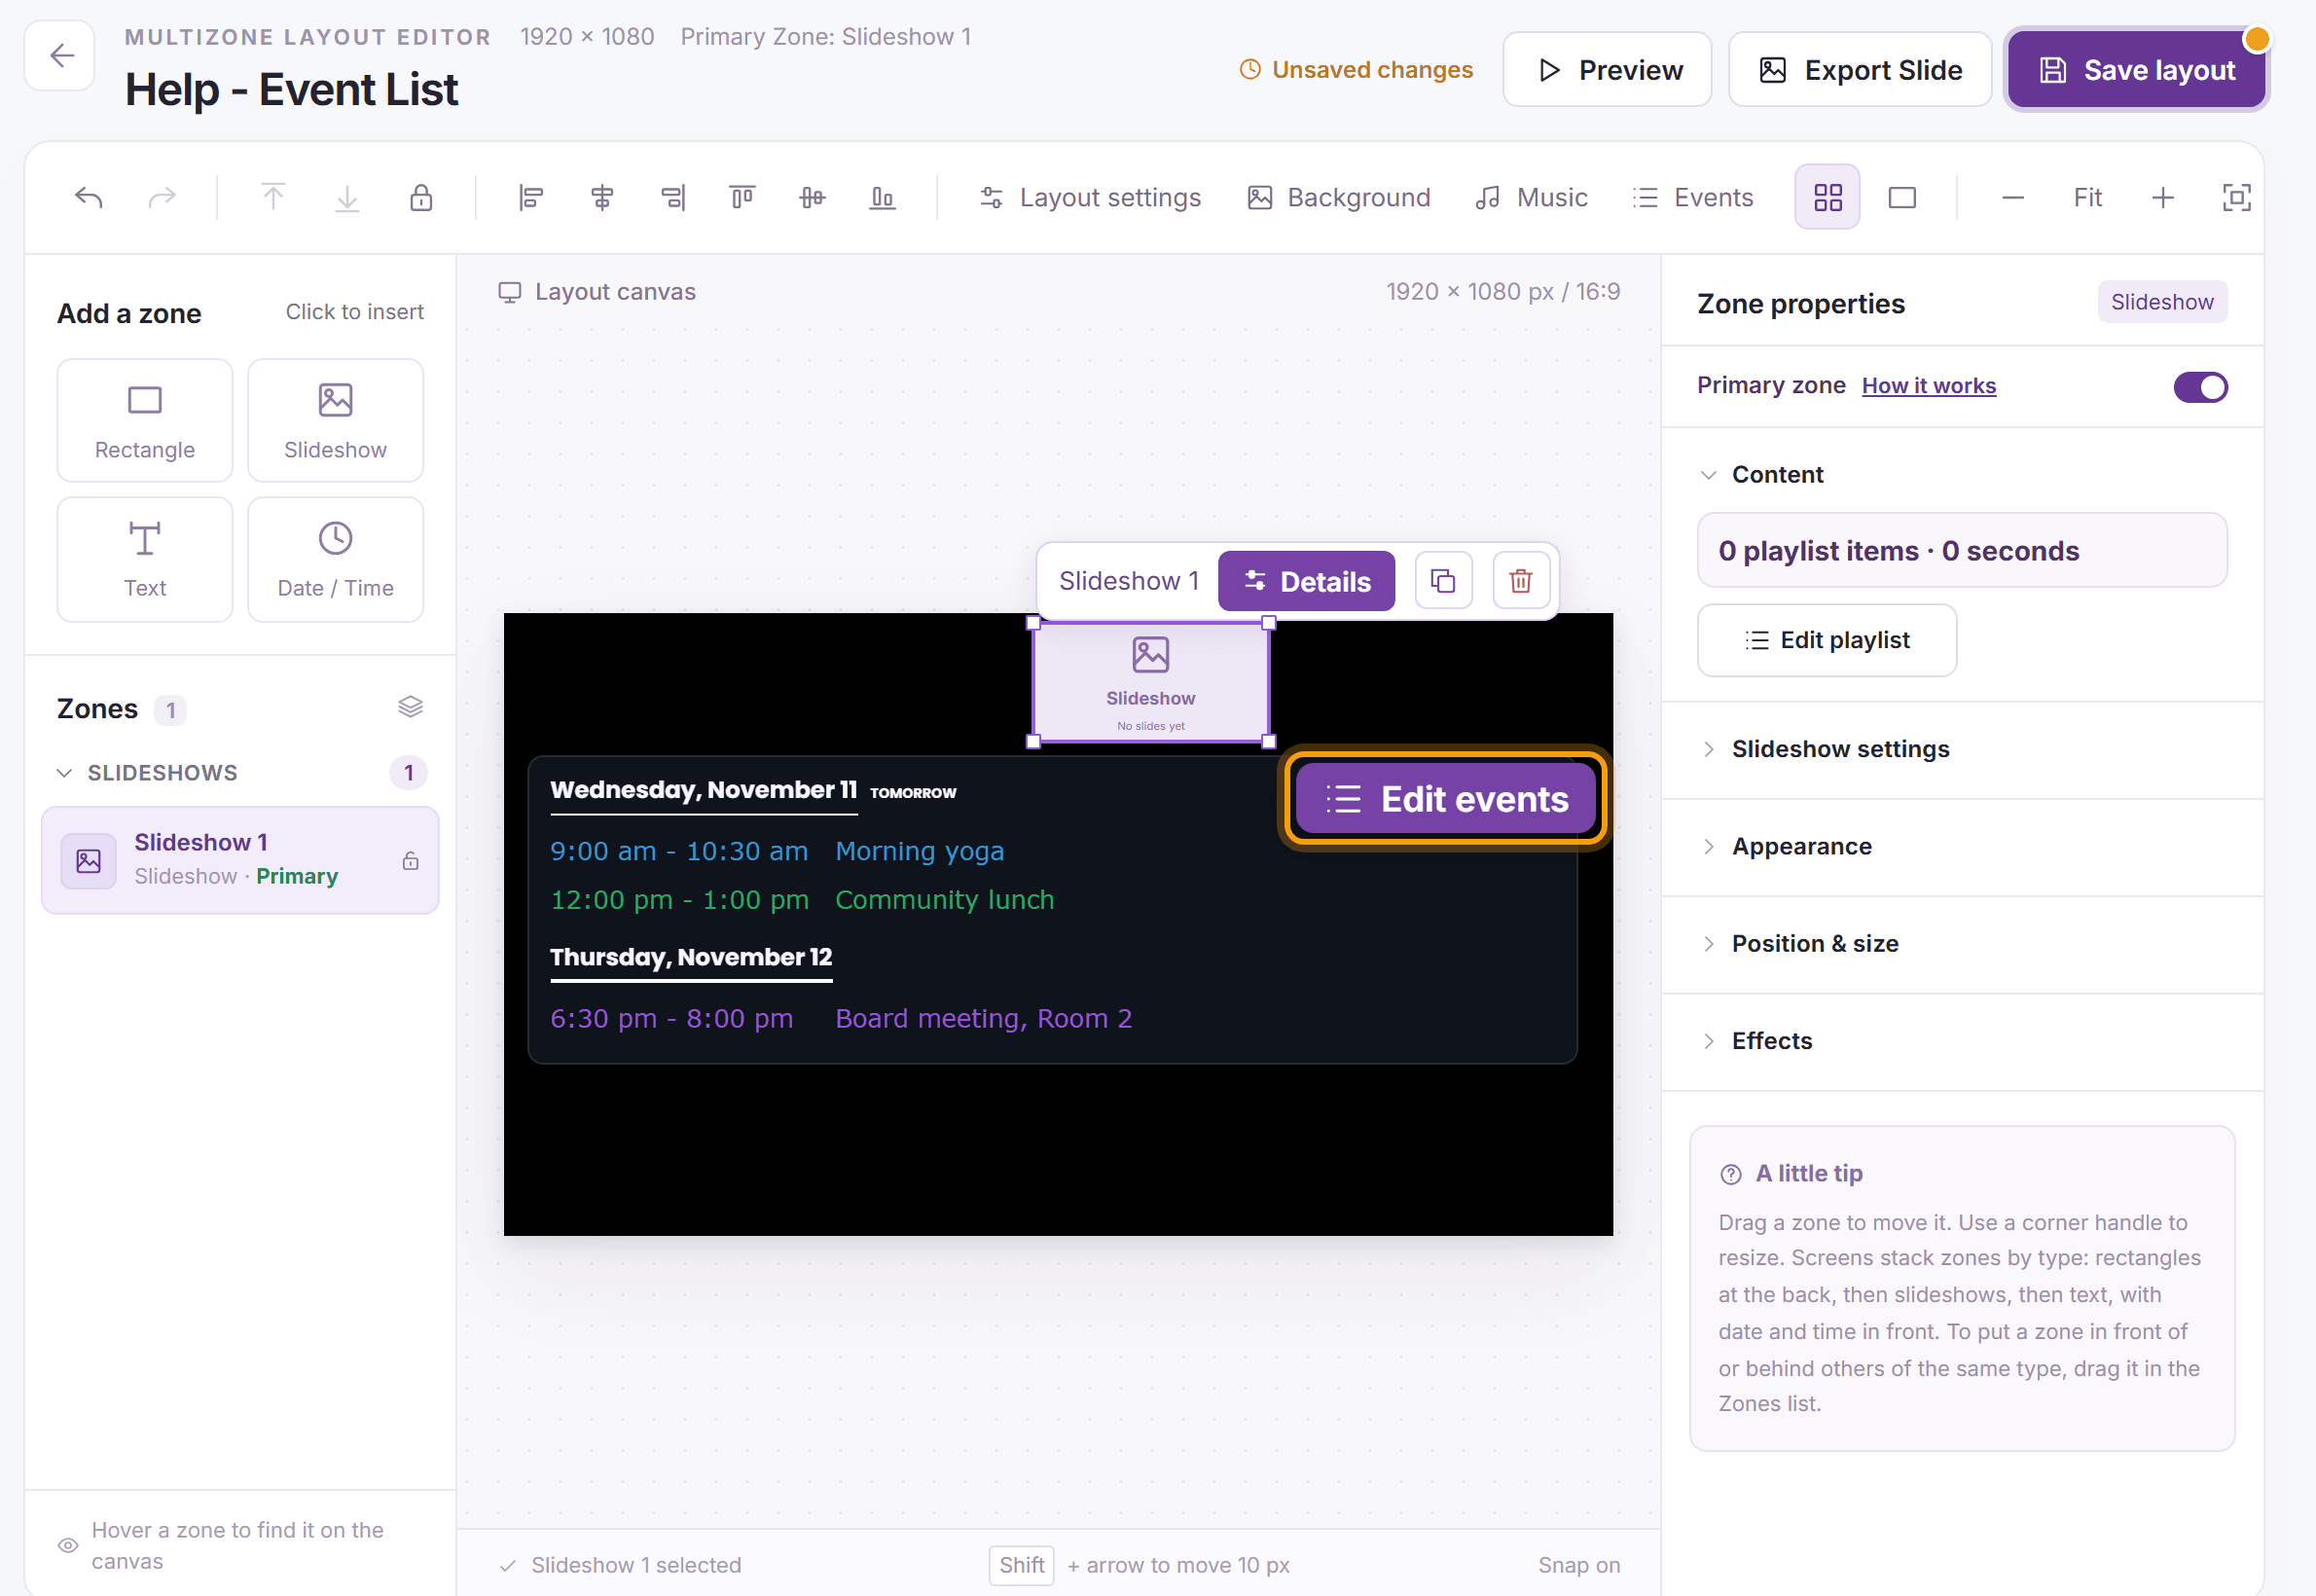
Changes are saved as you make them; screens show them when they next refresh. Click Close. The canvas draws the list in its style, with Page 1 of the number of pages when the events don’t fit on one; Preview turns the pages every few seconds. Click Save layout.
-
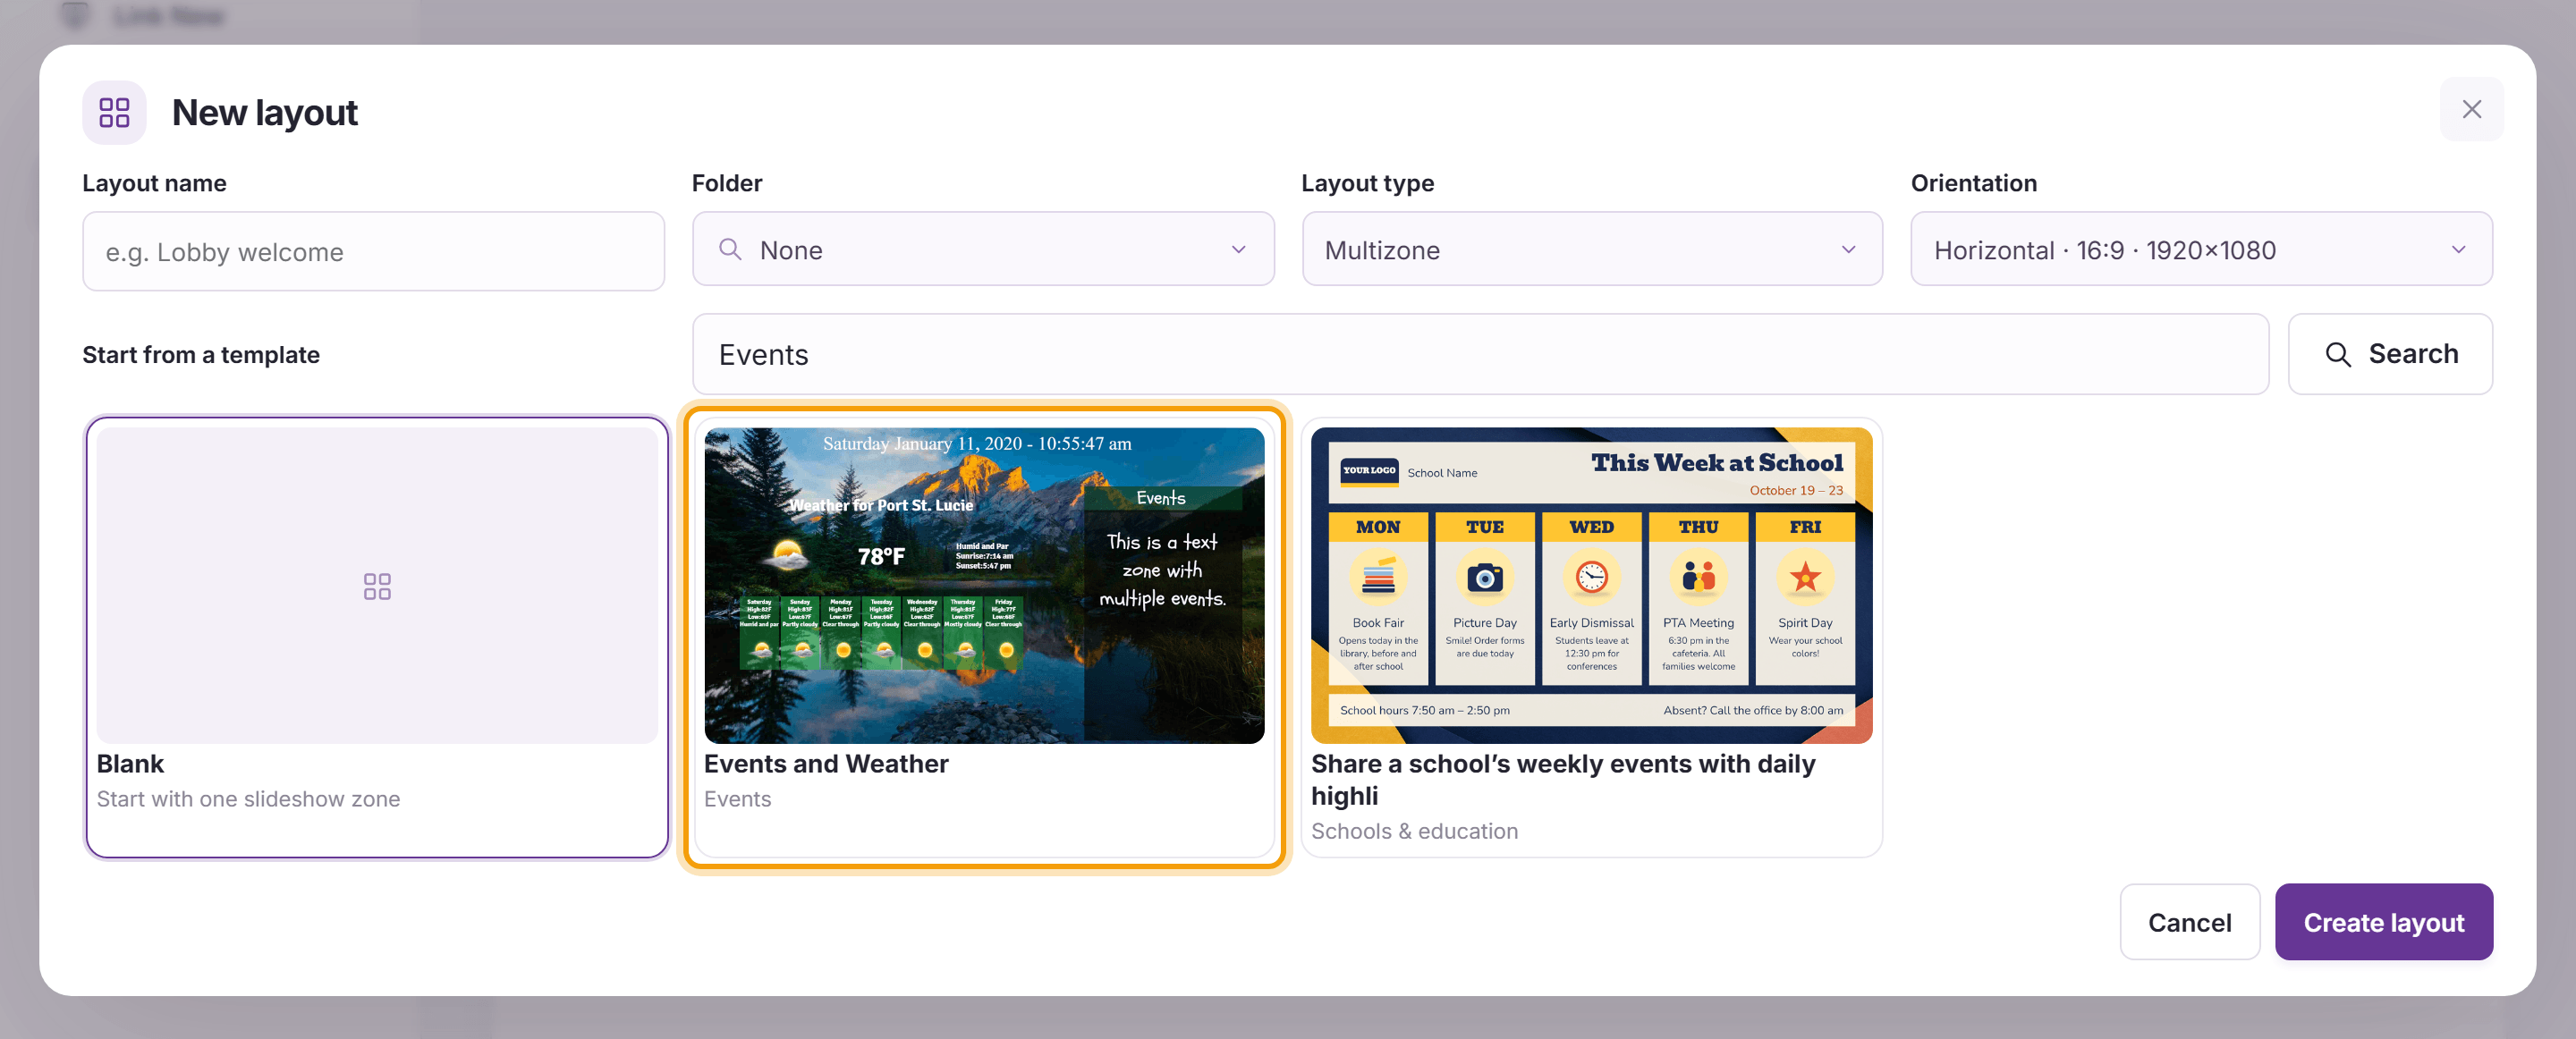
To start with a ready-made design instead, create a new multizone layout and choose the Events and Weather template under Start from a template (see Starting a Layout from a Template).


Tip: Roku screens show the Minimal and Columns styles with the Quickesign app version 10.5 or later. Until then, screens keep the current look.
What’s next
Calendar/Google Doc: show a Google or Outlook calendar instead.