
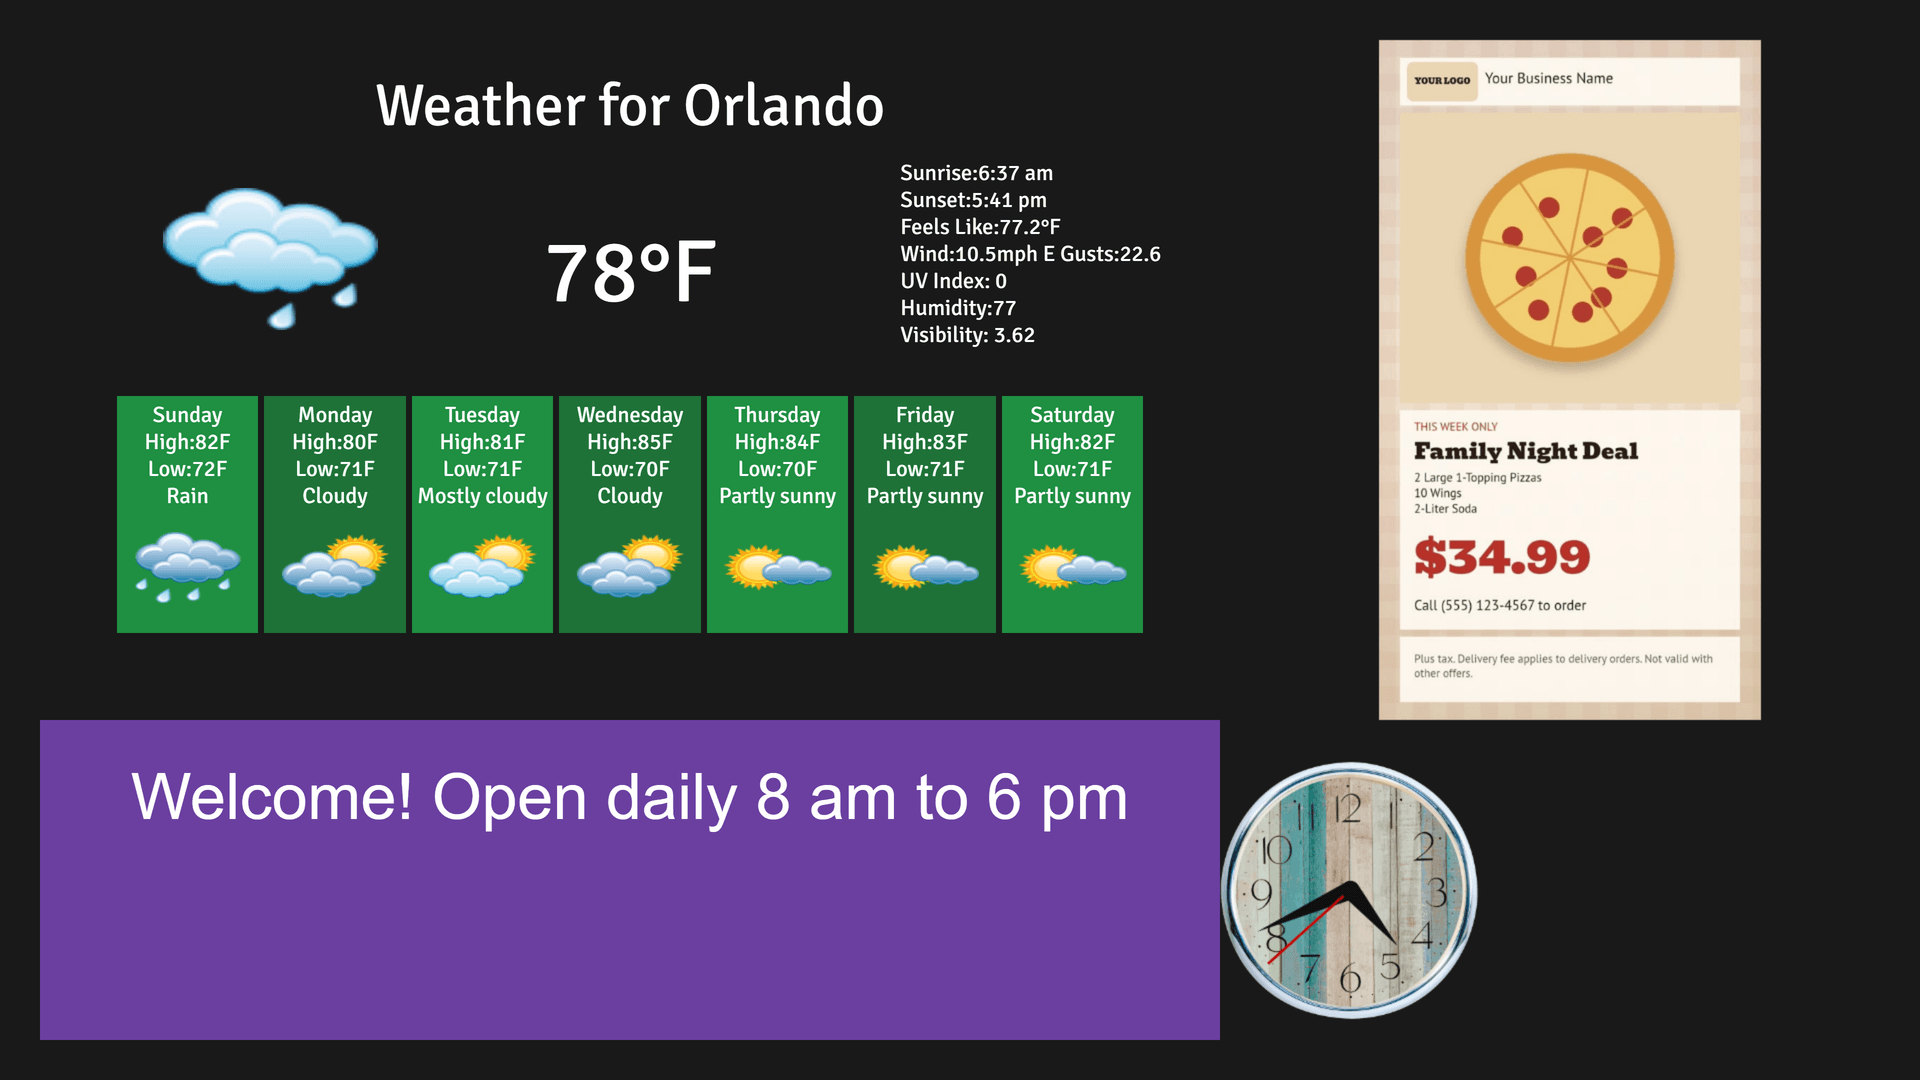
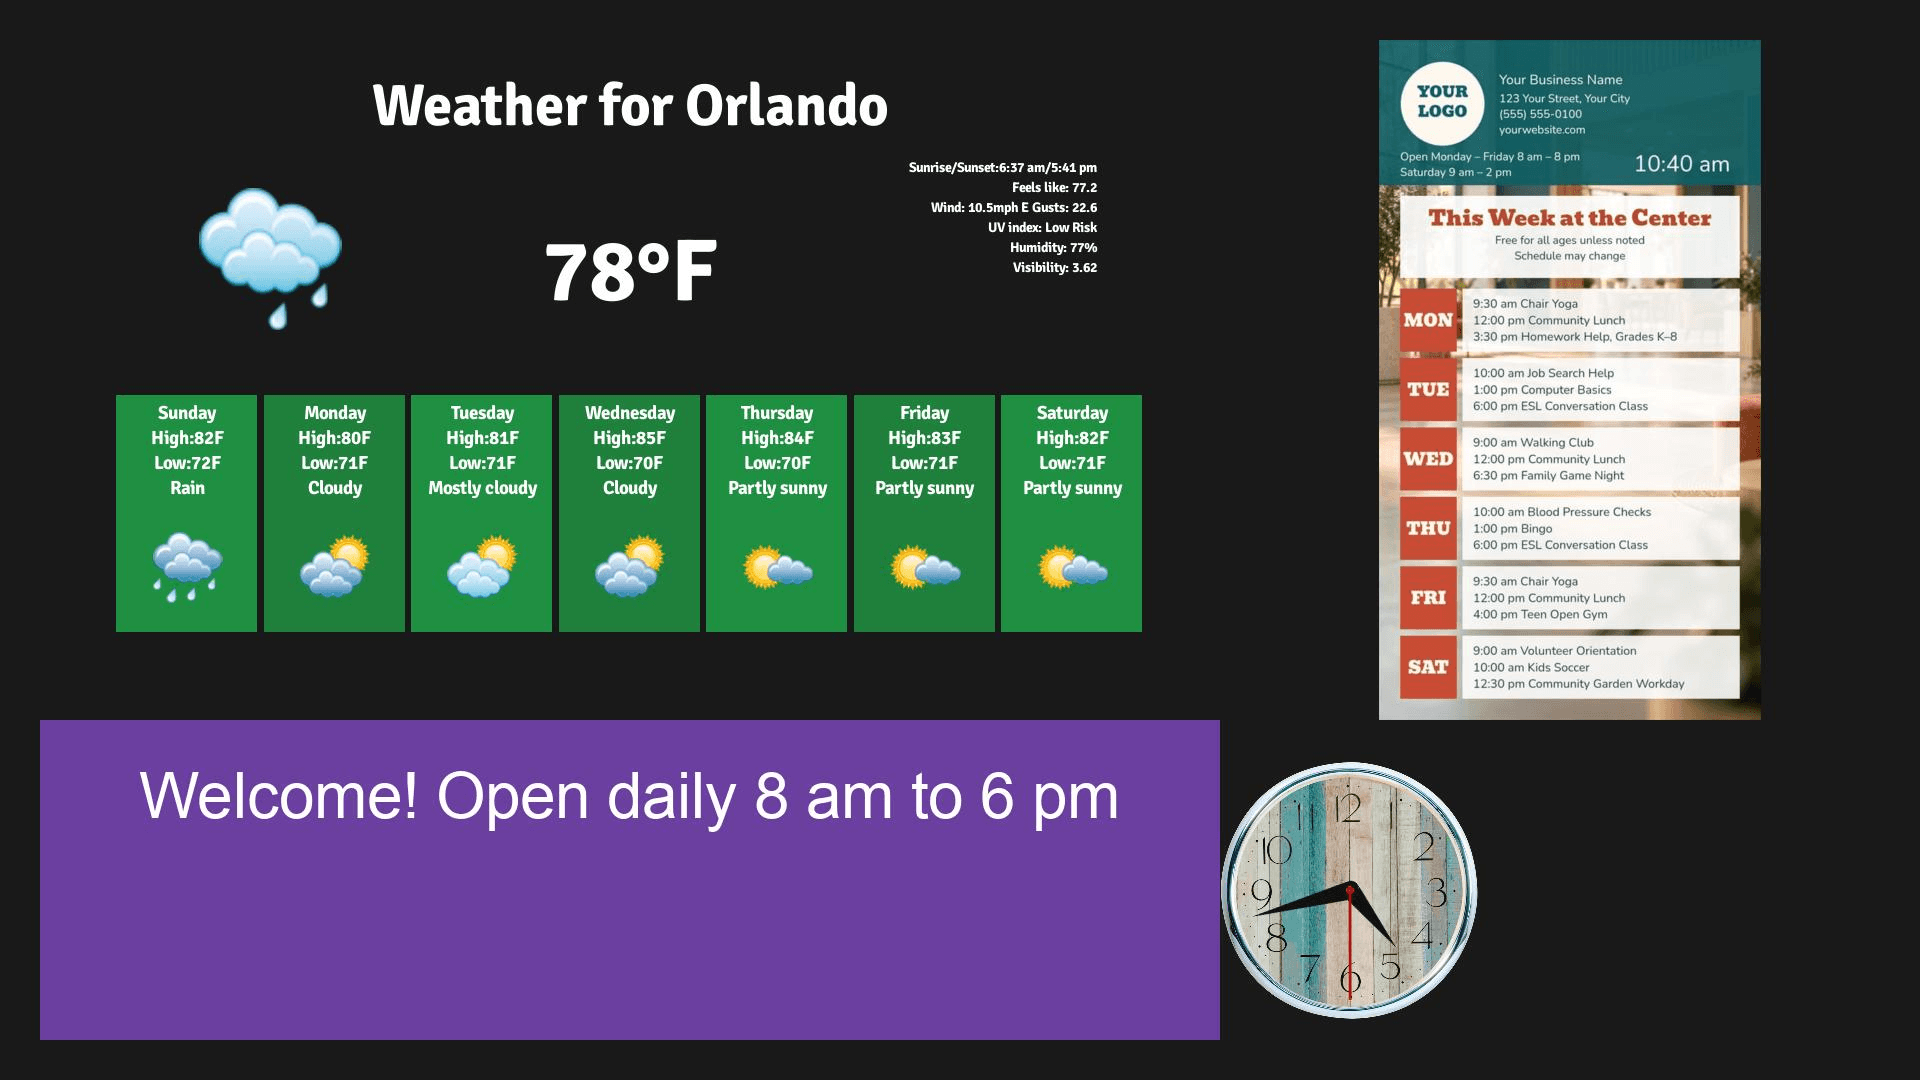
Split your screen into zones so weather, a clock, text and a slideshow can play side by side. This guide builds a complete multizone layout from a blank start.
What you’ll need
- A Quickesign account on the Standard plan or higher. The Weather widget used in this guide needs the Pro plan.
- A computer signed in to the dashboard at dashboard.quickesign.net.
- A few images or videos for the slideshow (PNG, JPG, MP4, MOV, PDF or PowerPoint), or files already in your library.
Steps
-
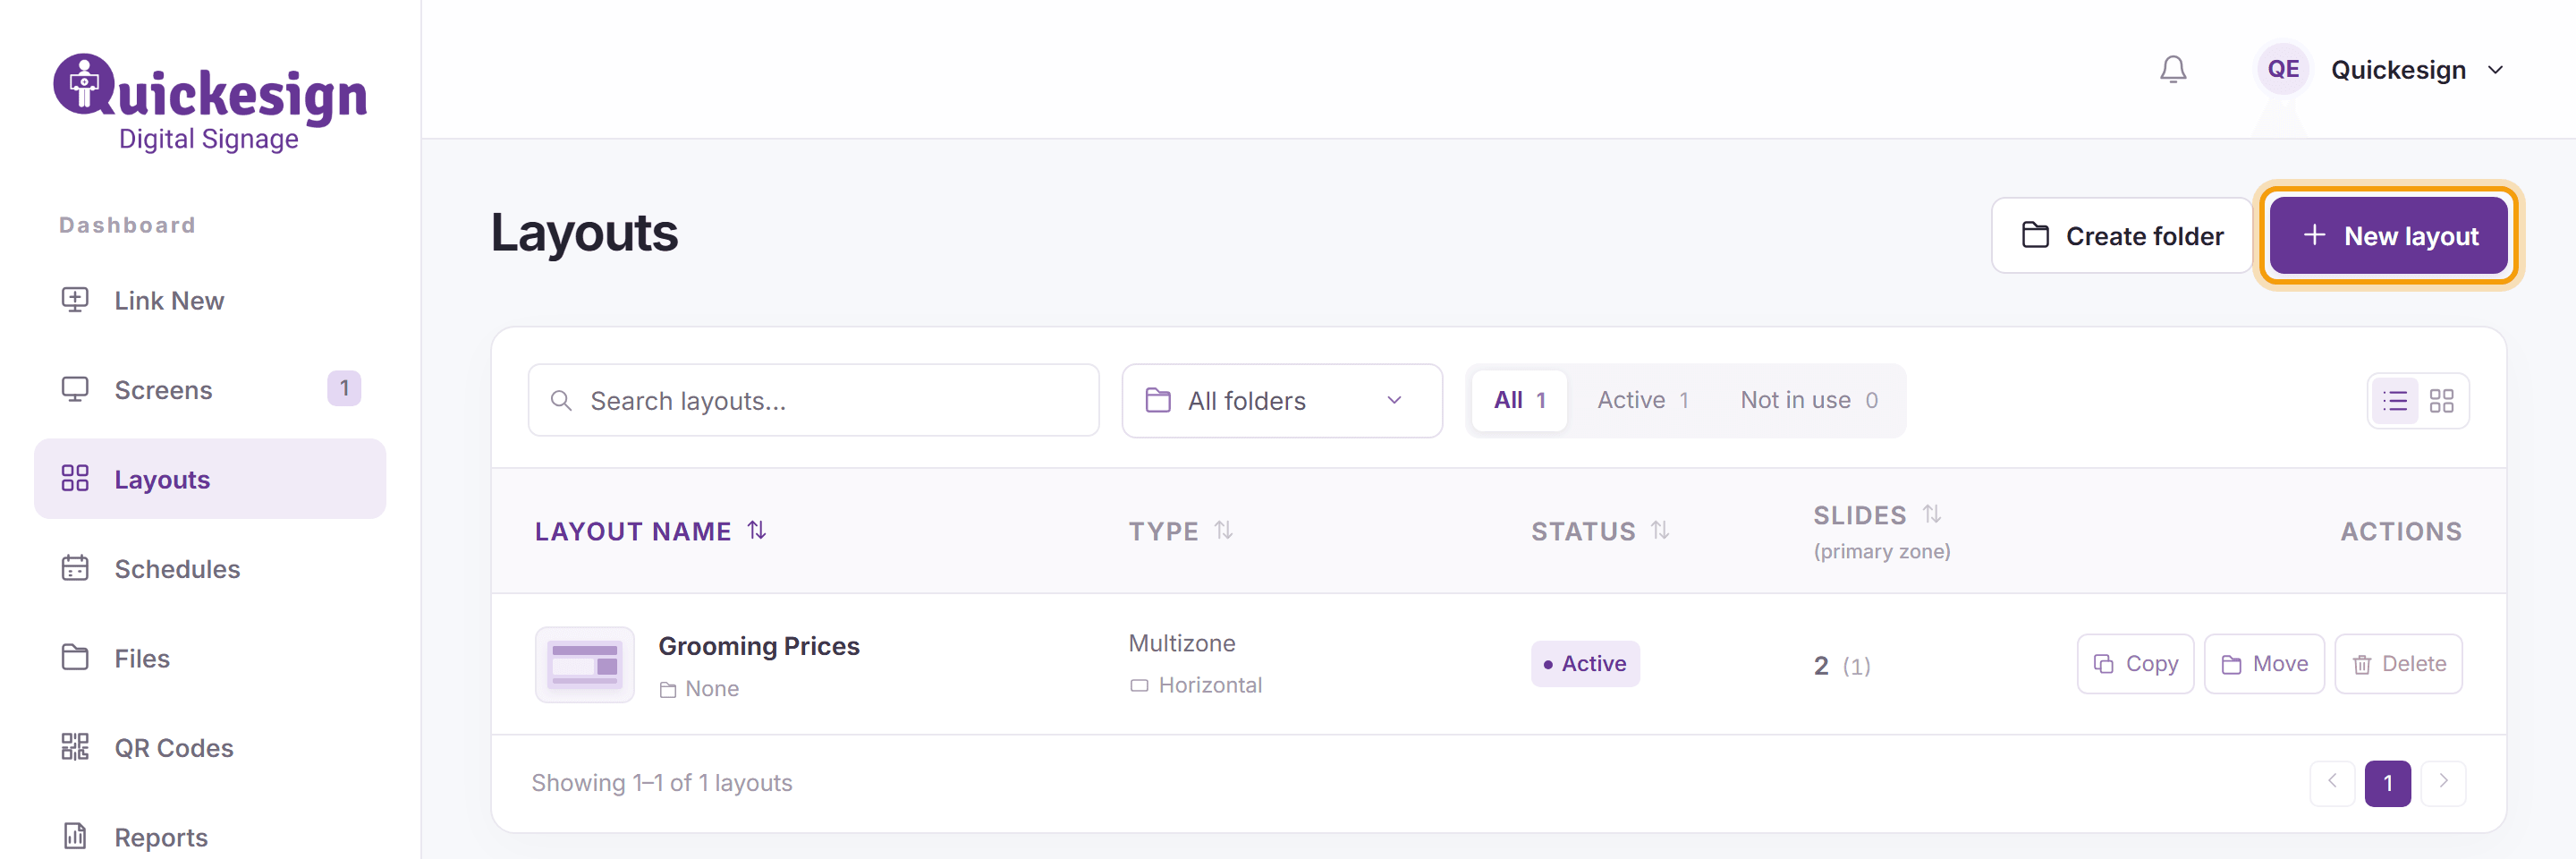
In the menu on the left, click Layouts, then click New layout.
-
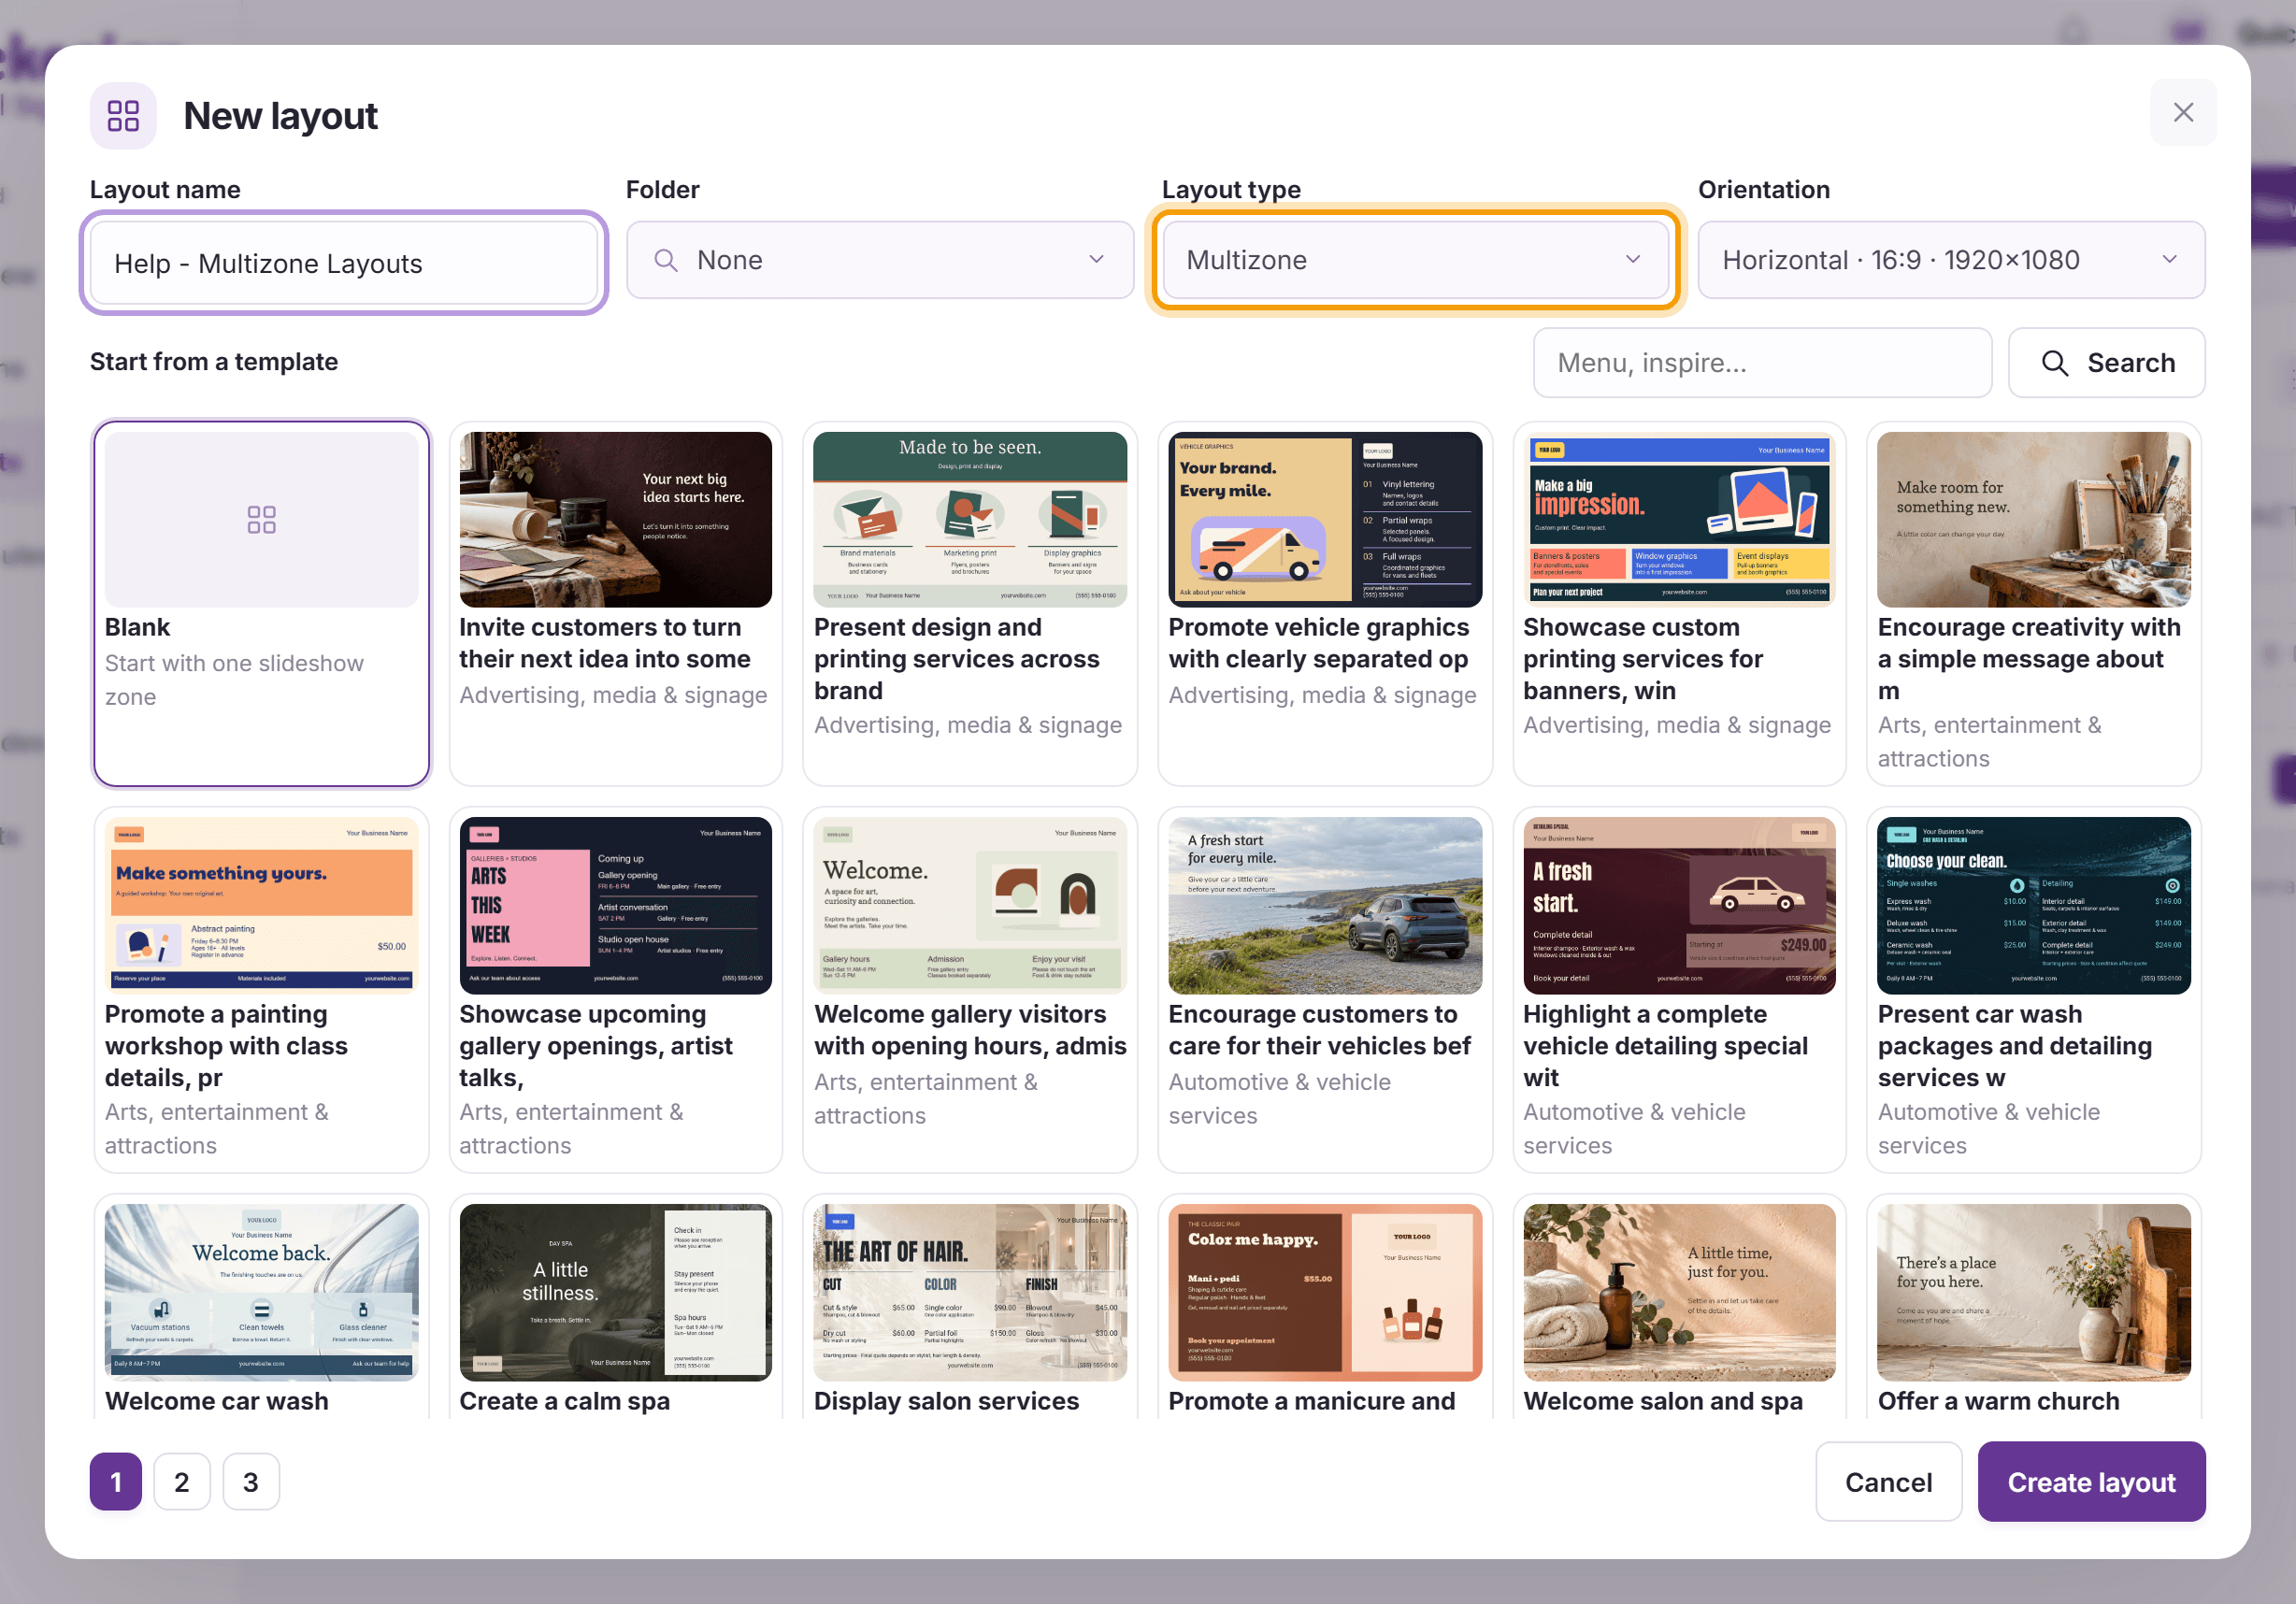
Enter a Layout name, set Layout type to Multizone and choose the Orientation that matches your screen. Leave Blank selected under Start from a template, then click Create layout.
-
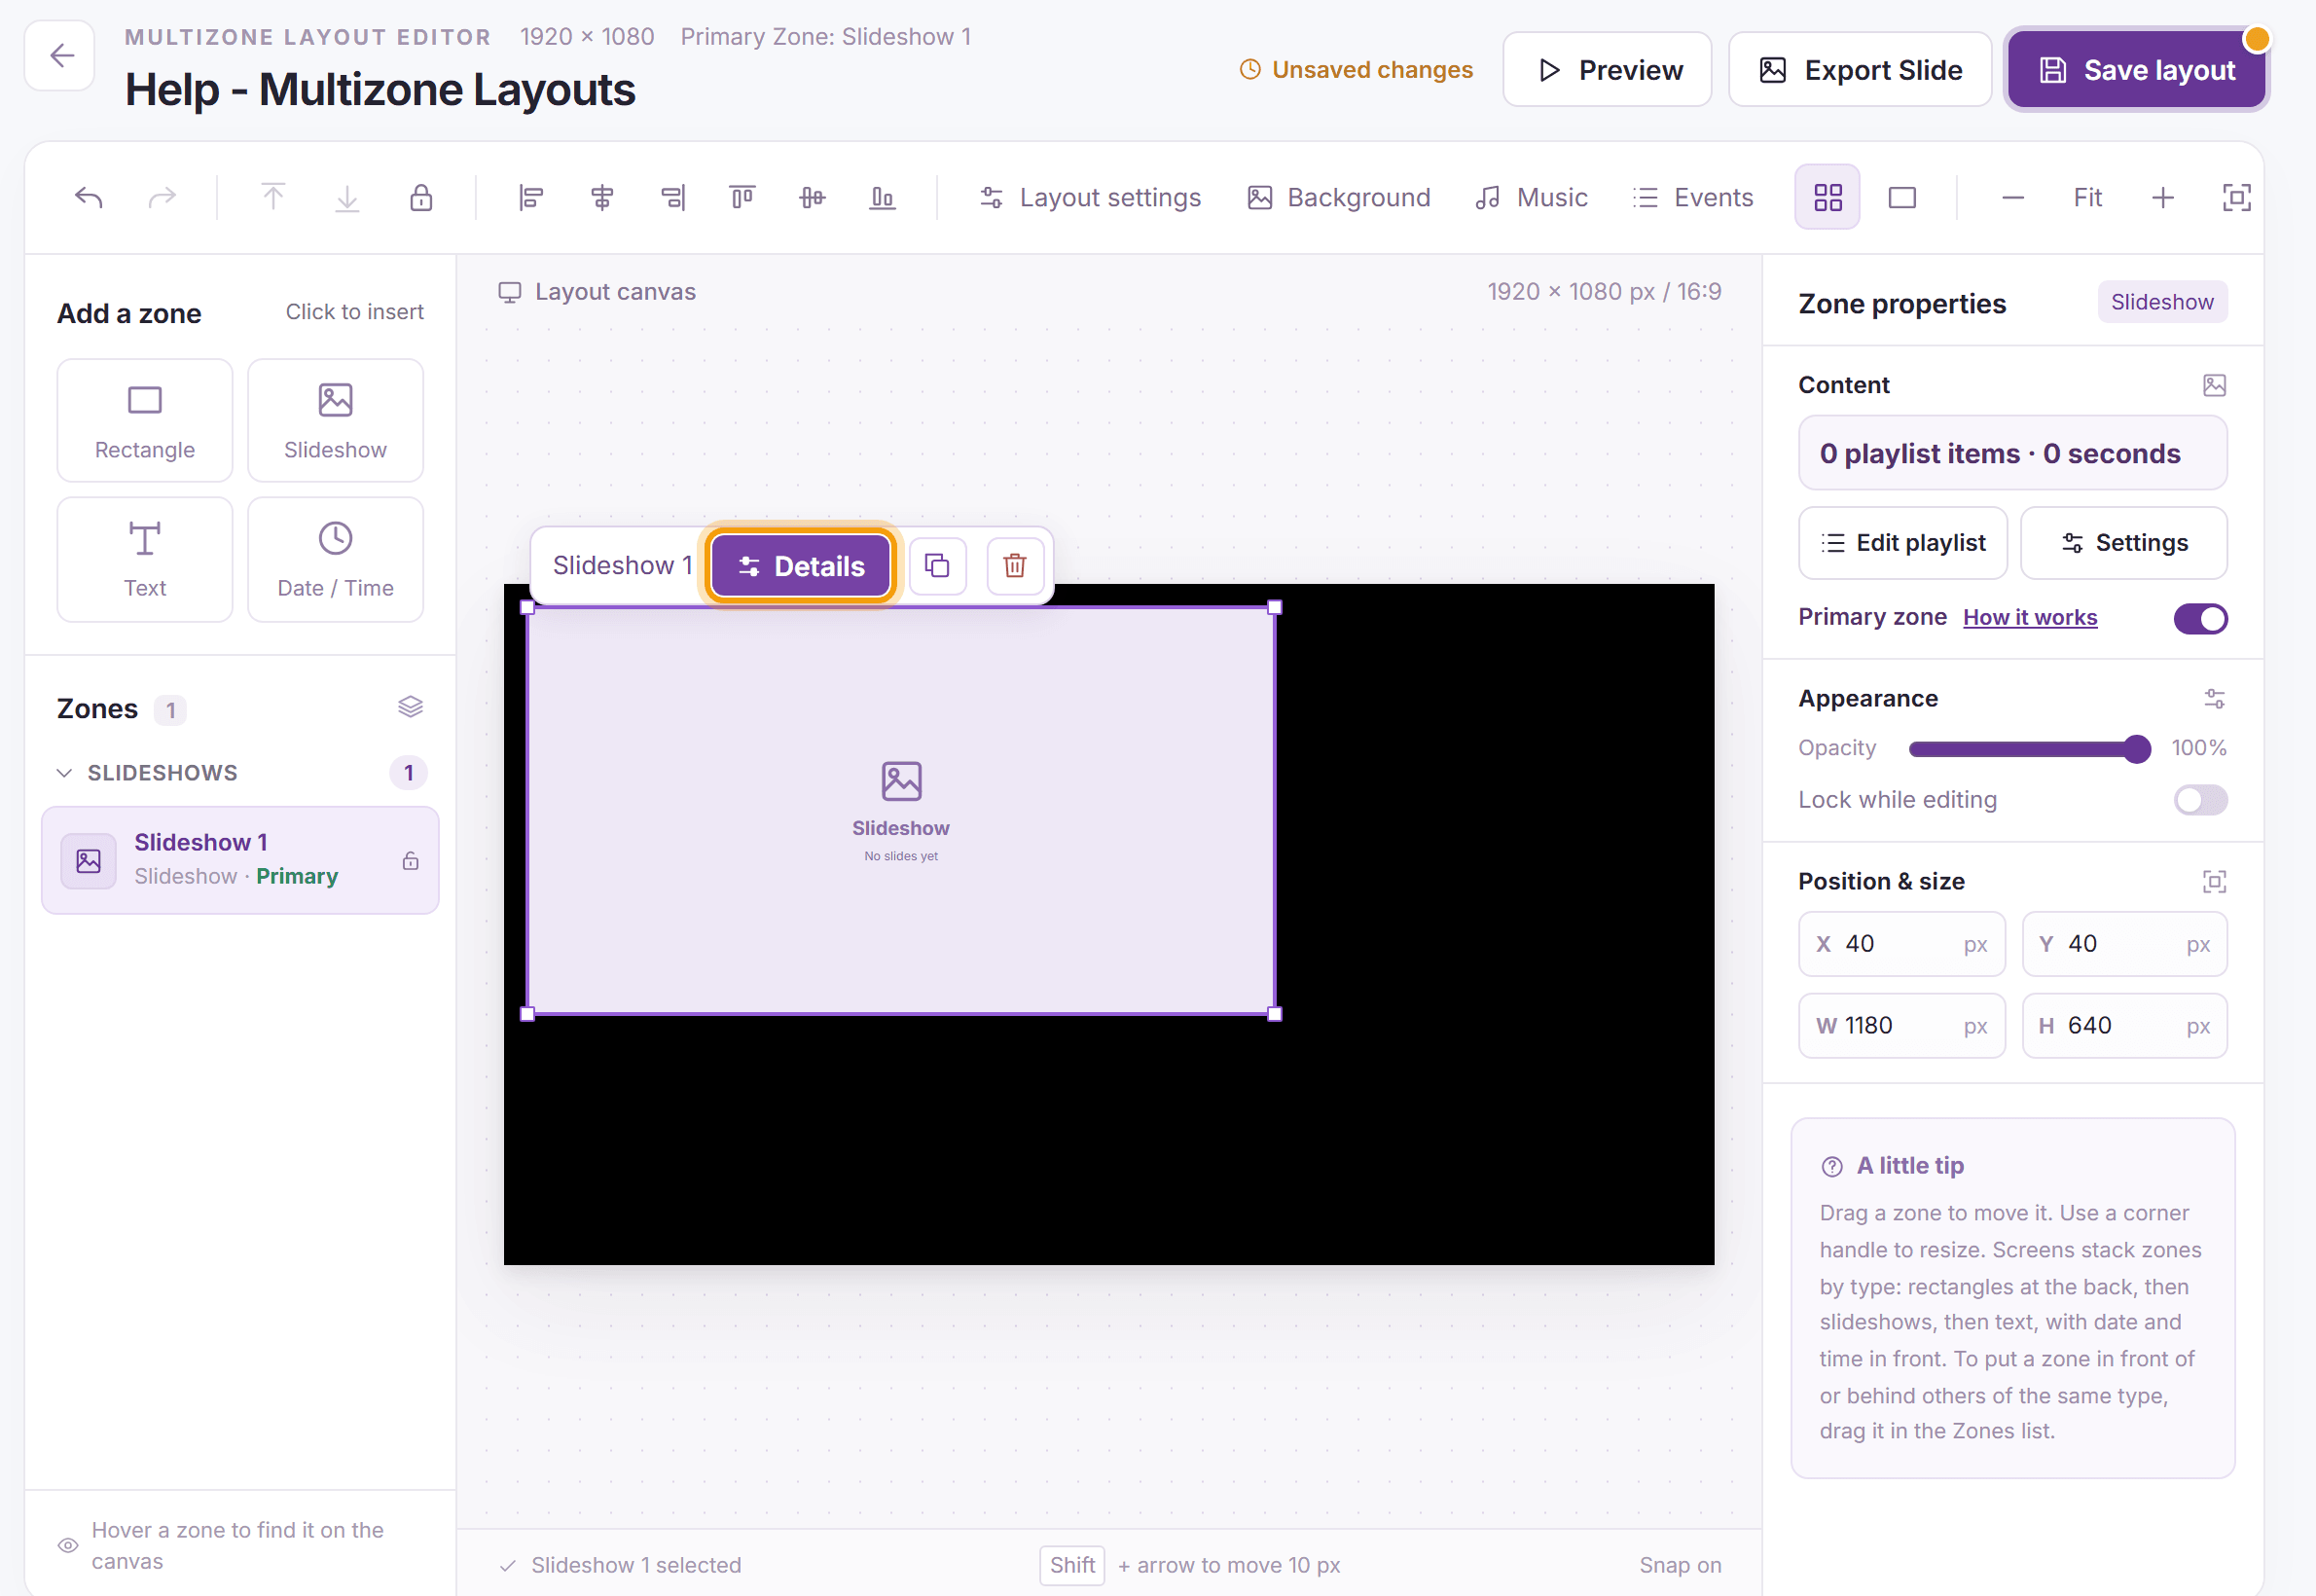
The multizone layout editor opens with one slideshow zone, Slideshow 1. Click the zone on the canvas, then click Details above it.
-
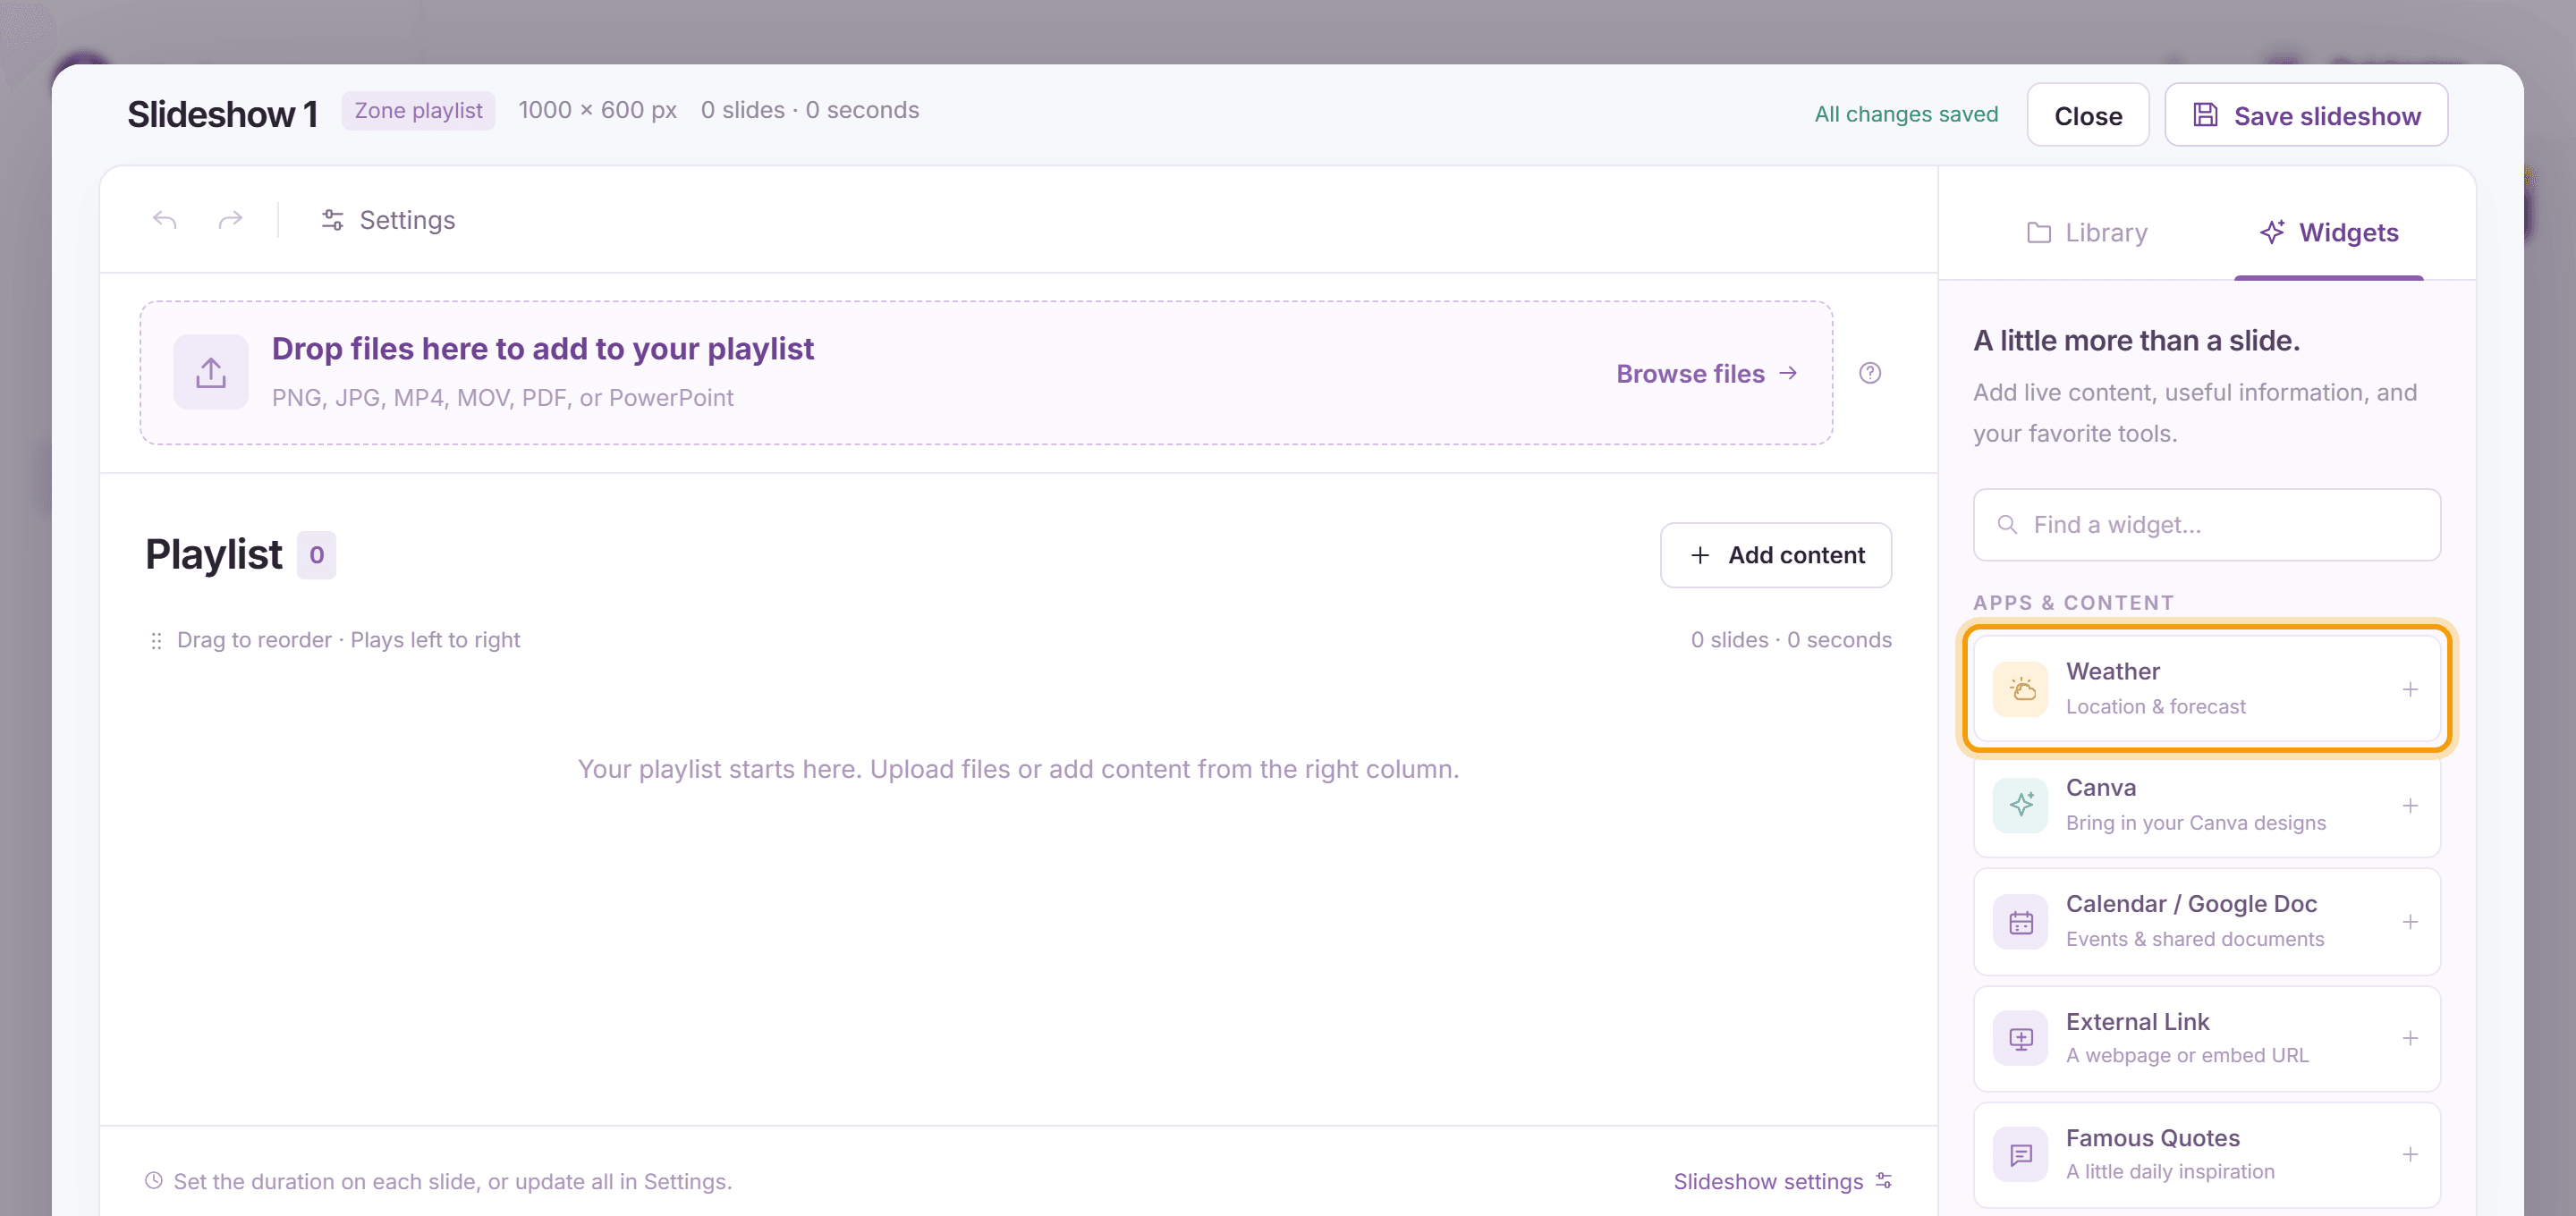
In the slideshow window, open the Widgets tab and click Weather.
-
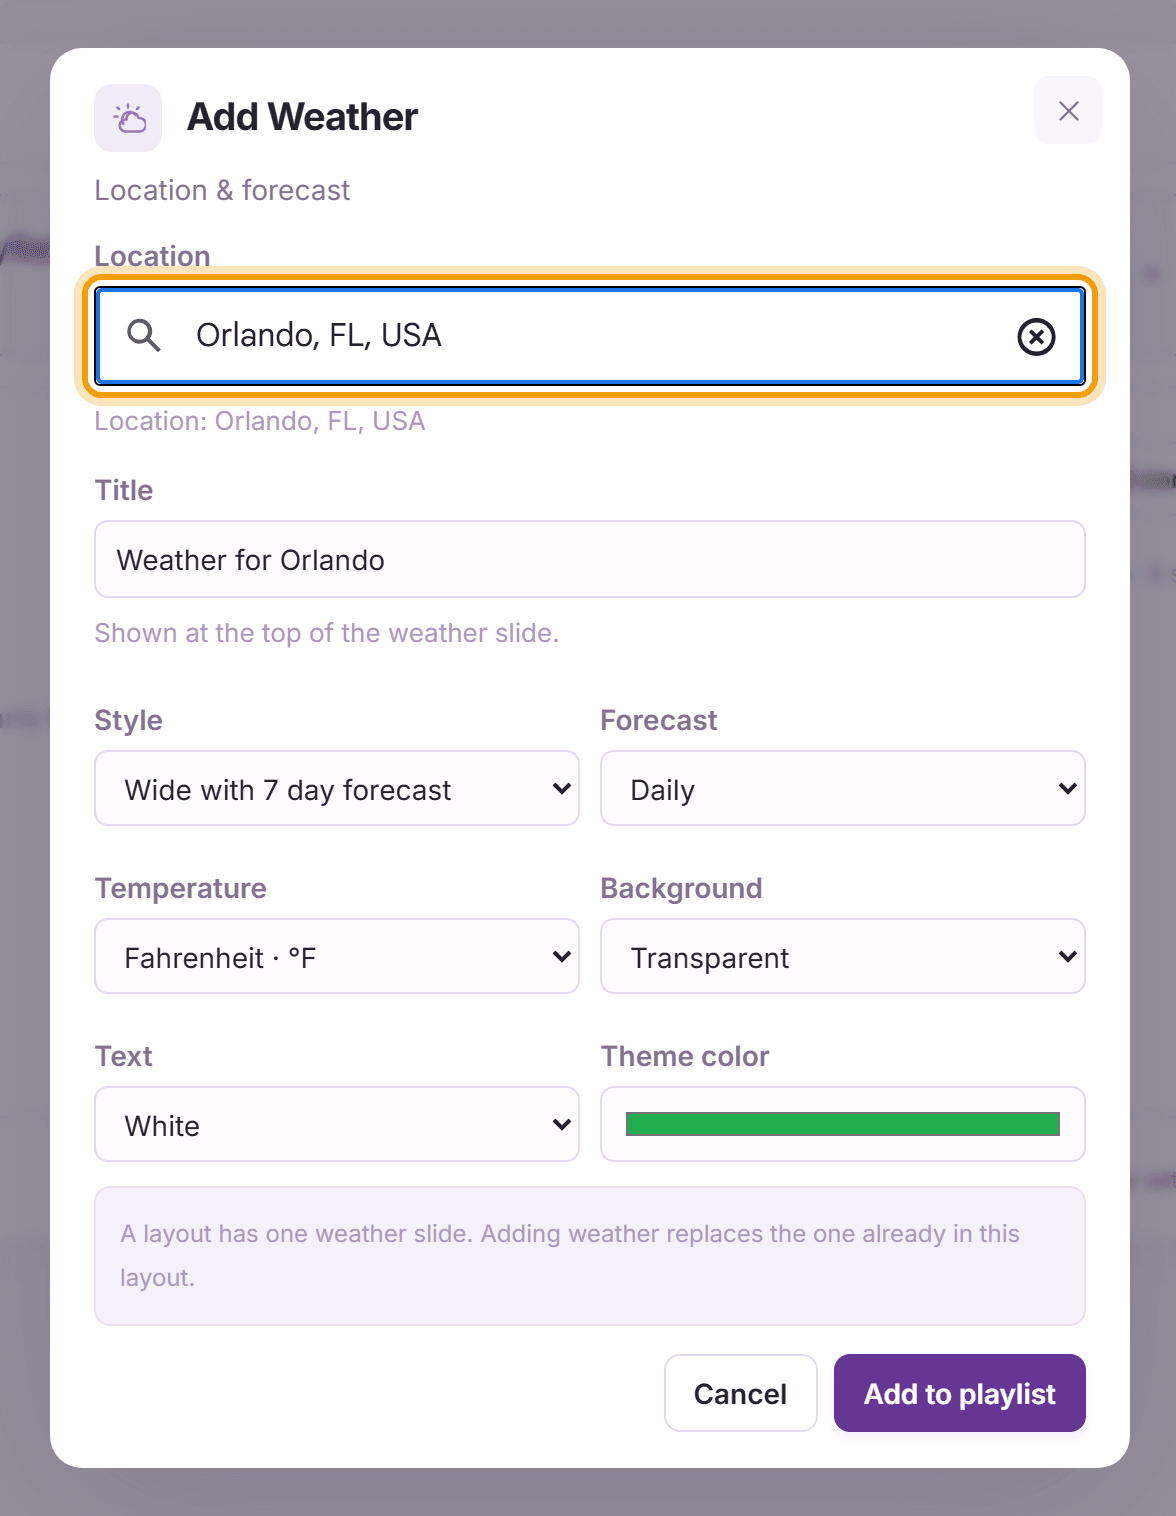
Under Location, start typing your city, address or ZIP code and choose it from the suggestions. Change the Title, Style, Forecast, Temperature, Background, Text and Theme color if you like, then click Add to playlist.
-
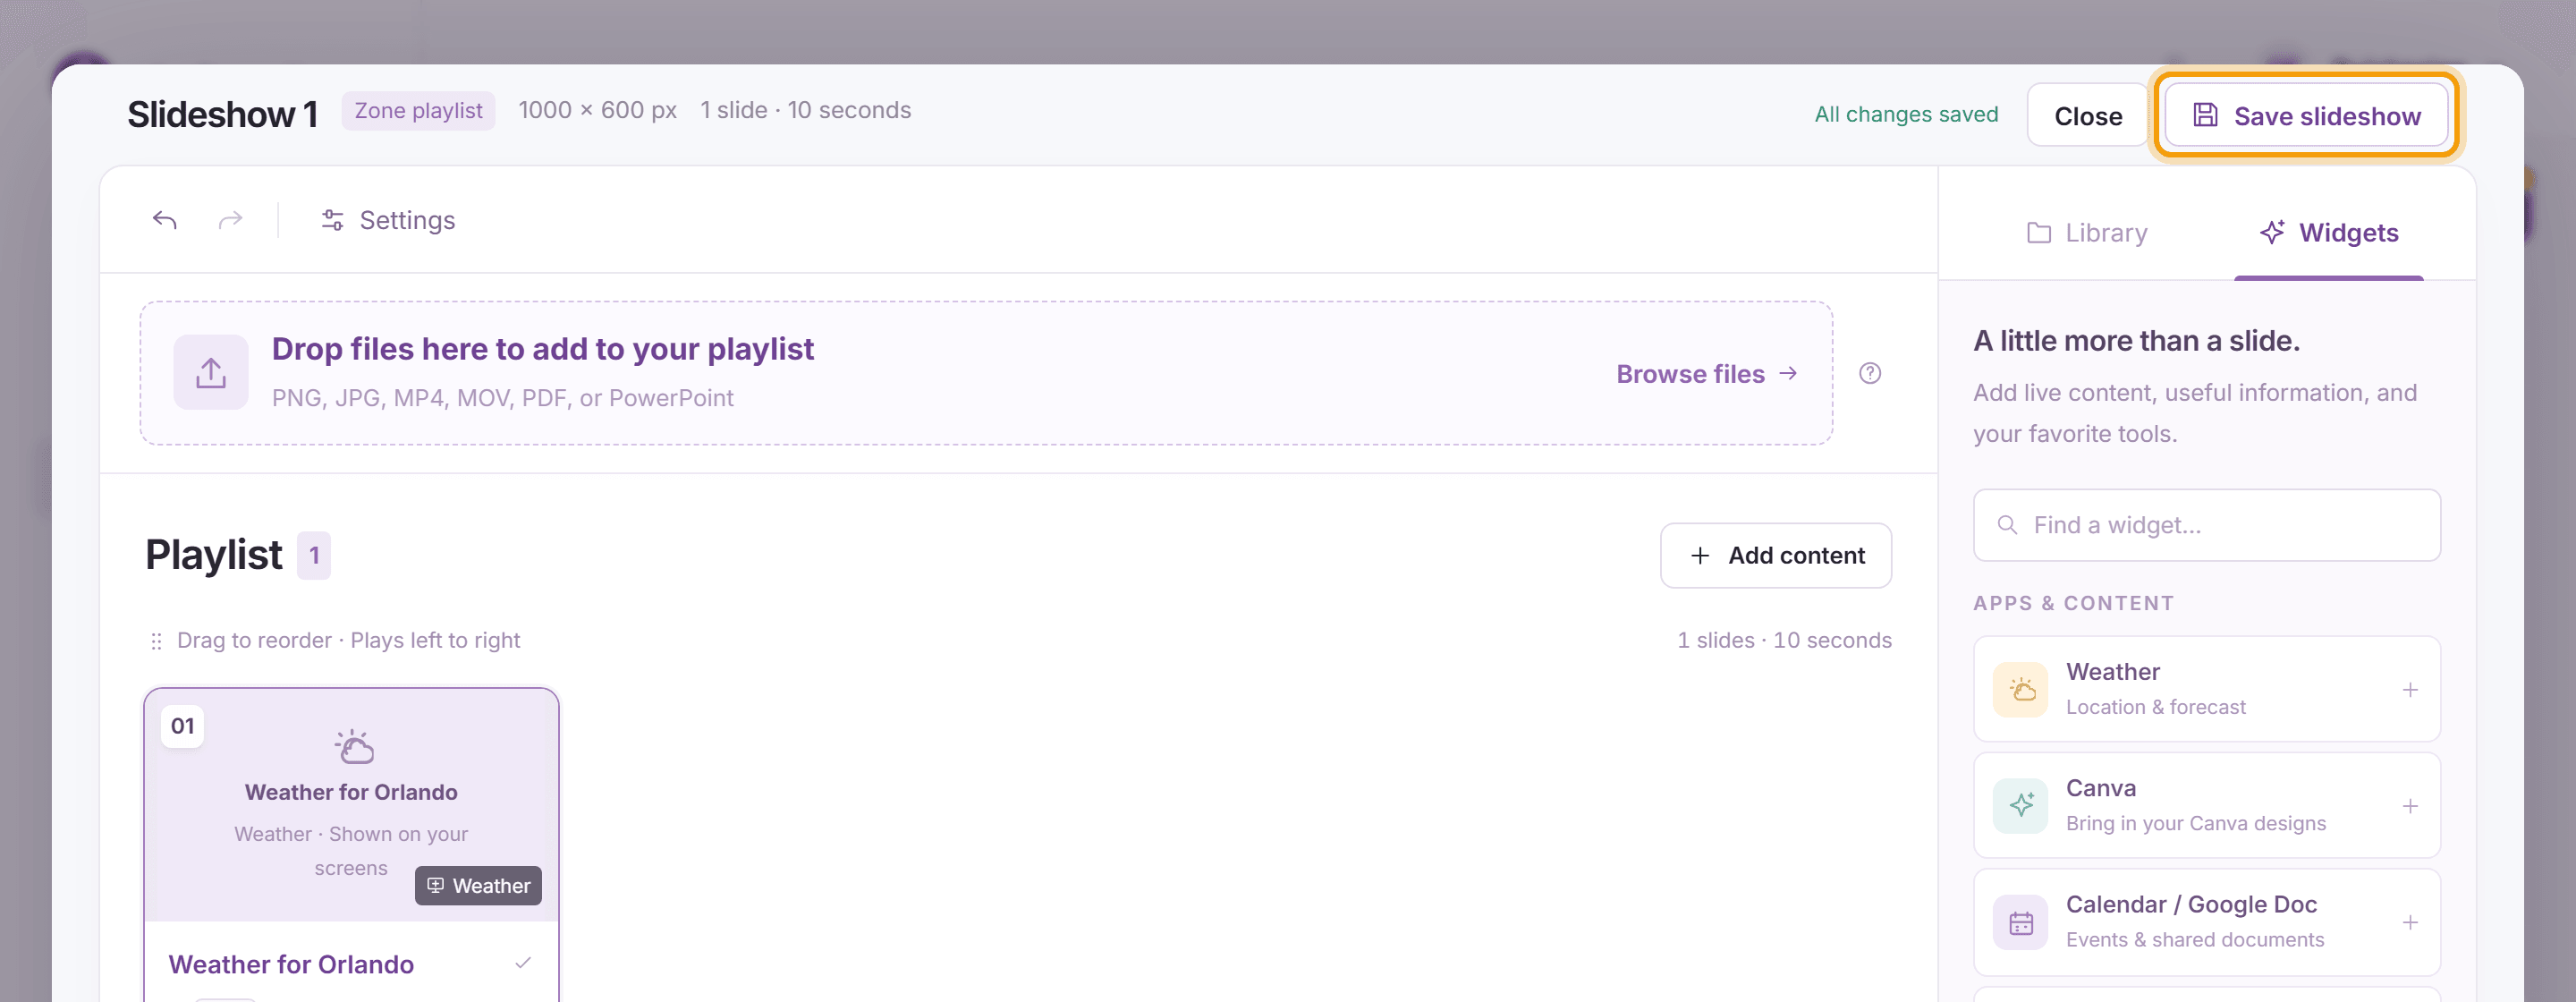
Click Save slideshow, then Close. In the editor, the zone shows a weather placeholder; your screen shows the live forecast.
-
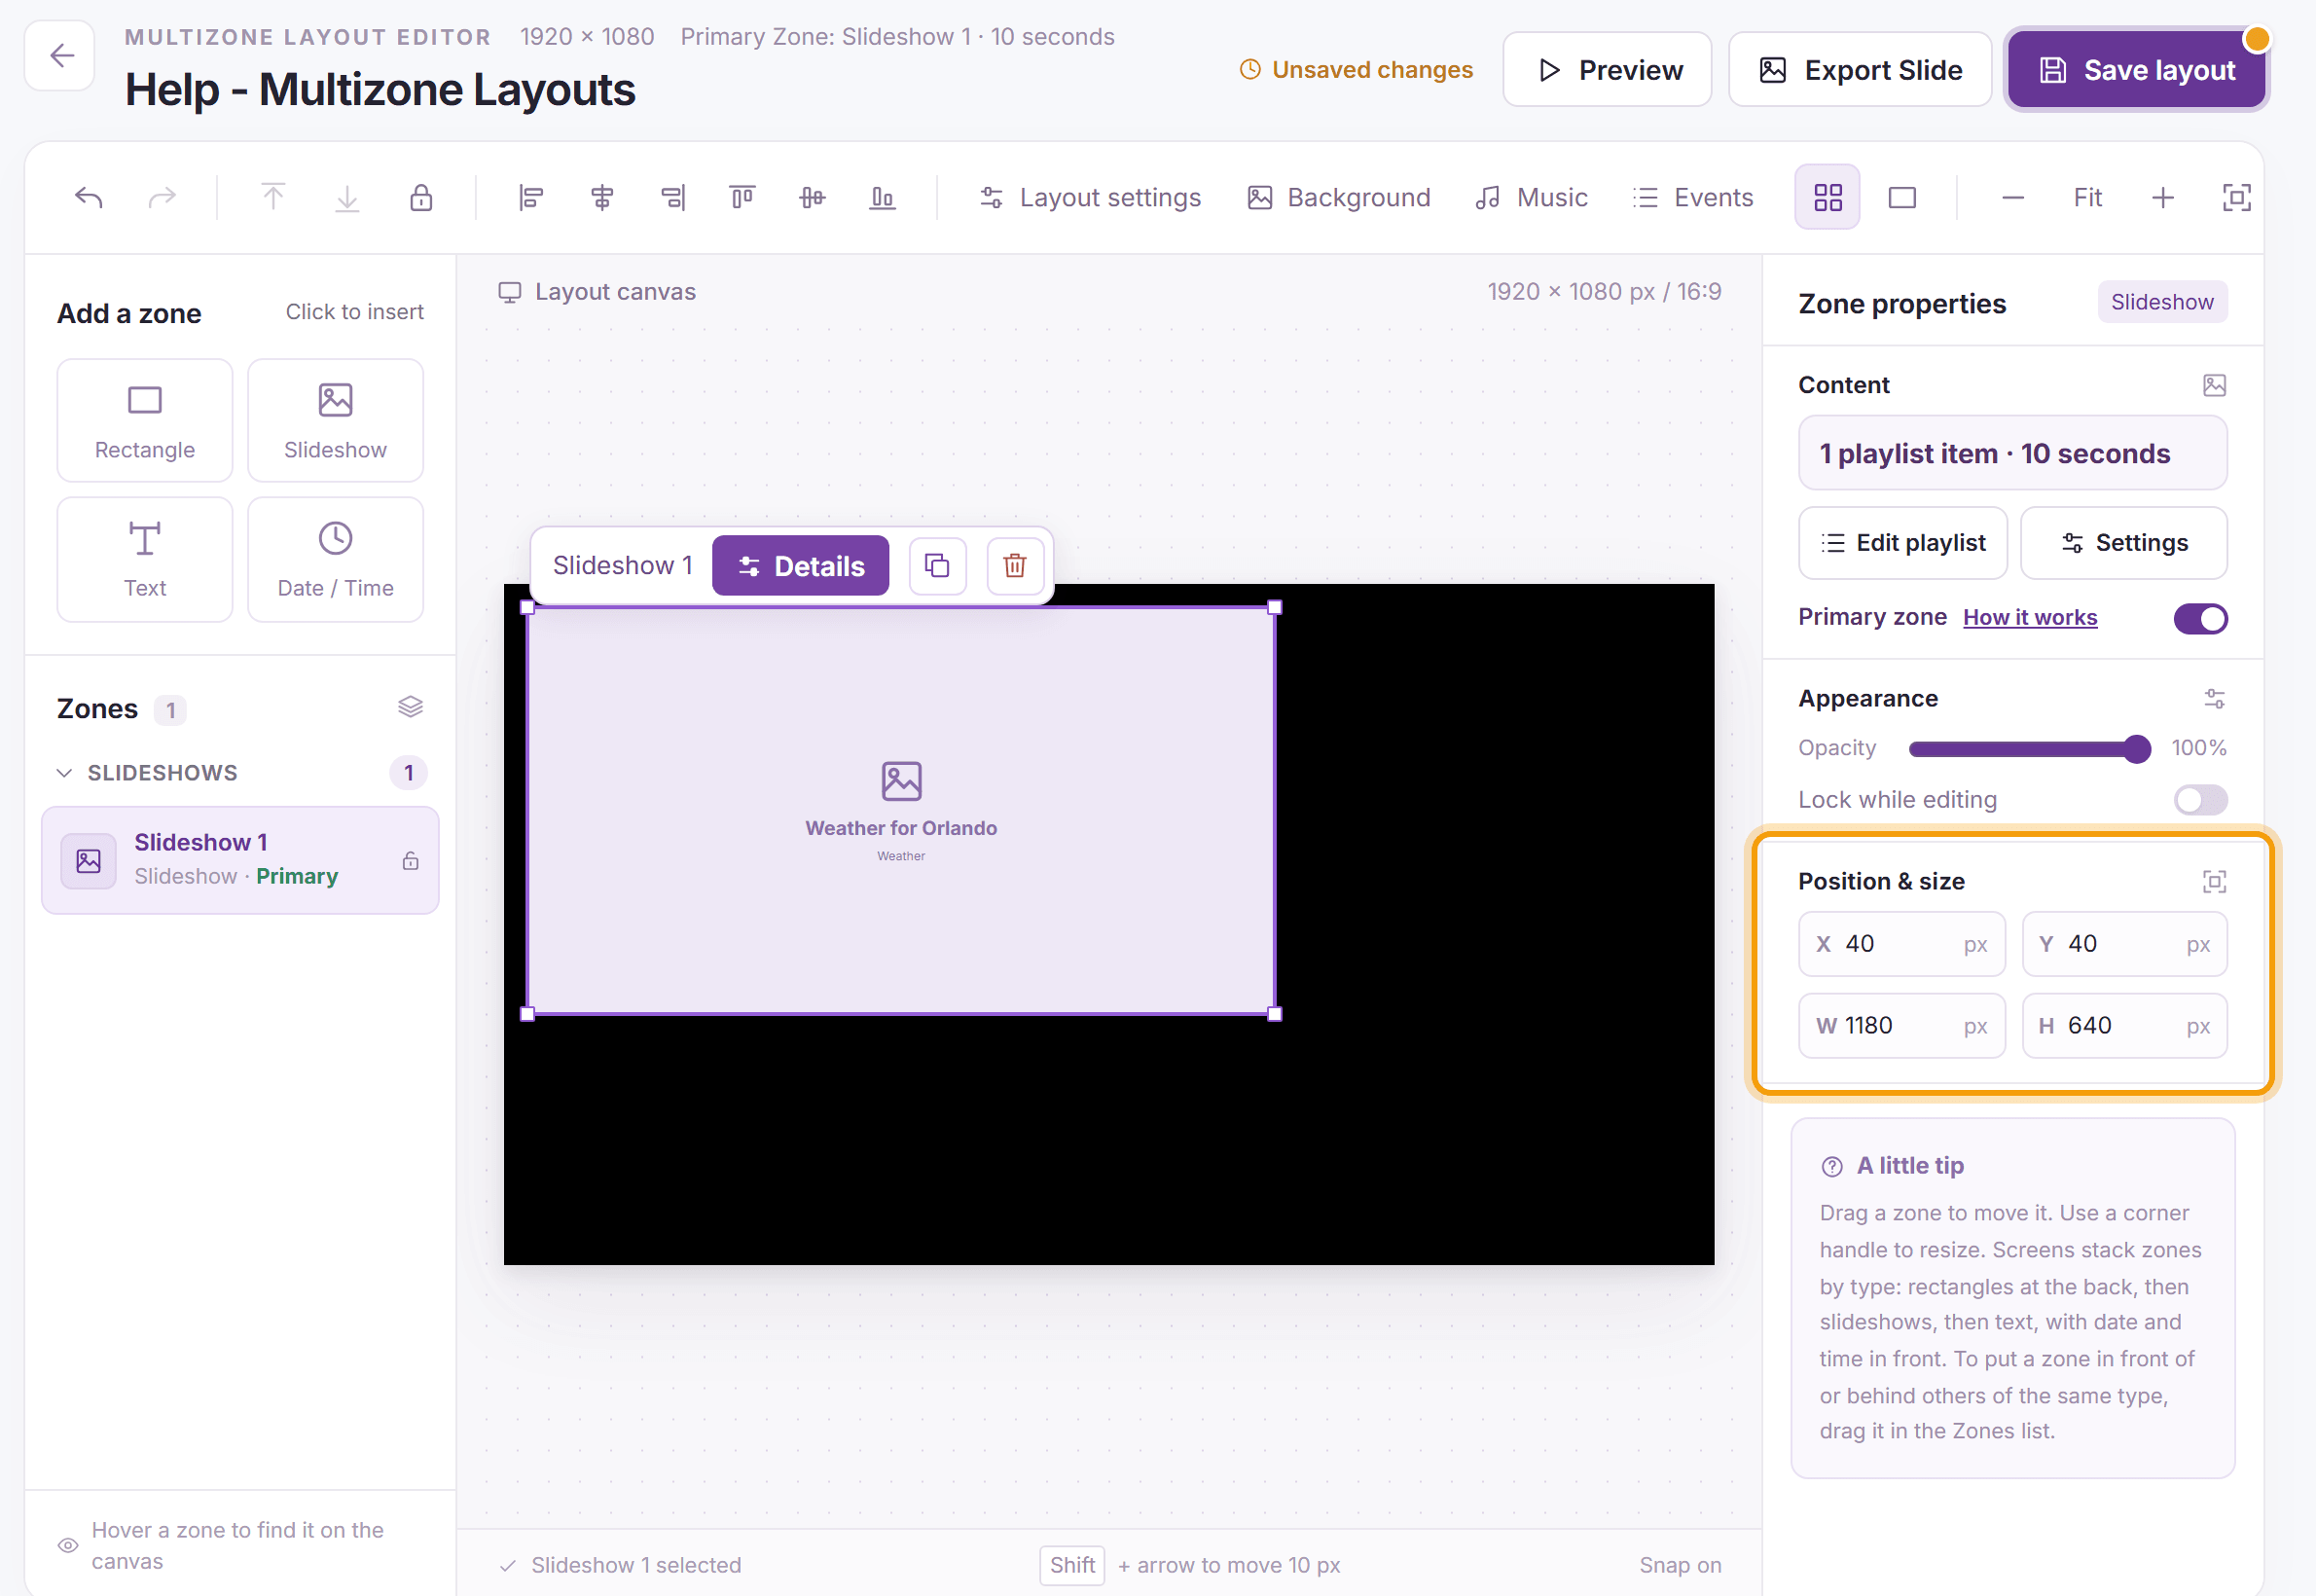
Size and place the zone. Drag it on the canvas and drag a corner handle to resize it, or type exact values under Position & size in Zone properties. The values are pixels on a 1920 × 1080 screen.
-
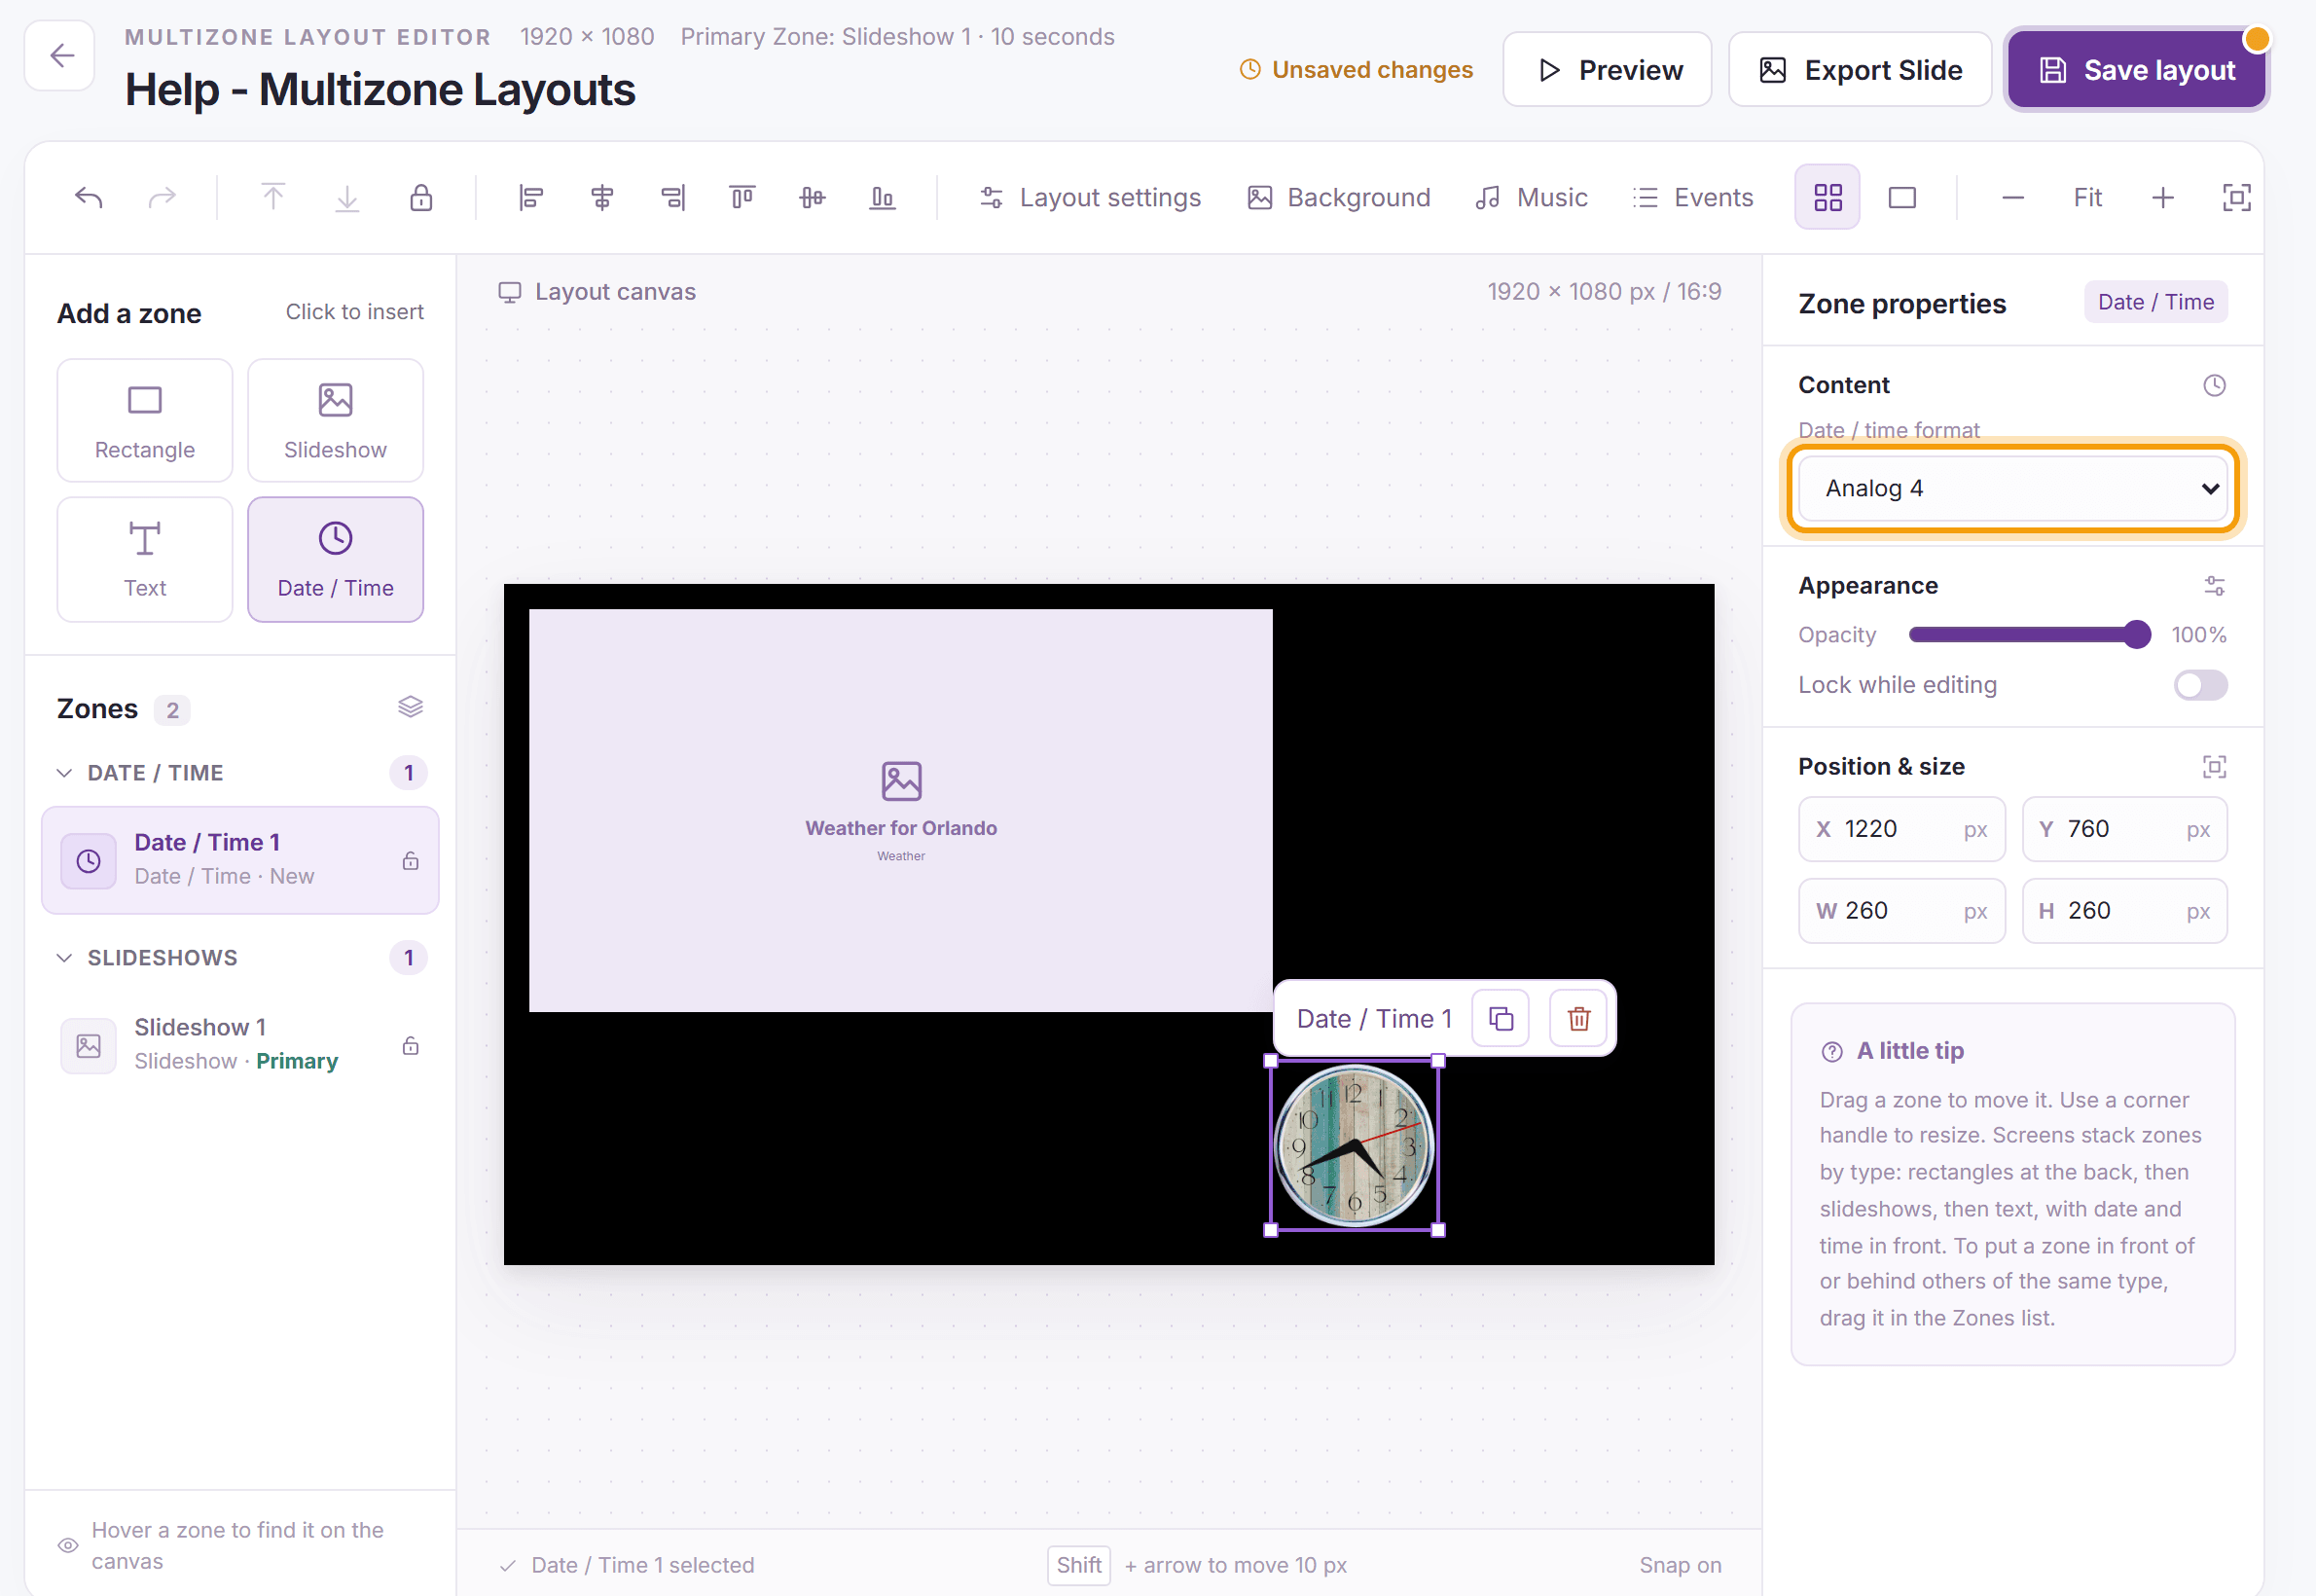
Add a clock. Under Add a zone, click Date / Time and drag the new zone into place. In Zone properties, choose a Date / time format: Analog 1 to Analog 12 are clock faces, and the other formats show the time, the date or both as text.
-
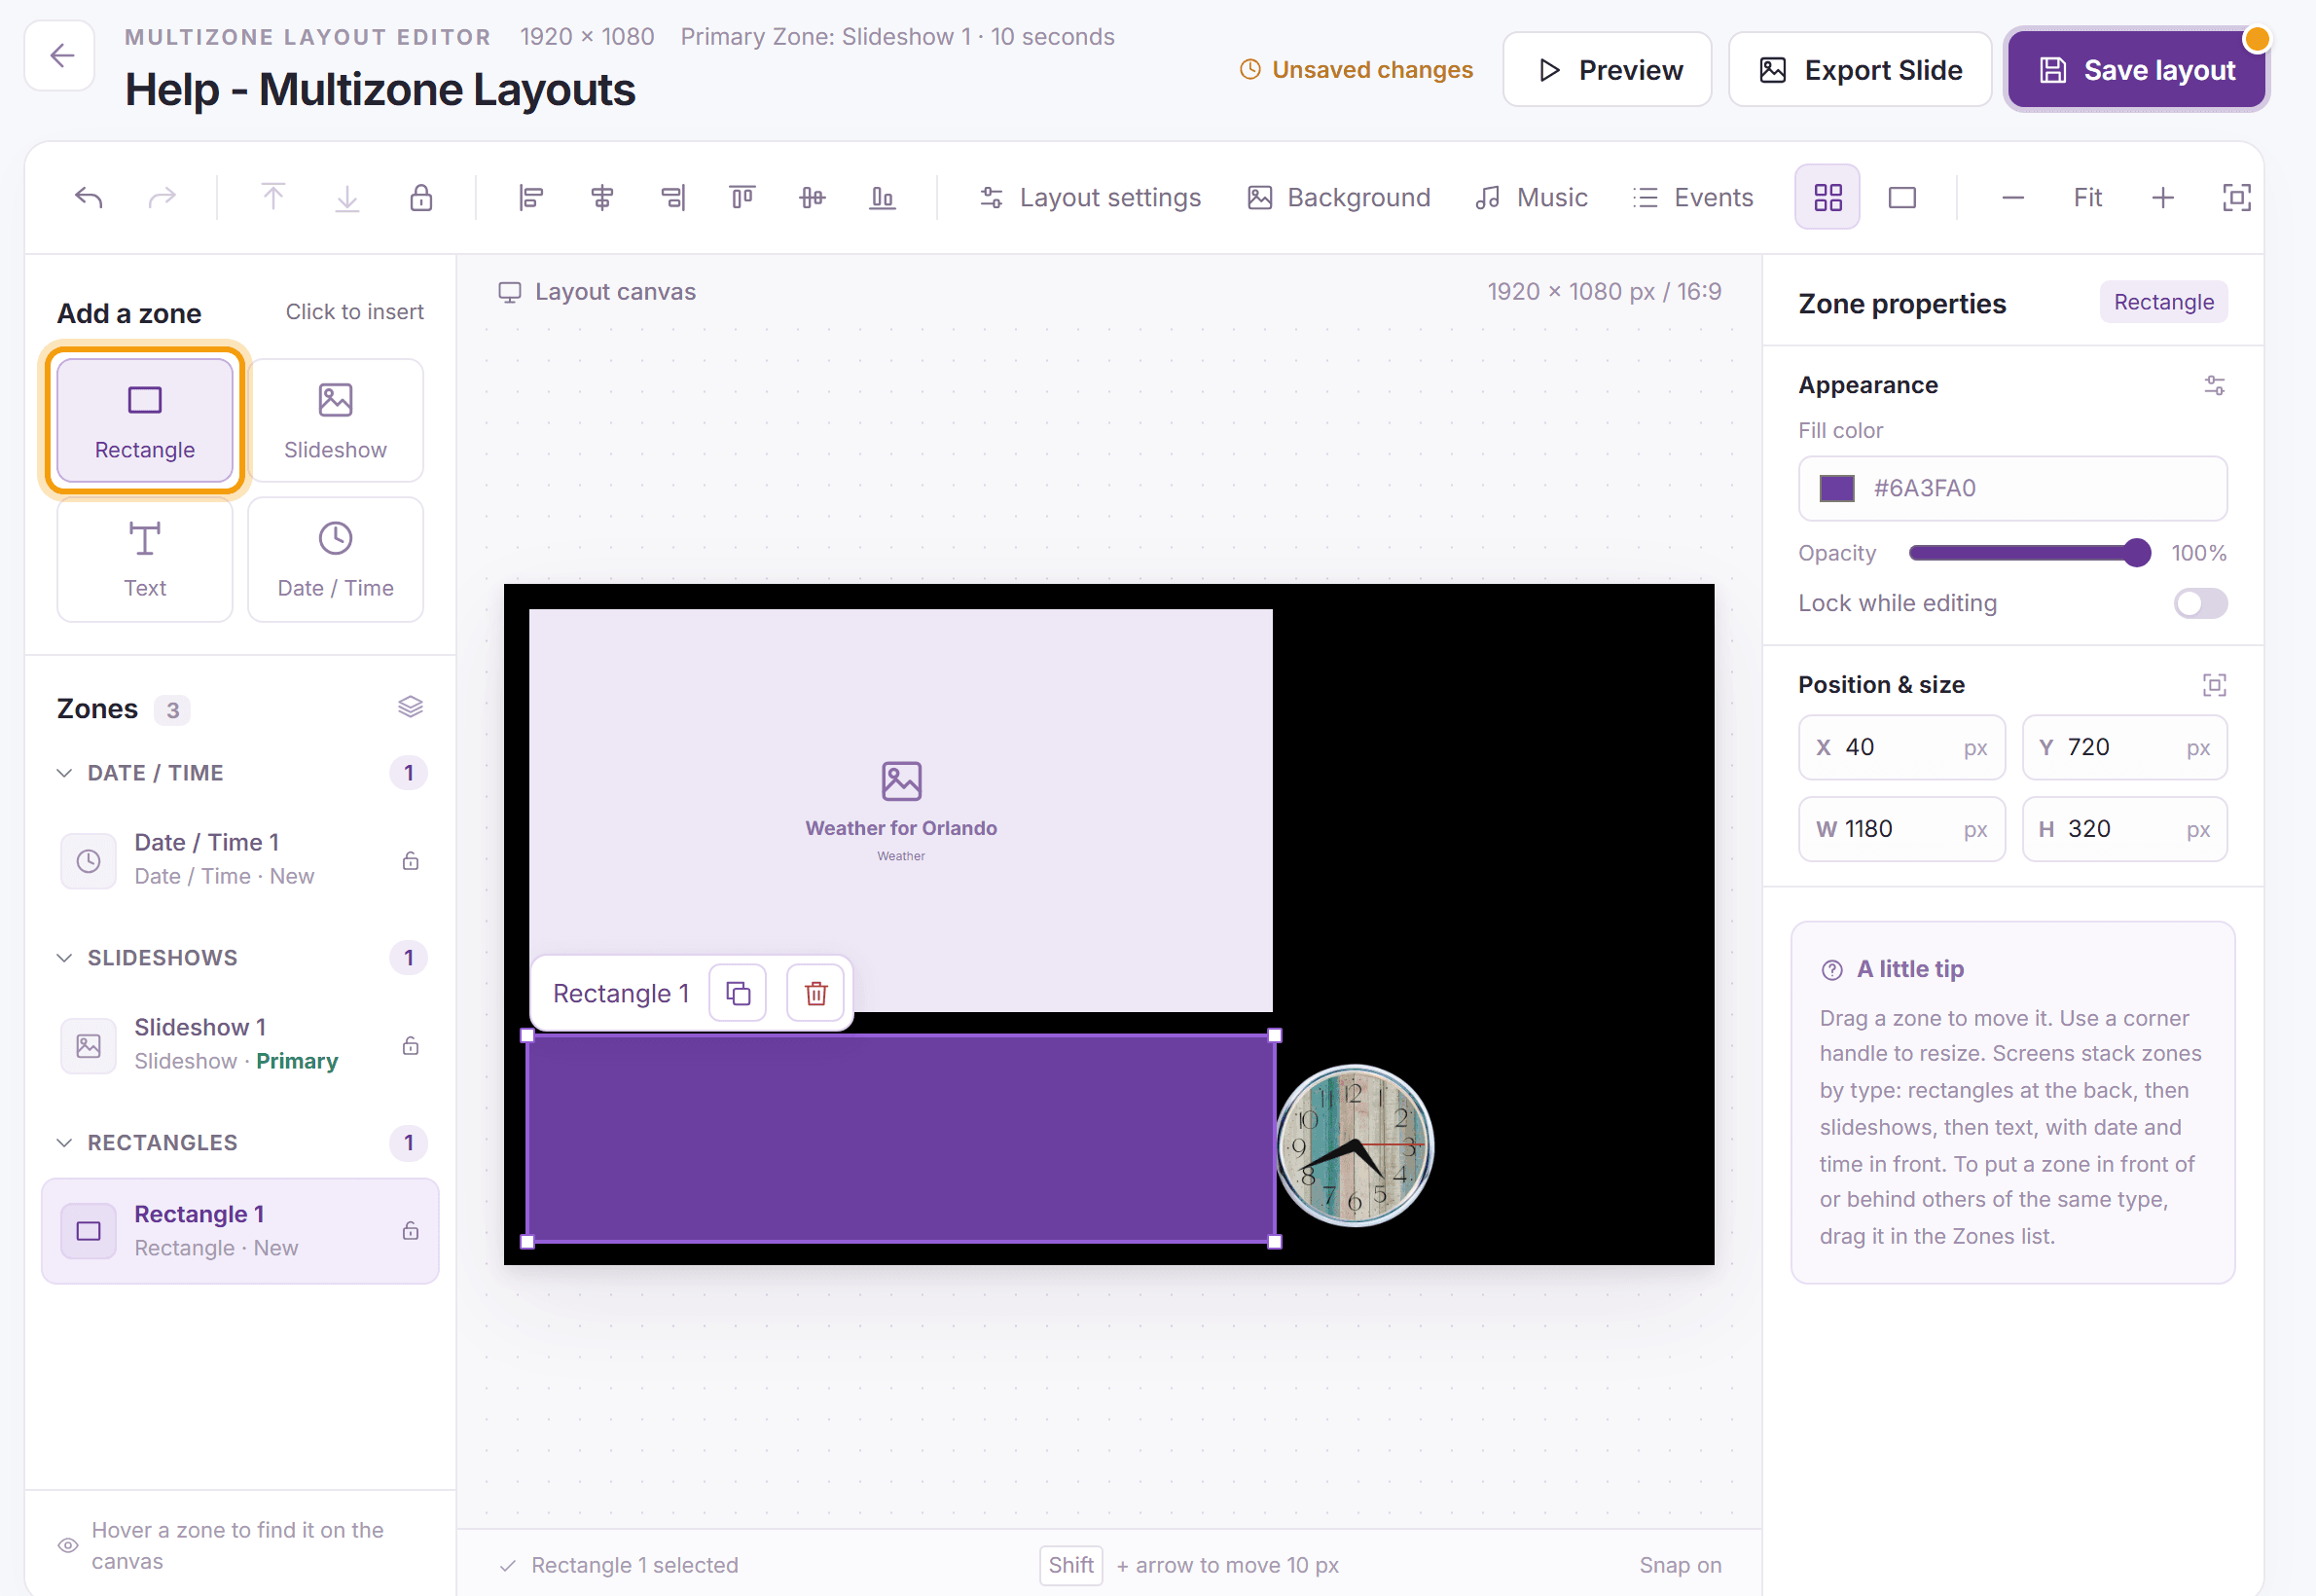
Add a background for your text. Under Add a zone, click Rectangle, place it where the text will go and choose a Fill color. Rectangles always play behind the other zones.
-
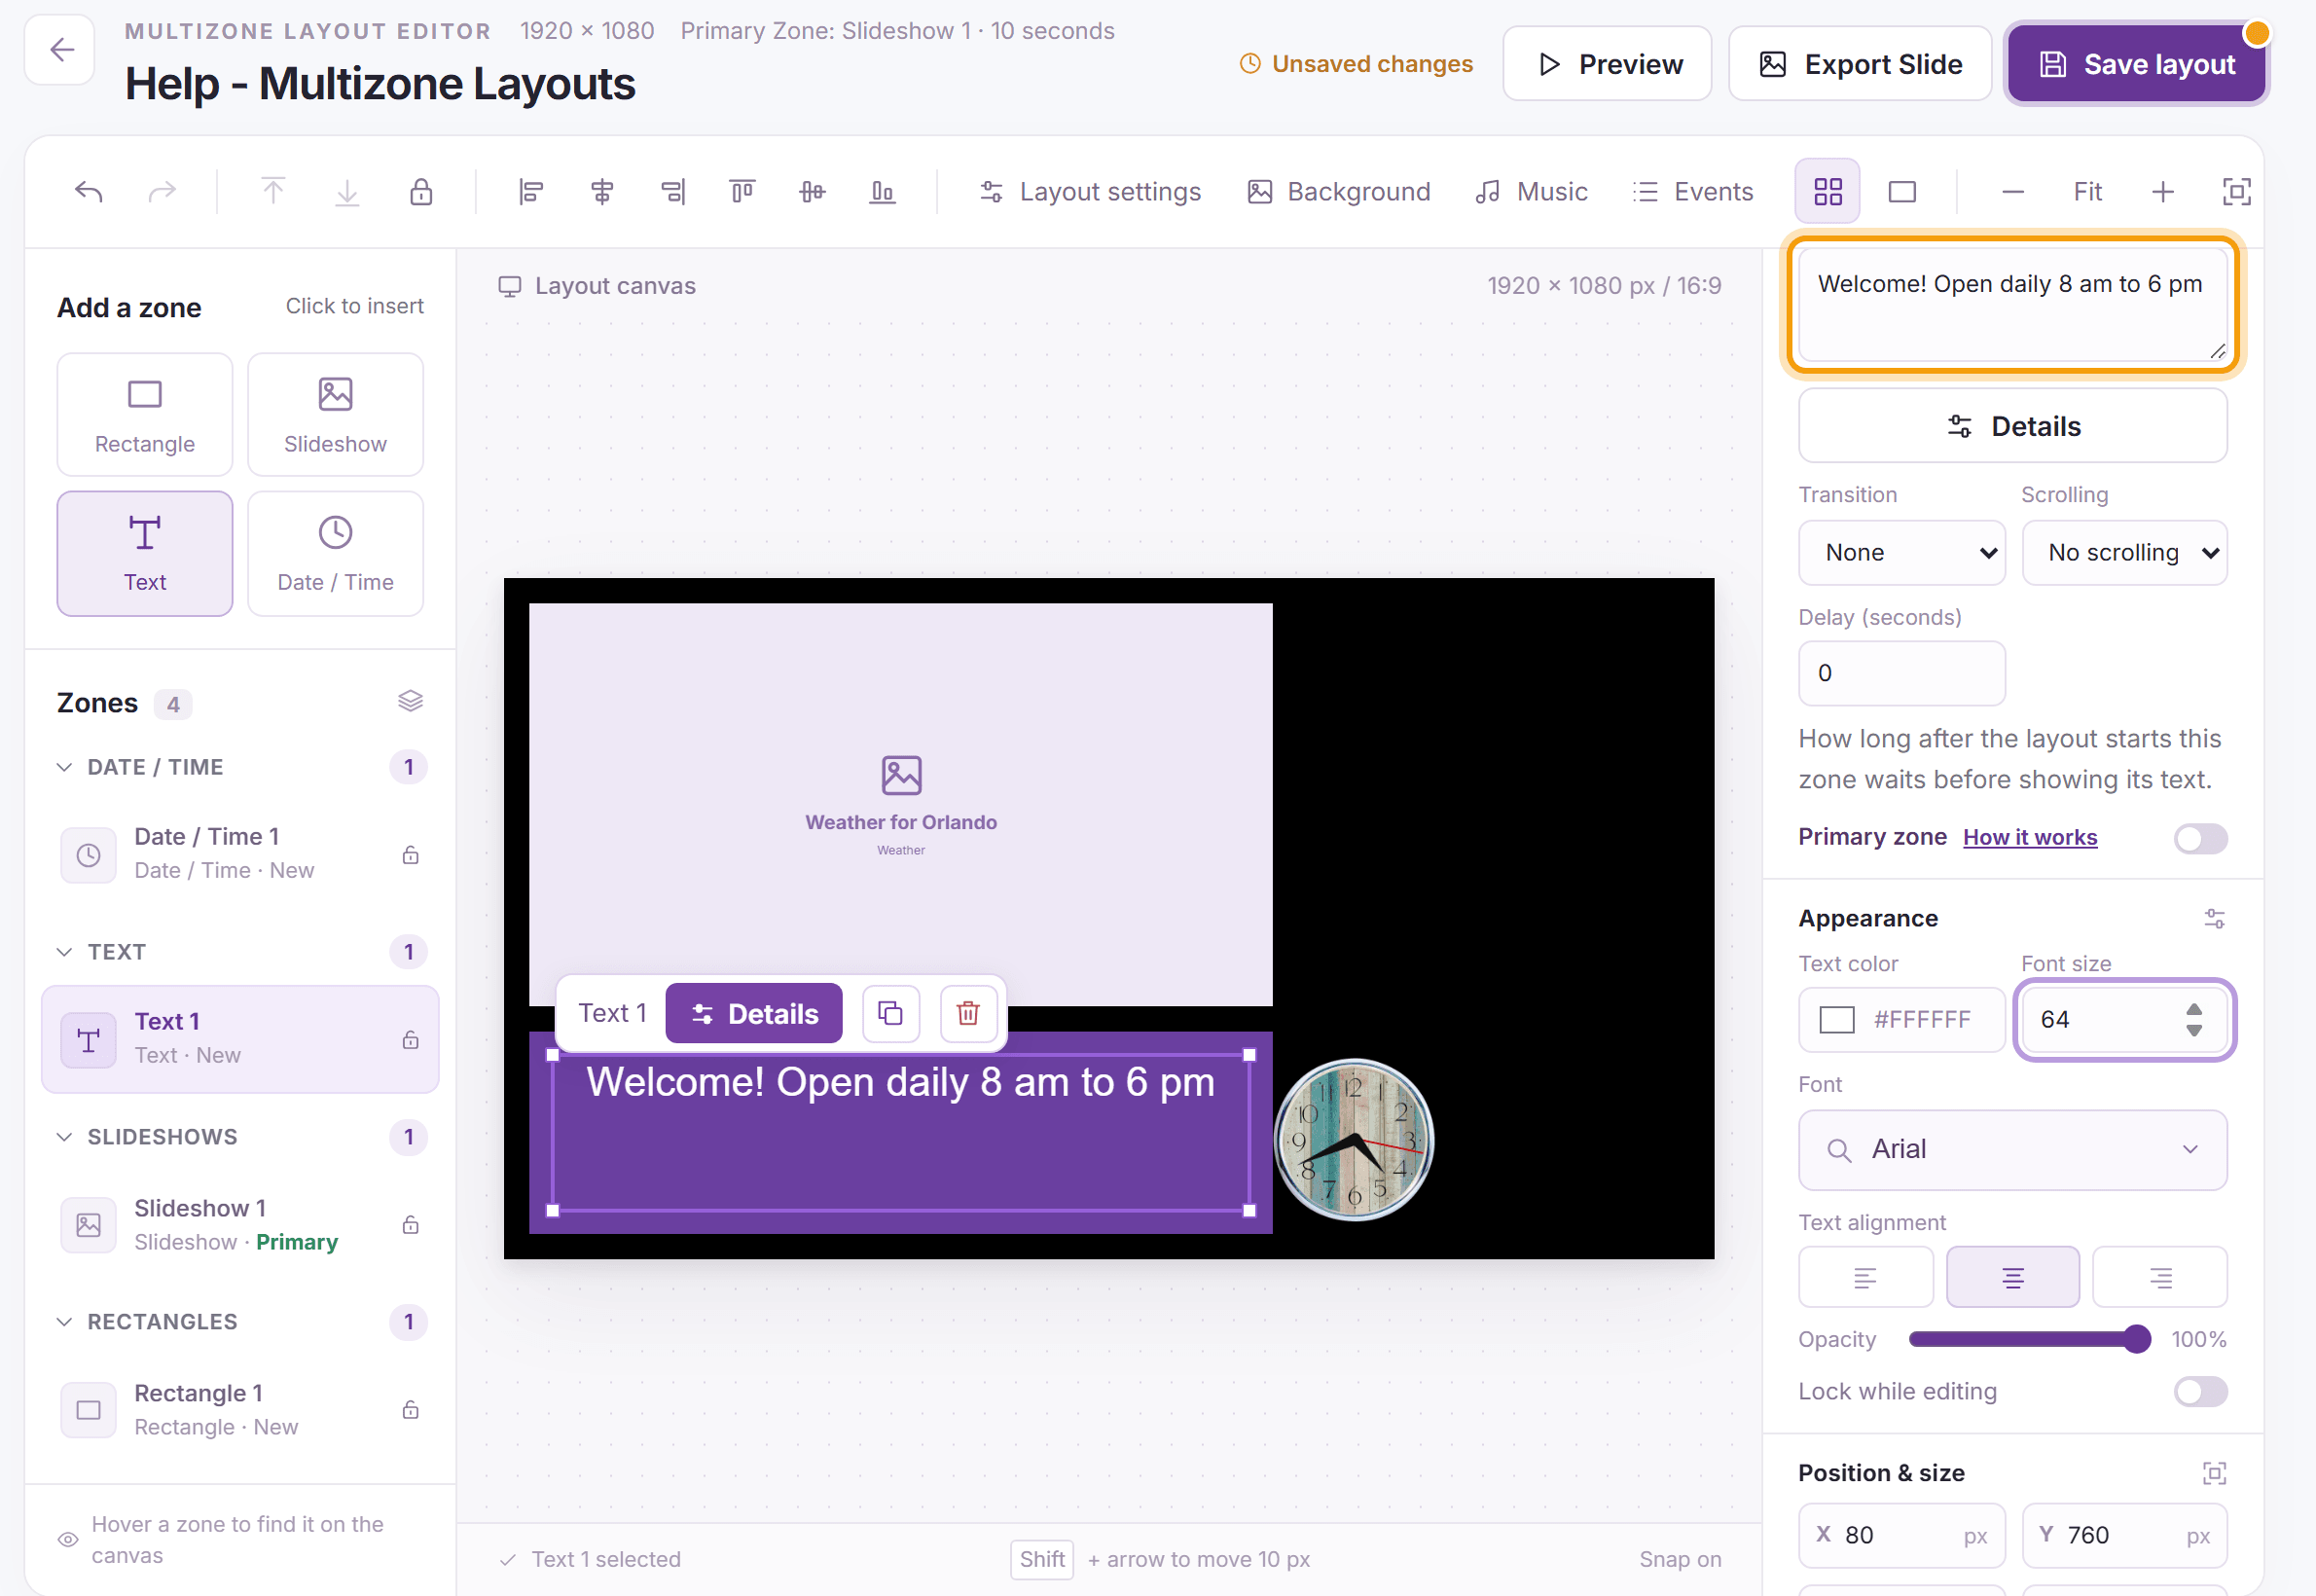
Add your message. Under Add a zone, click Text and place the zone on the rectangle. Type your message in the Text box in Zone properties, then set the Text color, Font size and Font.
-
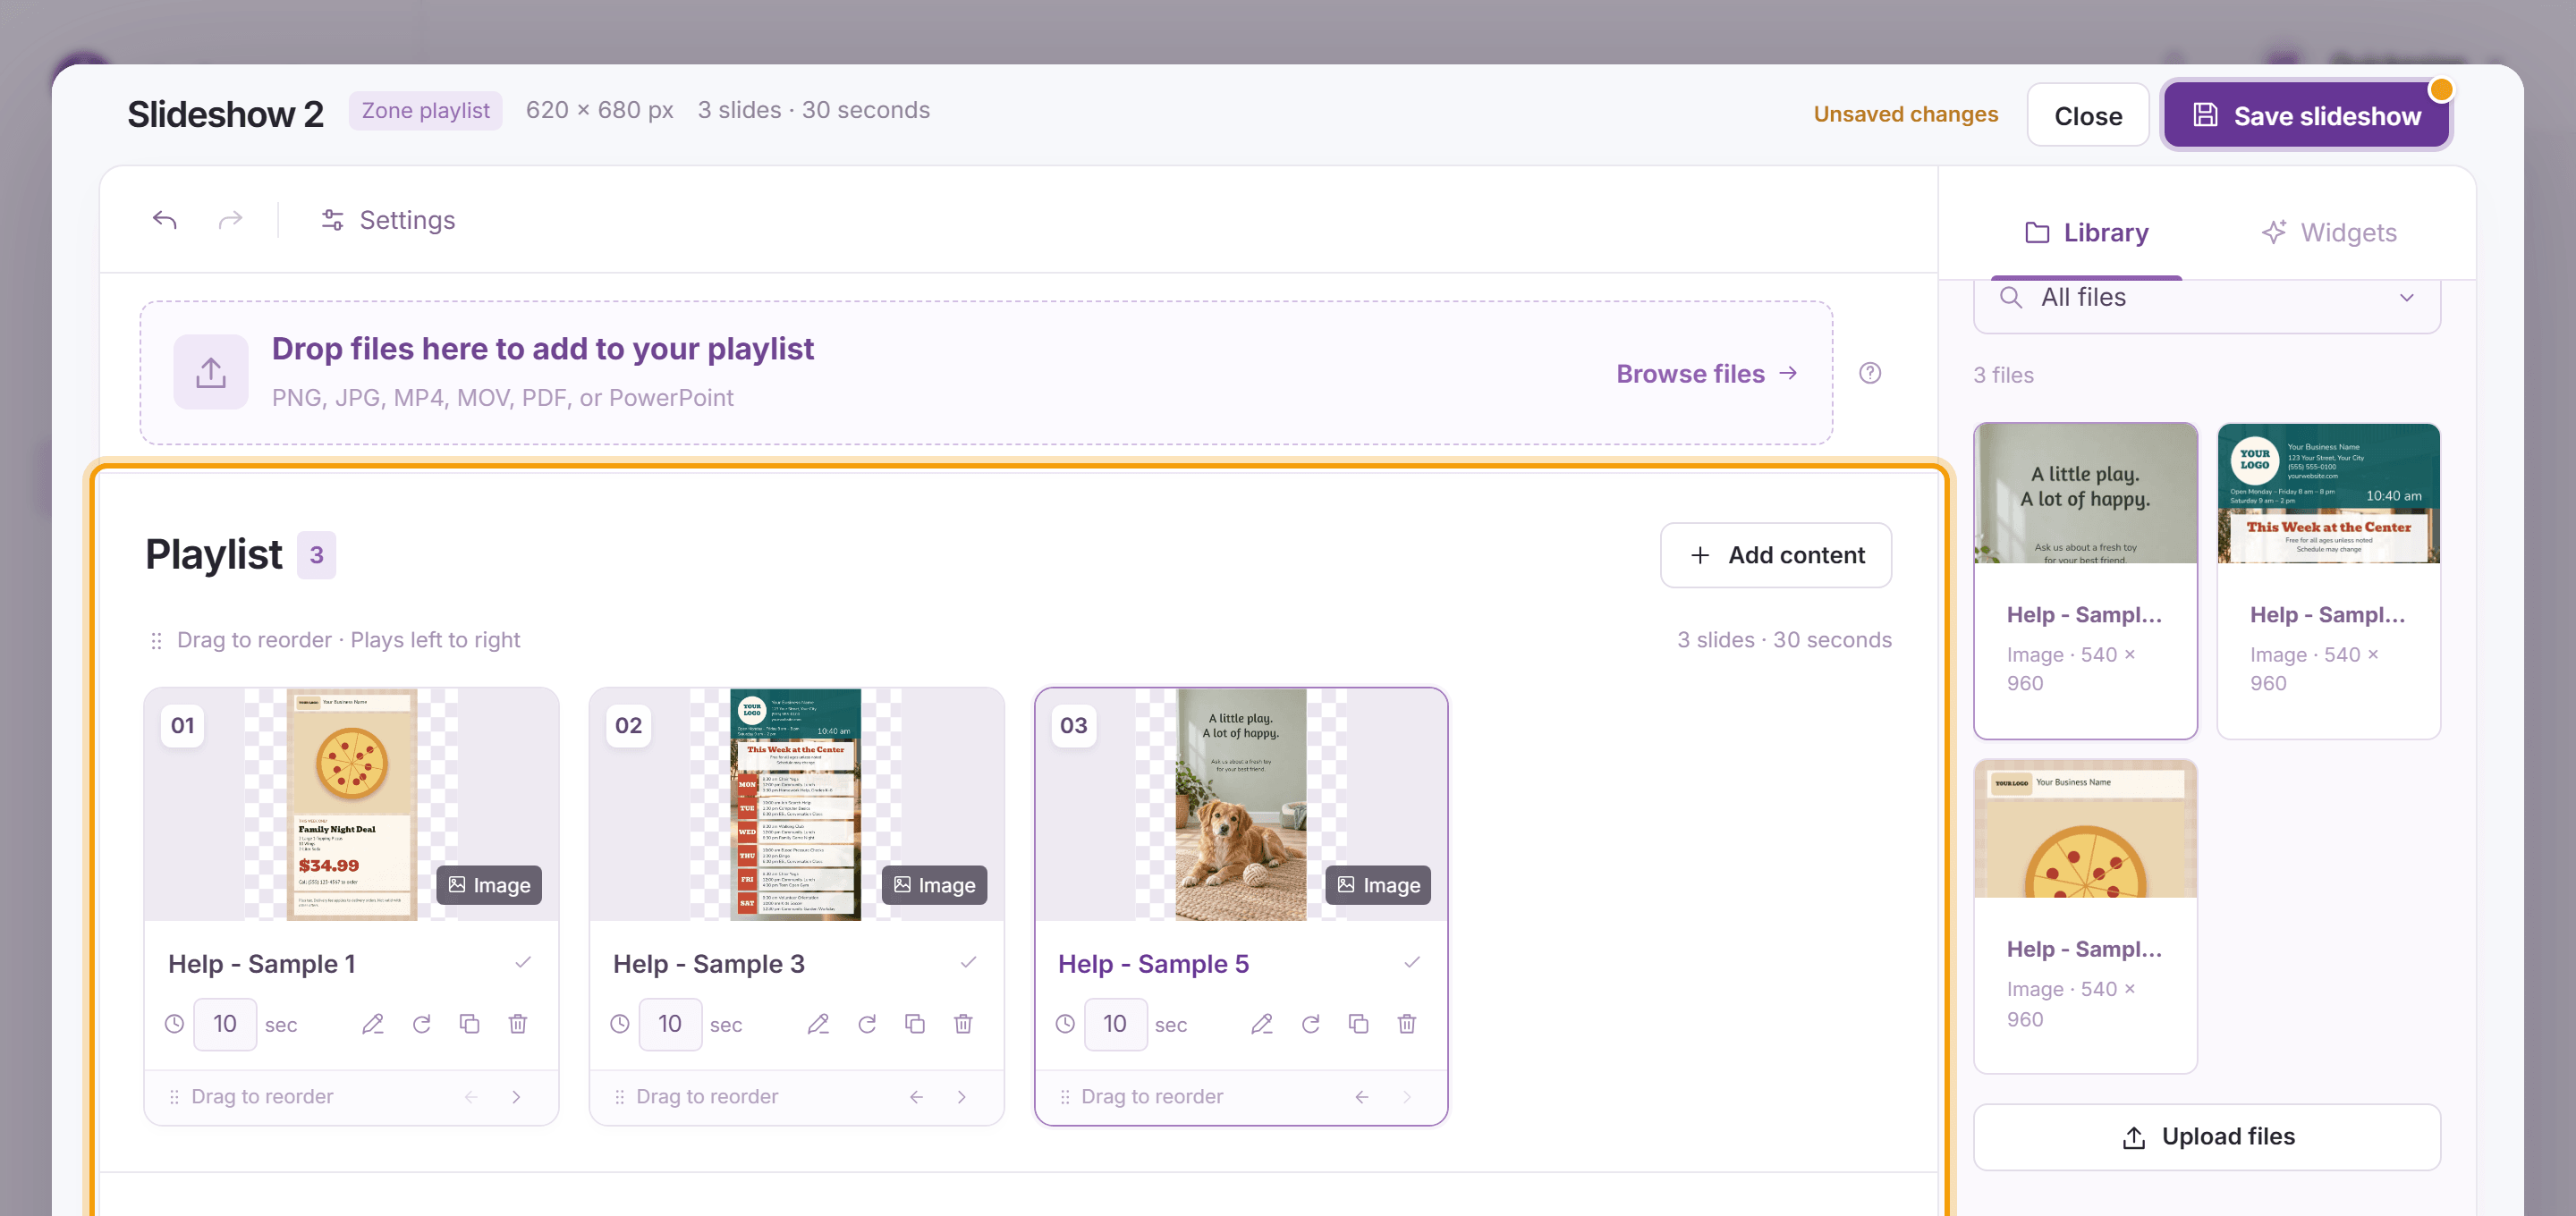
Add a slideshow of your own images. Under Add a zone, click Slideshow, place the zone, then click Details. Drop files on Drop files here to add to your playlist, click Browse files, or click files on the Library tab. Each file is added to the Playlist. Click Save slideshow, then Close.
-
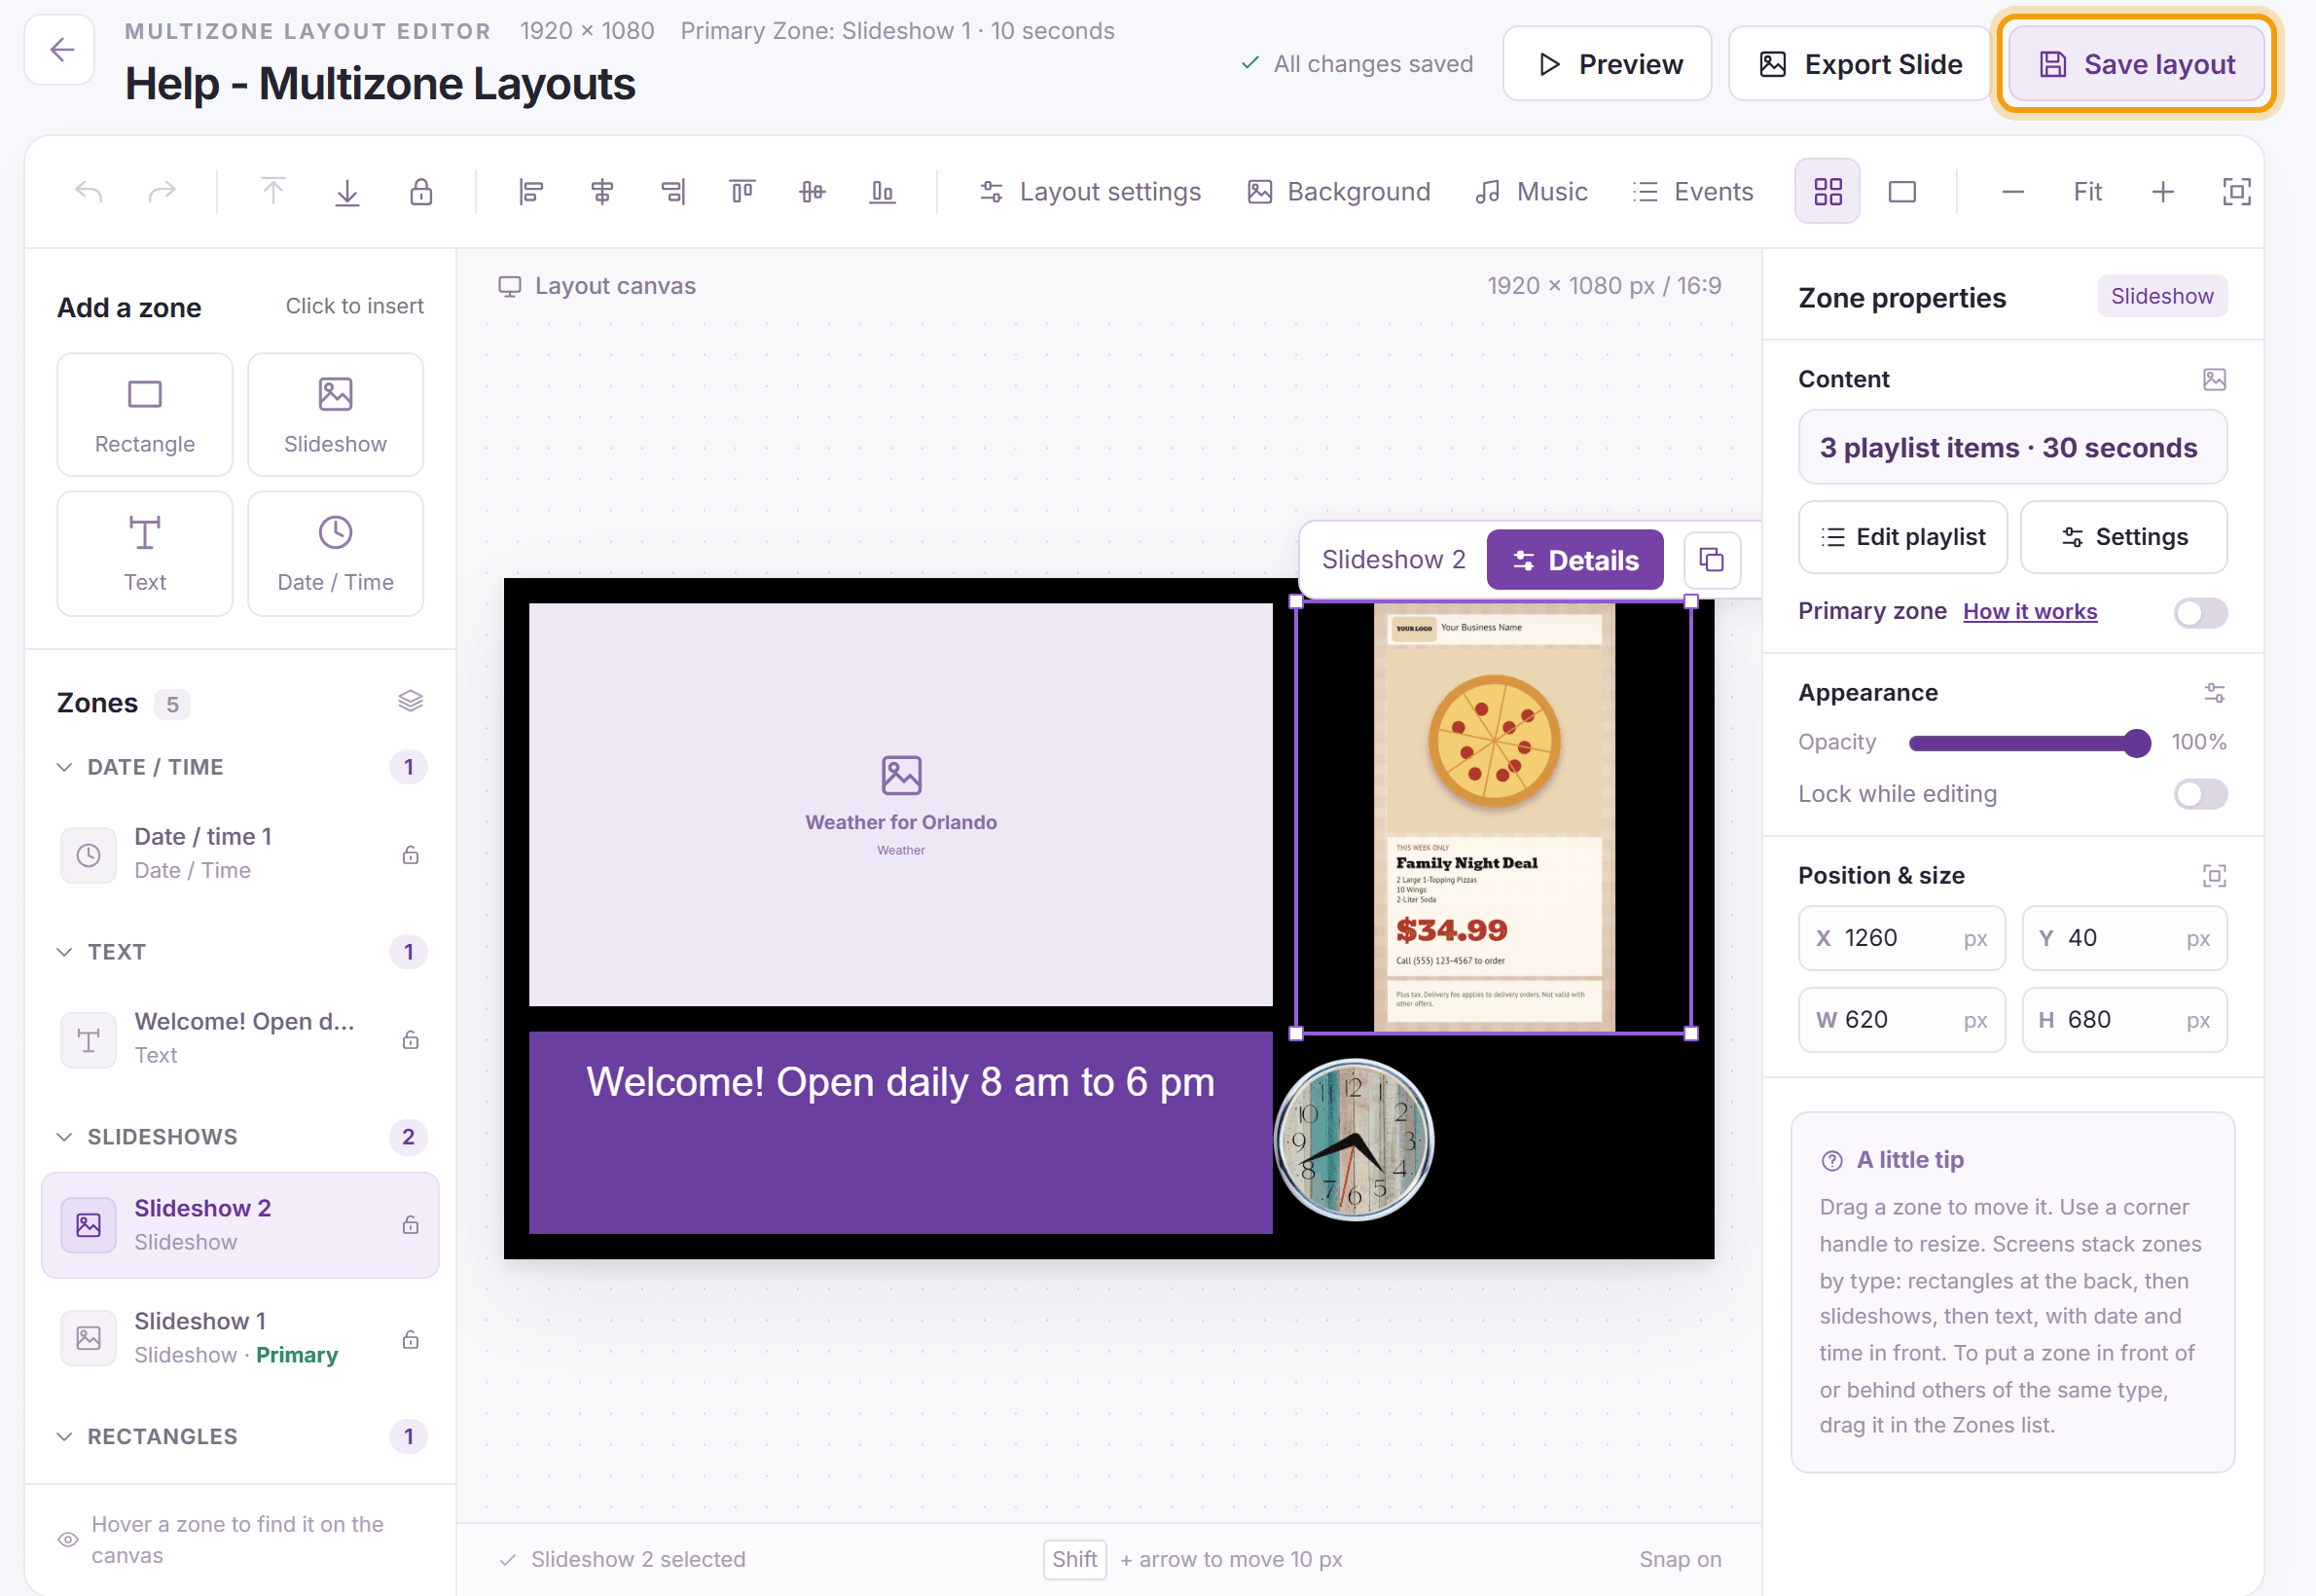
Click Save layout. Until you save, the editor shows Unsaved changes and your screens keep playing the last saved version.
-
Click Preview to see the layout full size, the way your screen will show it. The preview opens in a new window; close it to return to the editor.
-
Add the layout to a screen’s playlist (see Adding Layouts to the Screen’s Playlist). Your screen picks up the layout at its next update.


Tip: The first slideshow is the Primary zone. When a screen plays more than one layout, the primary zone decides how long this layout stays on screen. See Primary Zone.
What’s next
Adding Layouts to the Screen’s Playlist: put your new layout on a screen.
More about each zone: Slideshow Zones, Text Zones, Date and Time Zones, Rectangle Zones and the Weather Widget.