
Make a full-screen slideshow of your images, videos and documents, the quickest way to get content on a screen. Simple layouts are a good fit for menus, posters and announcements that fill the whole screen.
What you’ll need
- A computer signed in to the dashboard at dashboard.quickesign.net.
- The files you want to show: PNG, JPG, MP4 or MOV on any plan; PDF and PowerPoint on the Standard plan or higher. Each page of a PDF or PowerPoint becomes its own slide.
Steps
-
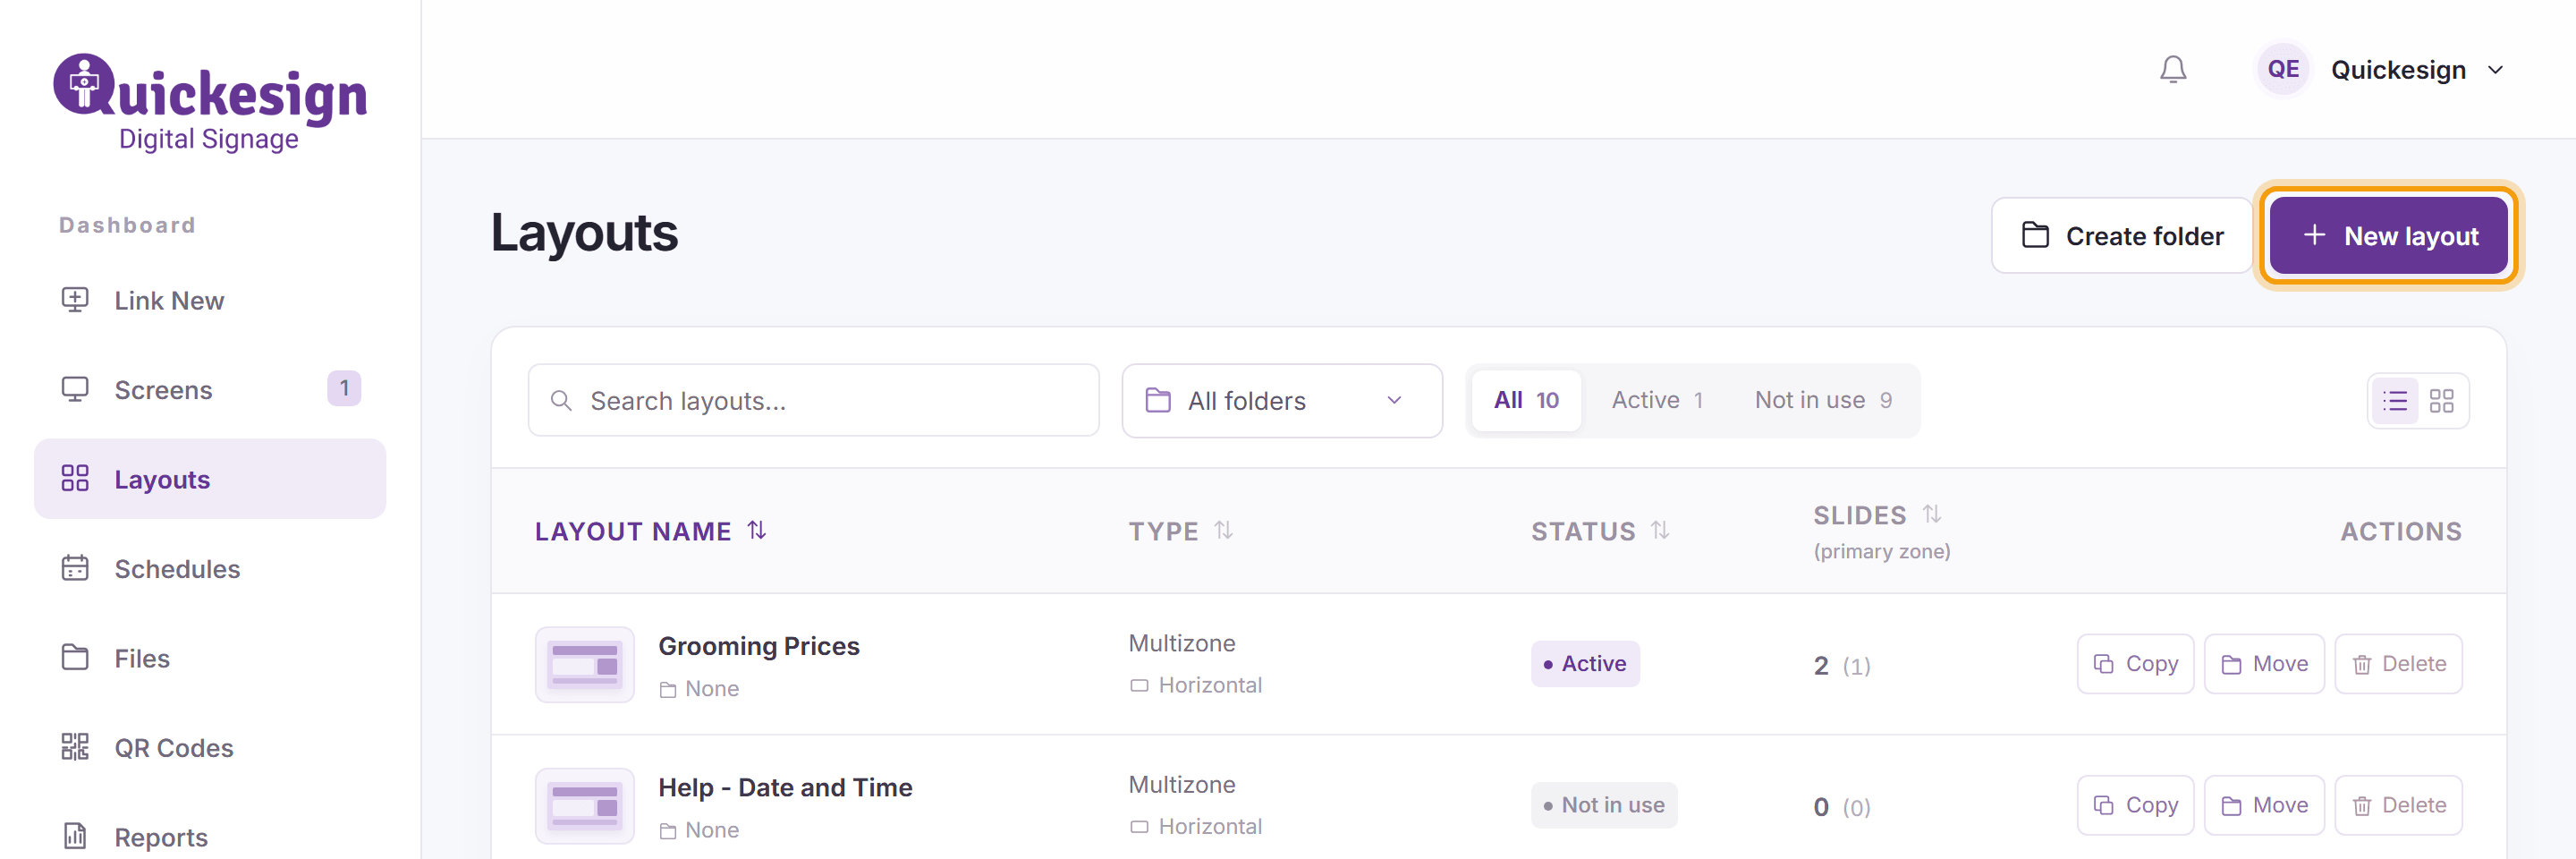
In the menu on the left, click Layouts, then click New layout.
-
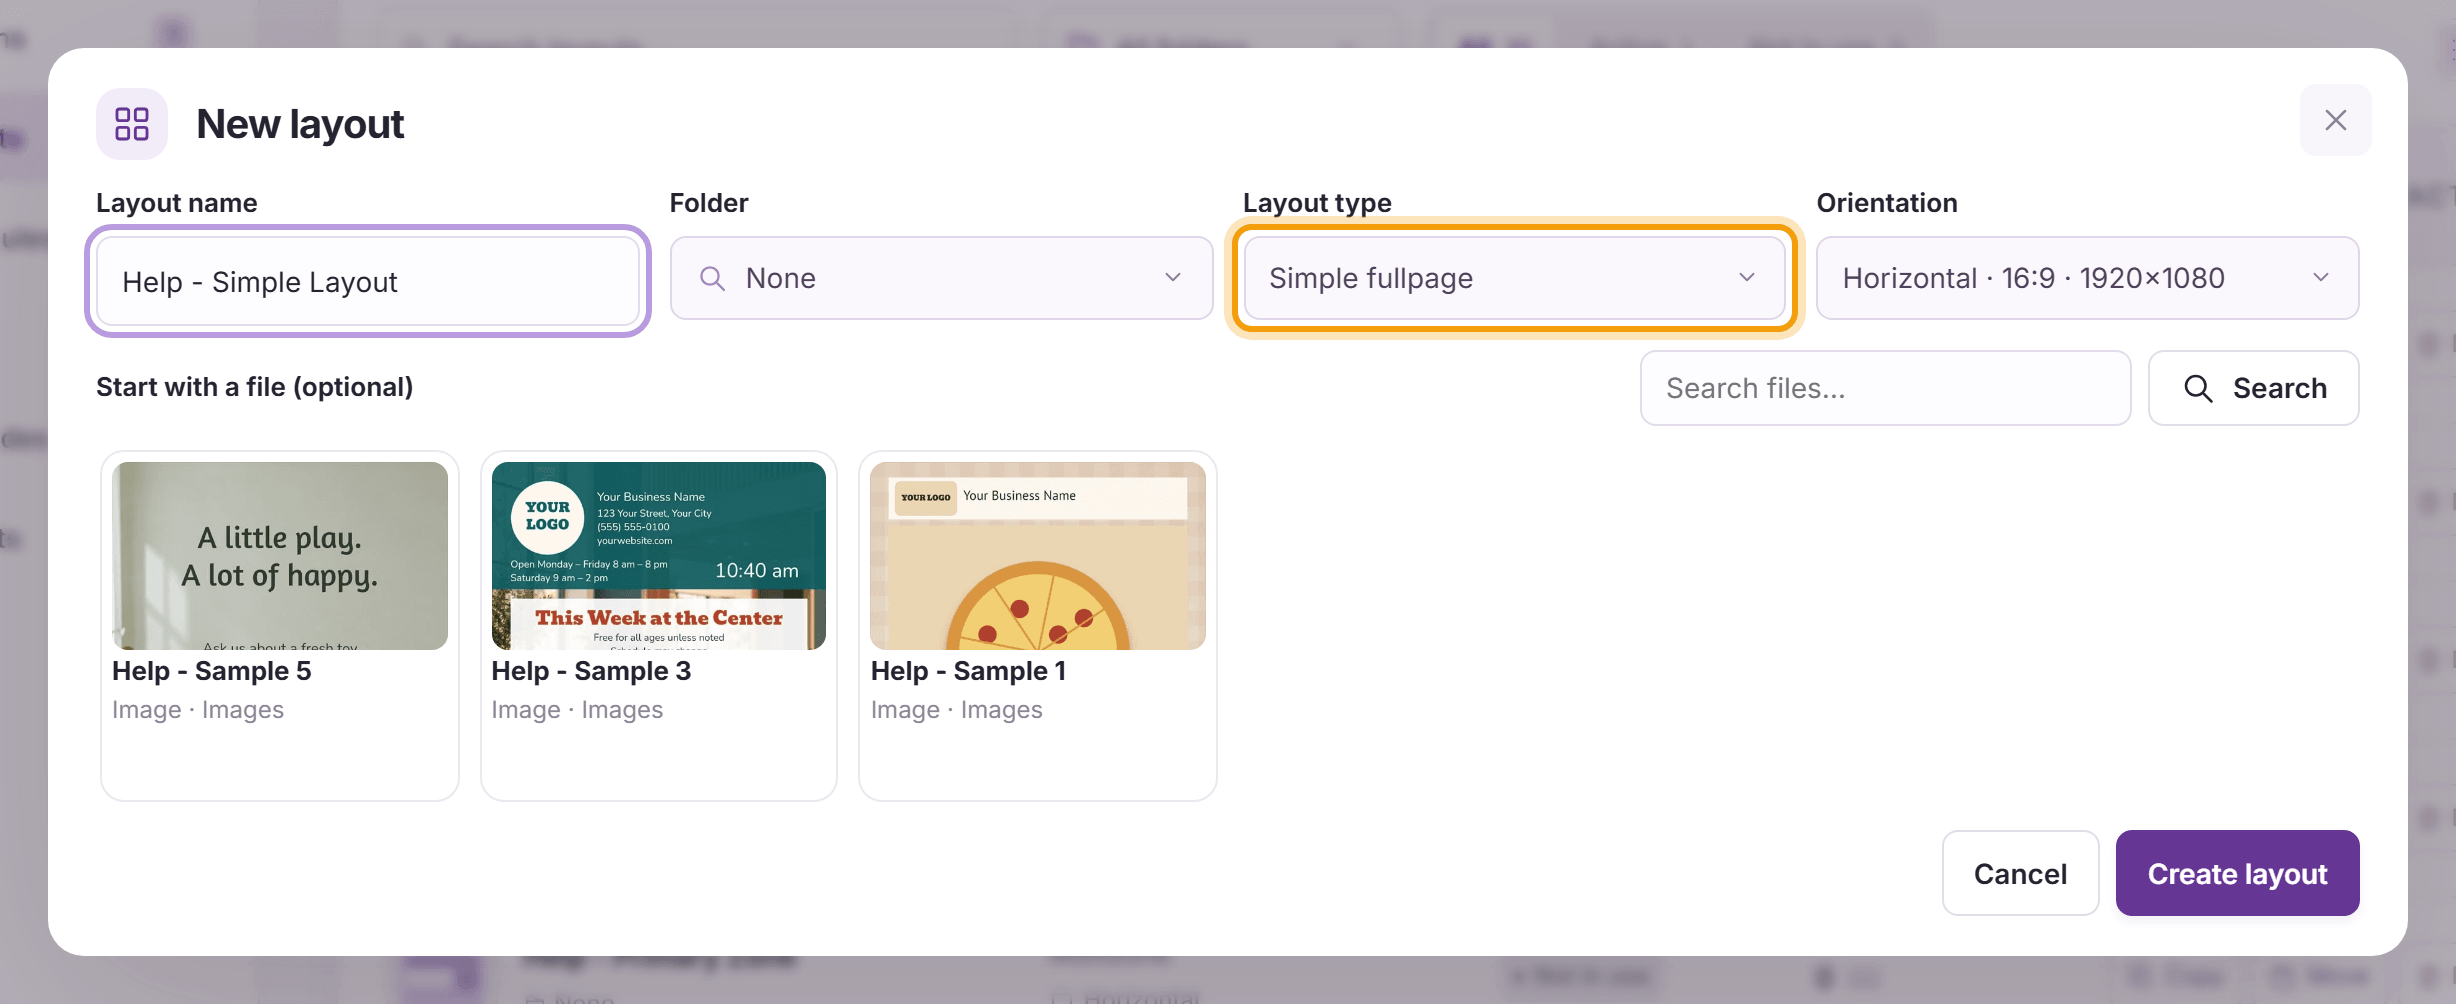
Enter a Layout name, set Layout type to Simple fullpage and choose the Orientation that matches your screen. You can also pick a file under Start with a file (optional). Click Create layout.
-
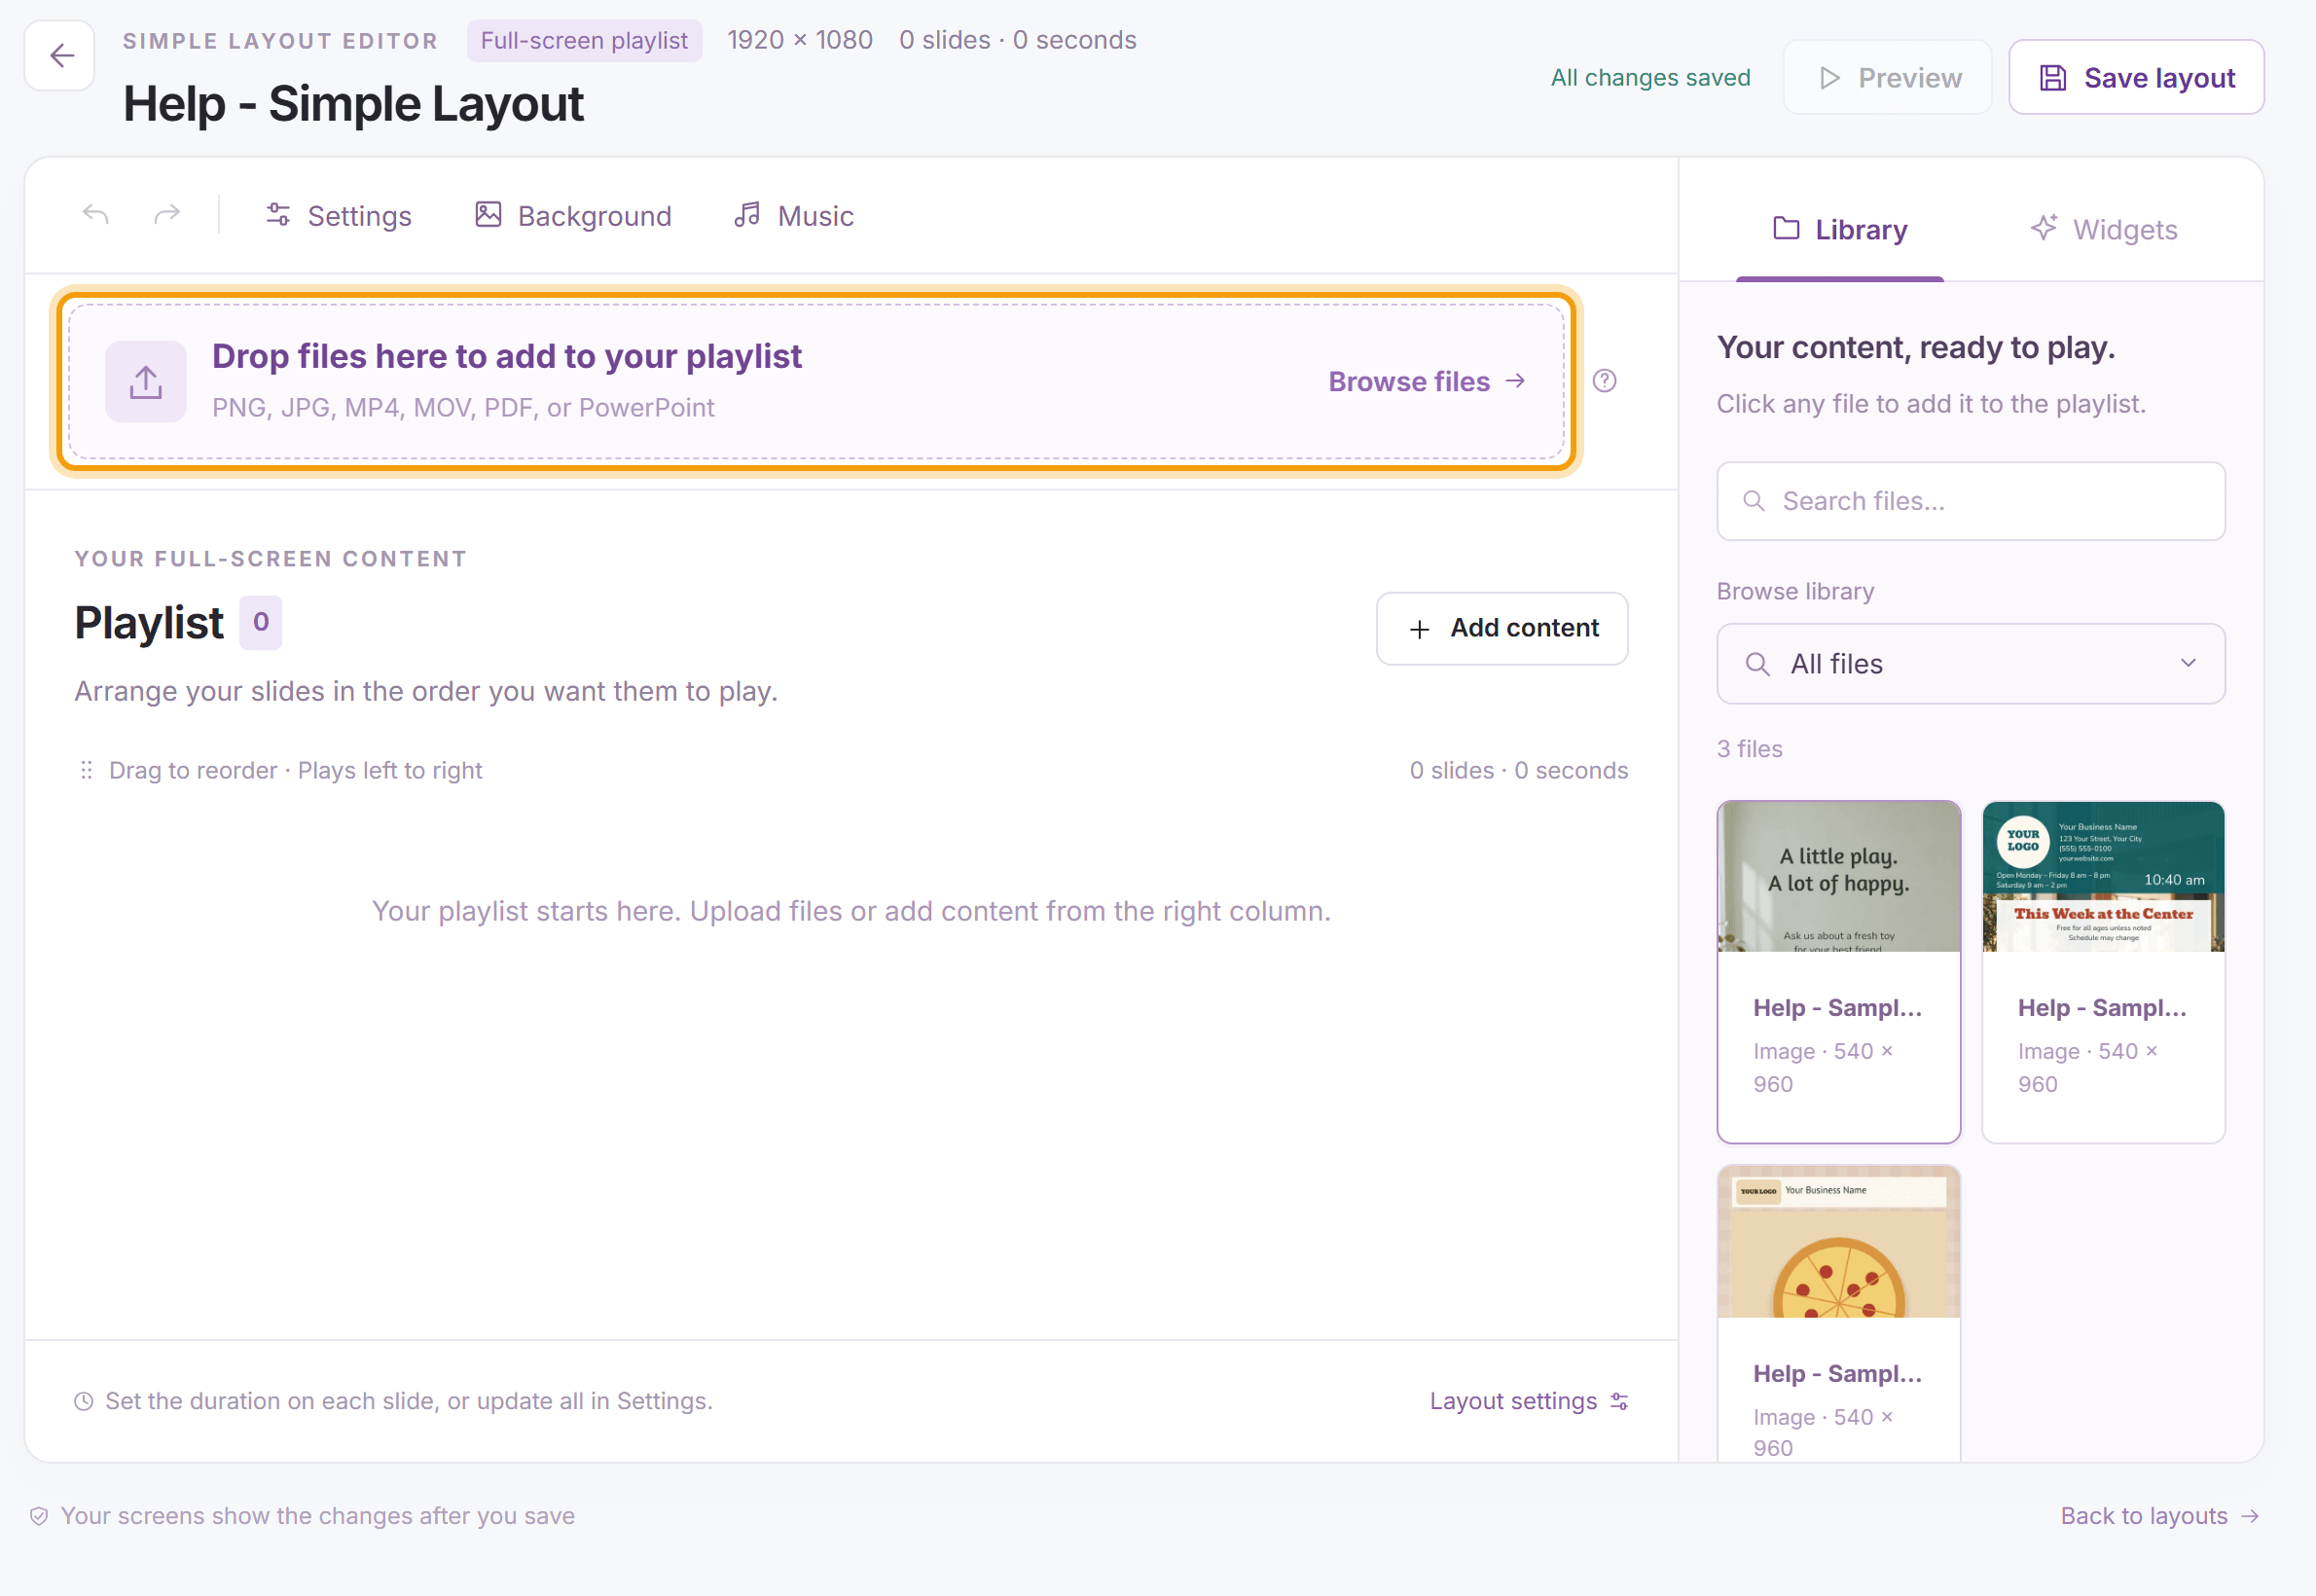
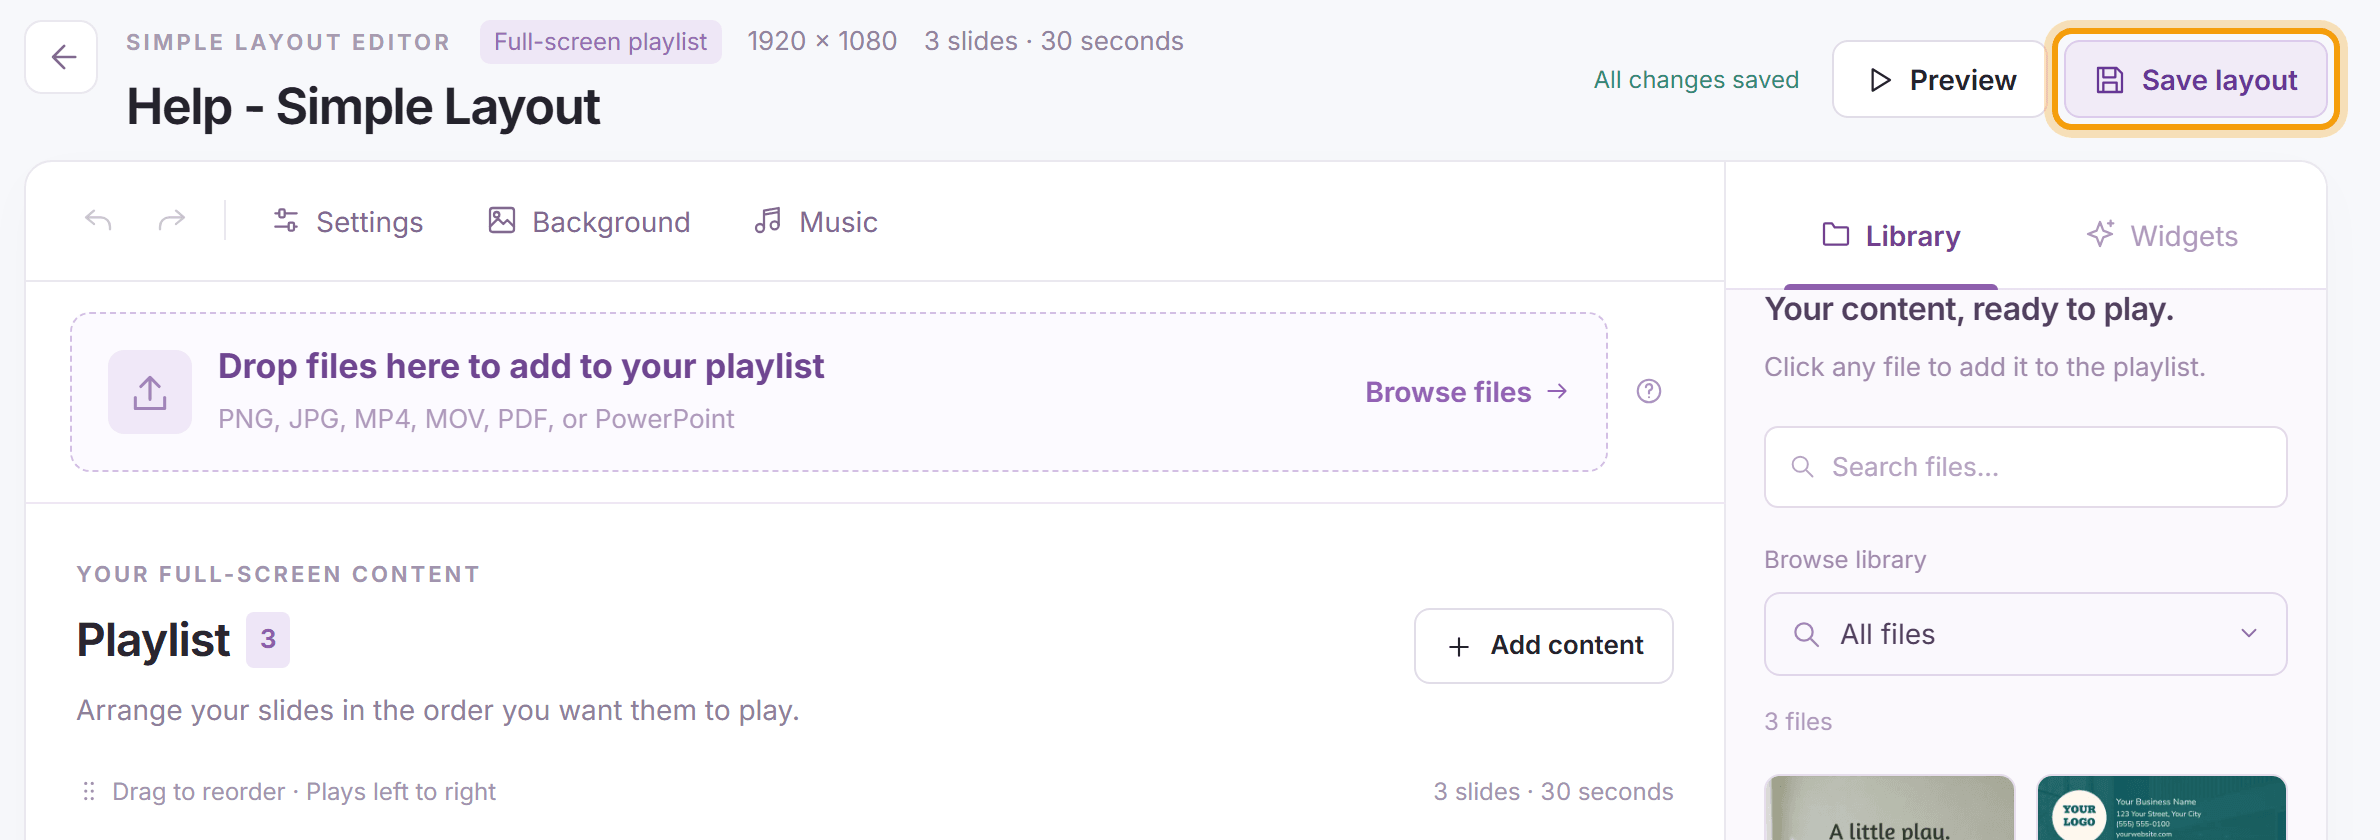
Add your files: drop them on Drop files here to add to your playlist, or click Browse files to choose them from your computer.
-
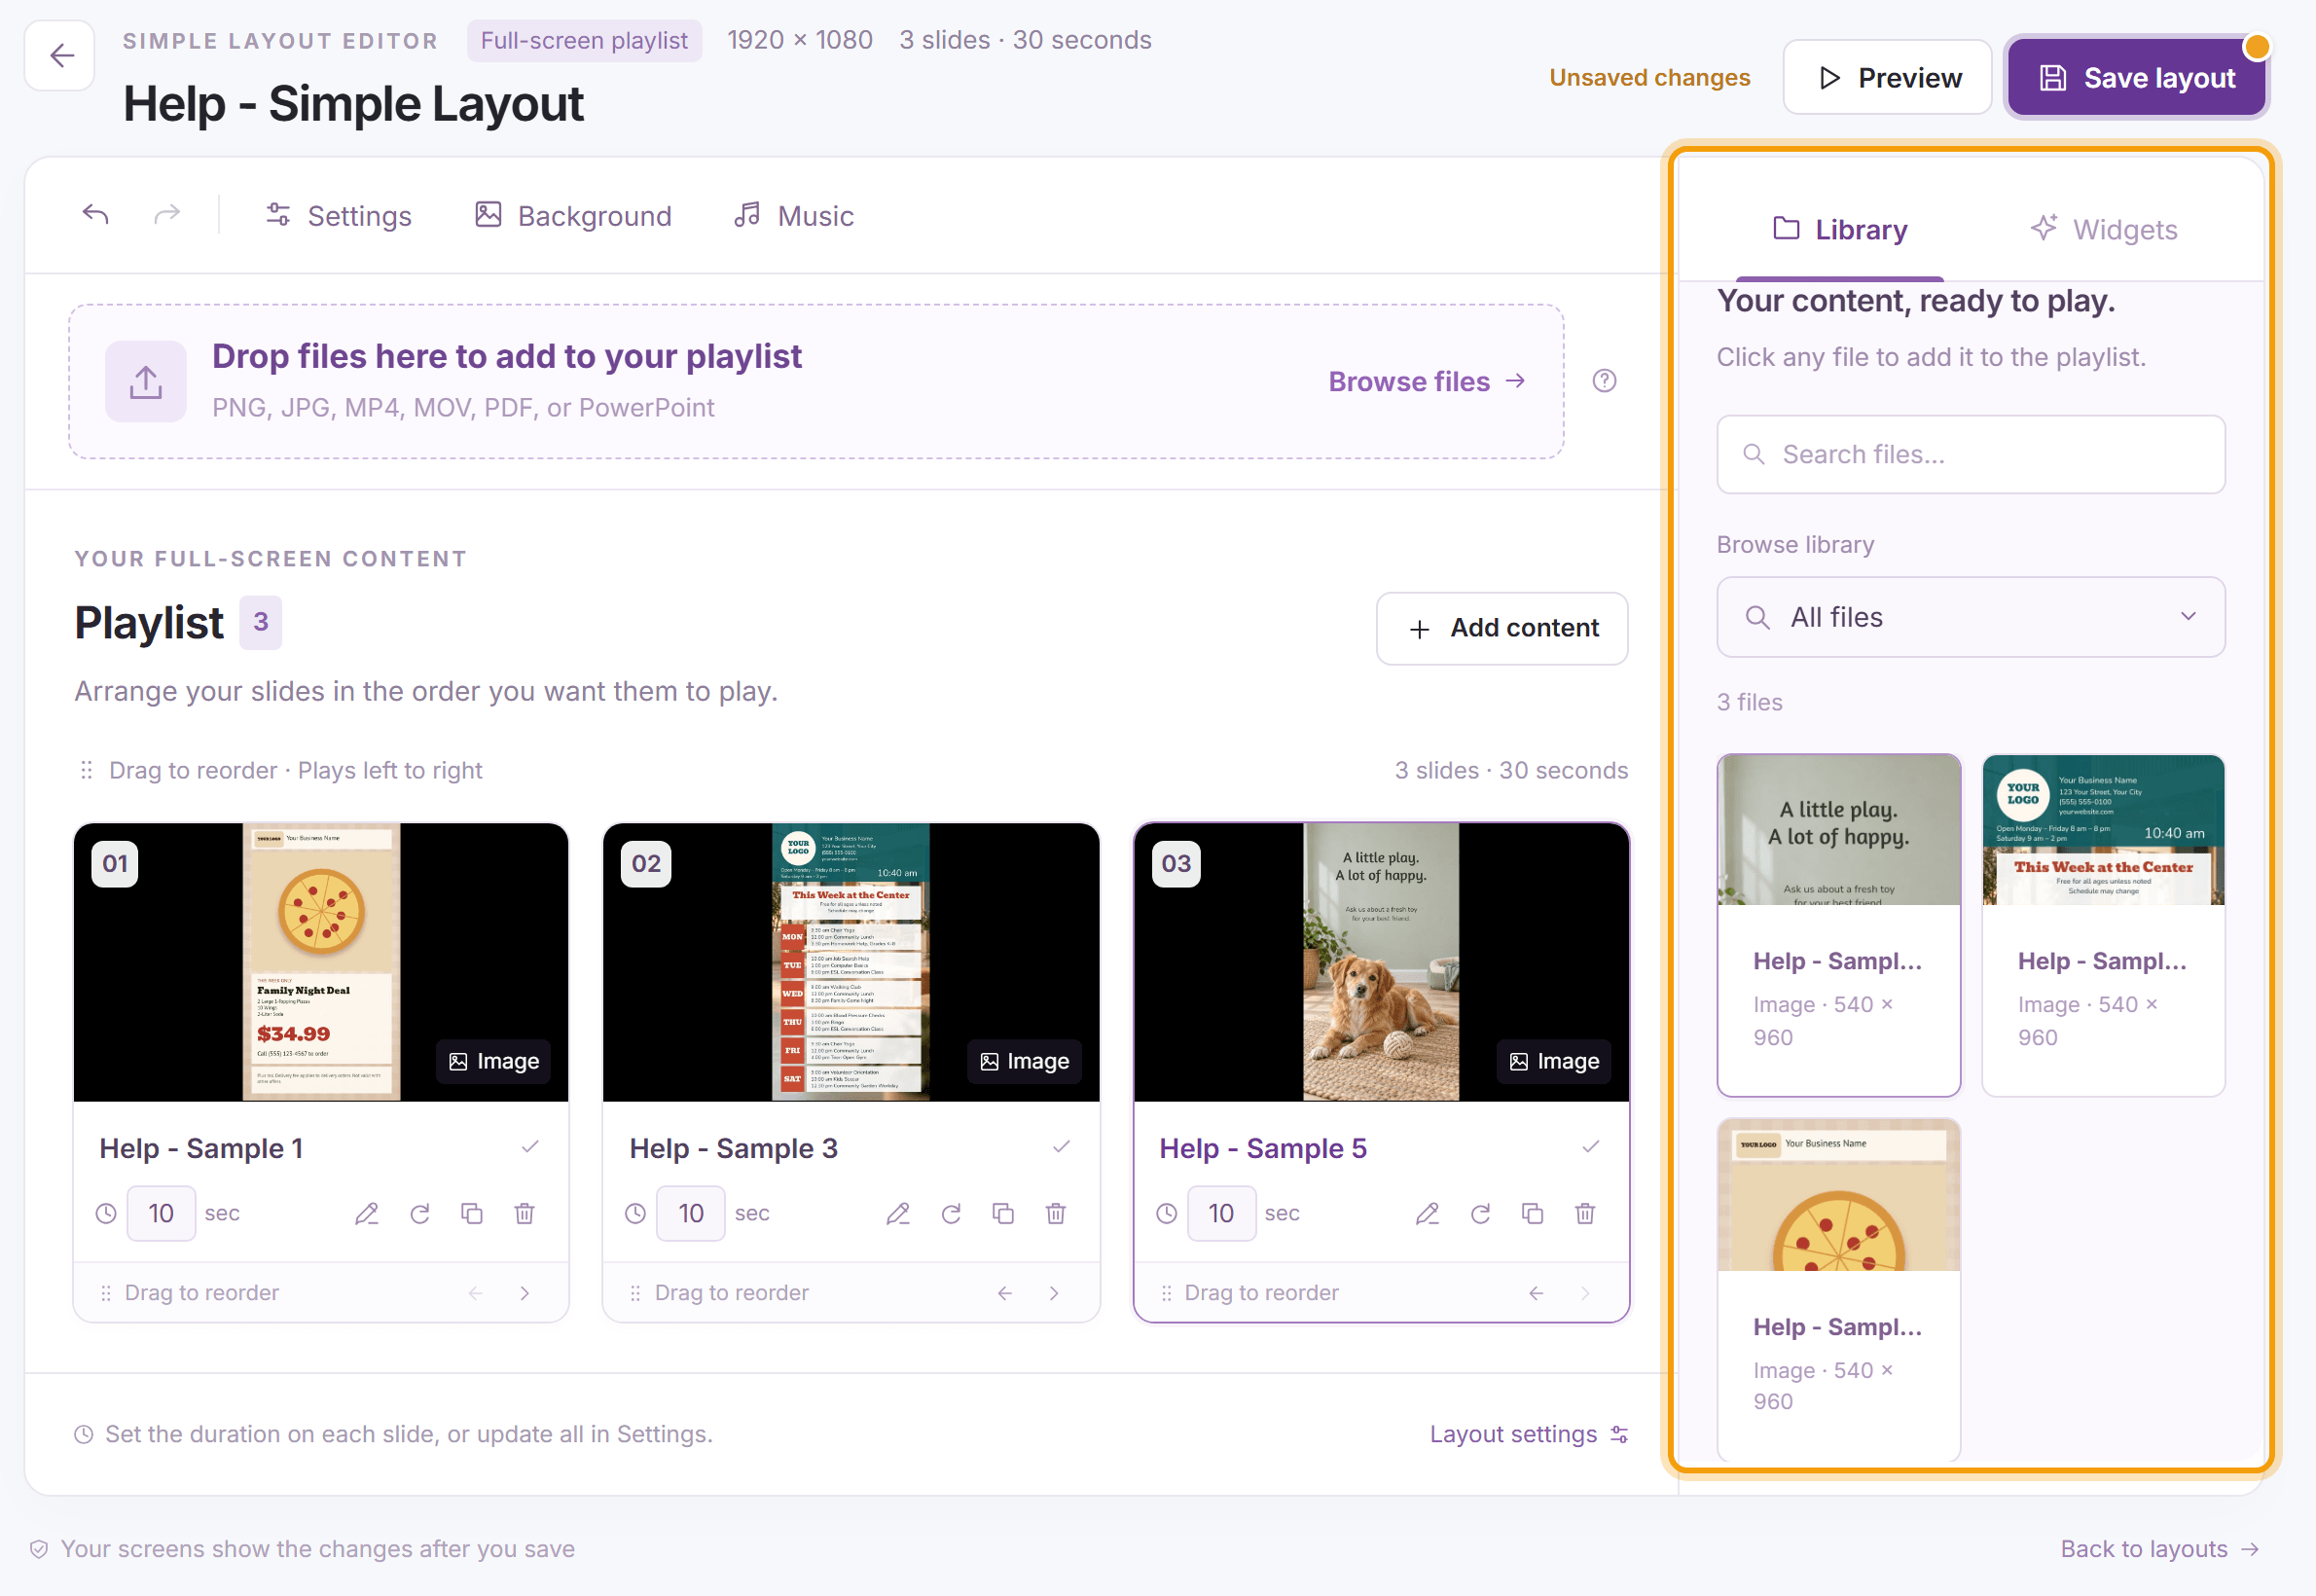
Everything you upload is kept in your library, so you can use it again in other layouts without uploading it twice. To add a file you already have, click it in the Library column on the right. The Widgets tab next to it adds live content such as weather and news.
-
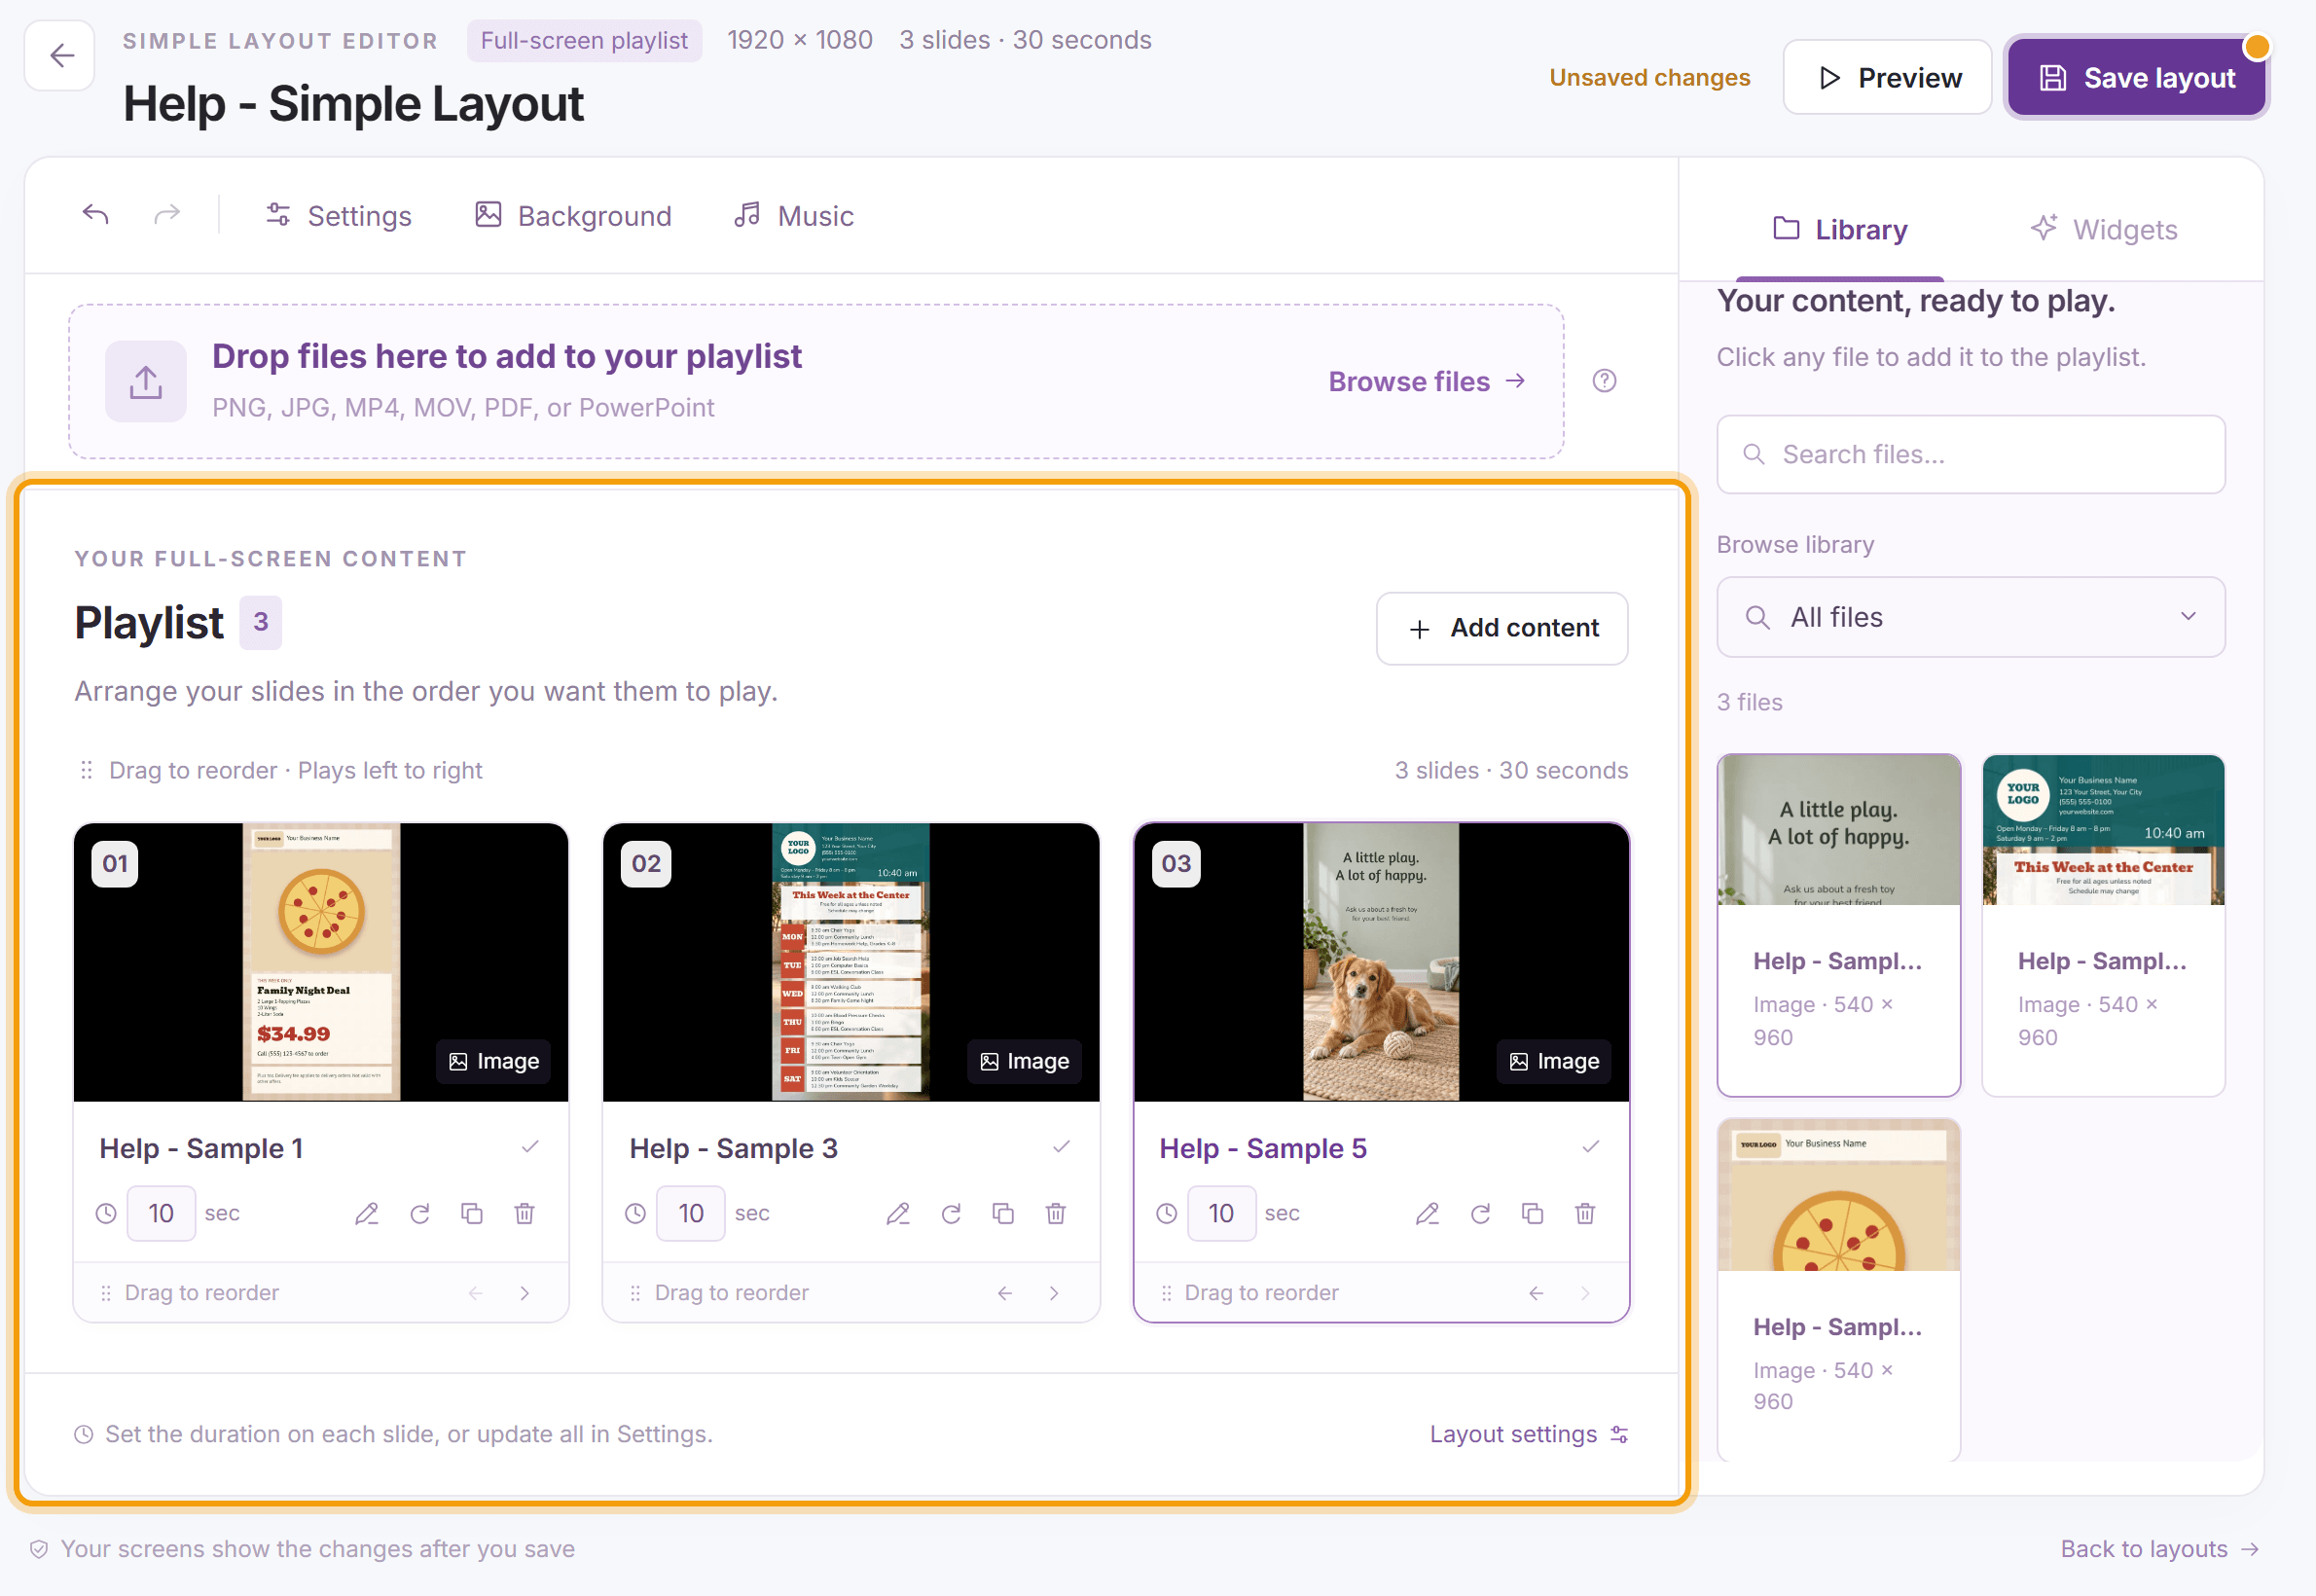
Arrange the Playlist. Slides play from left to right: drag them to change the order. Under each slide you can set how many seconds it shows, edit it, rotate it, duplicate it or remove it. A video always plays to the end, so its slide shows the video’s length instead of a number of seconds.
-
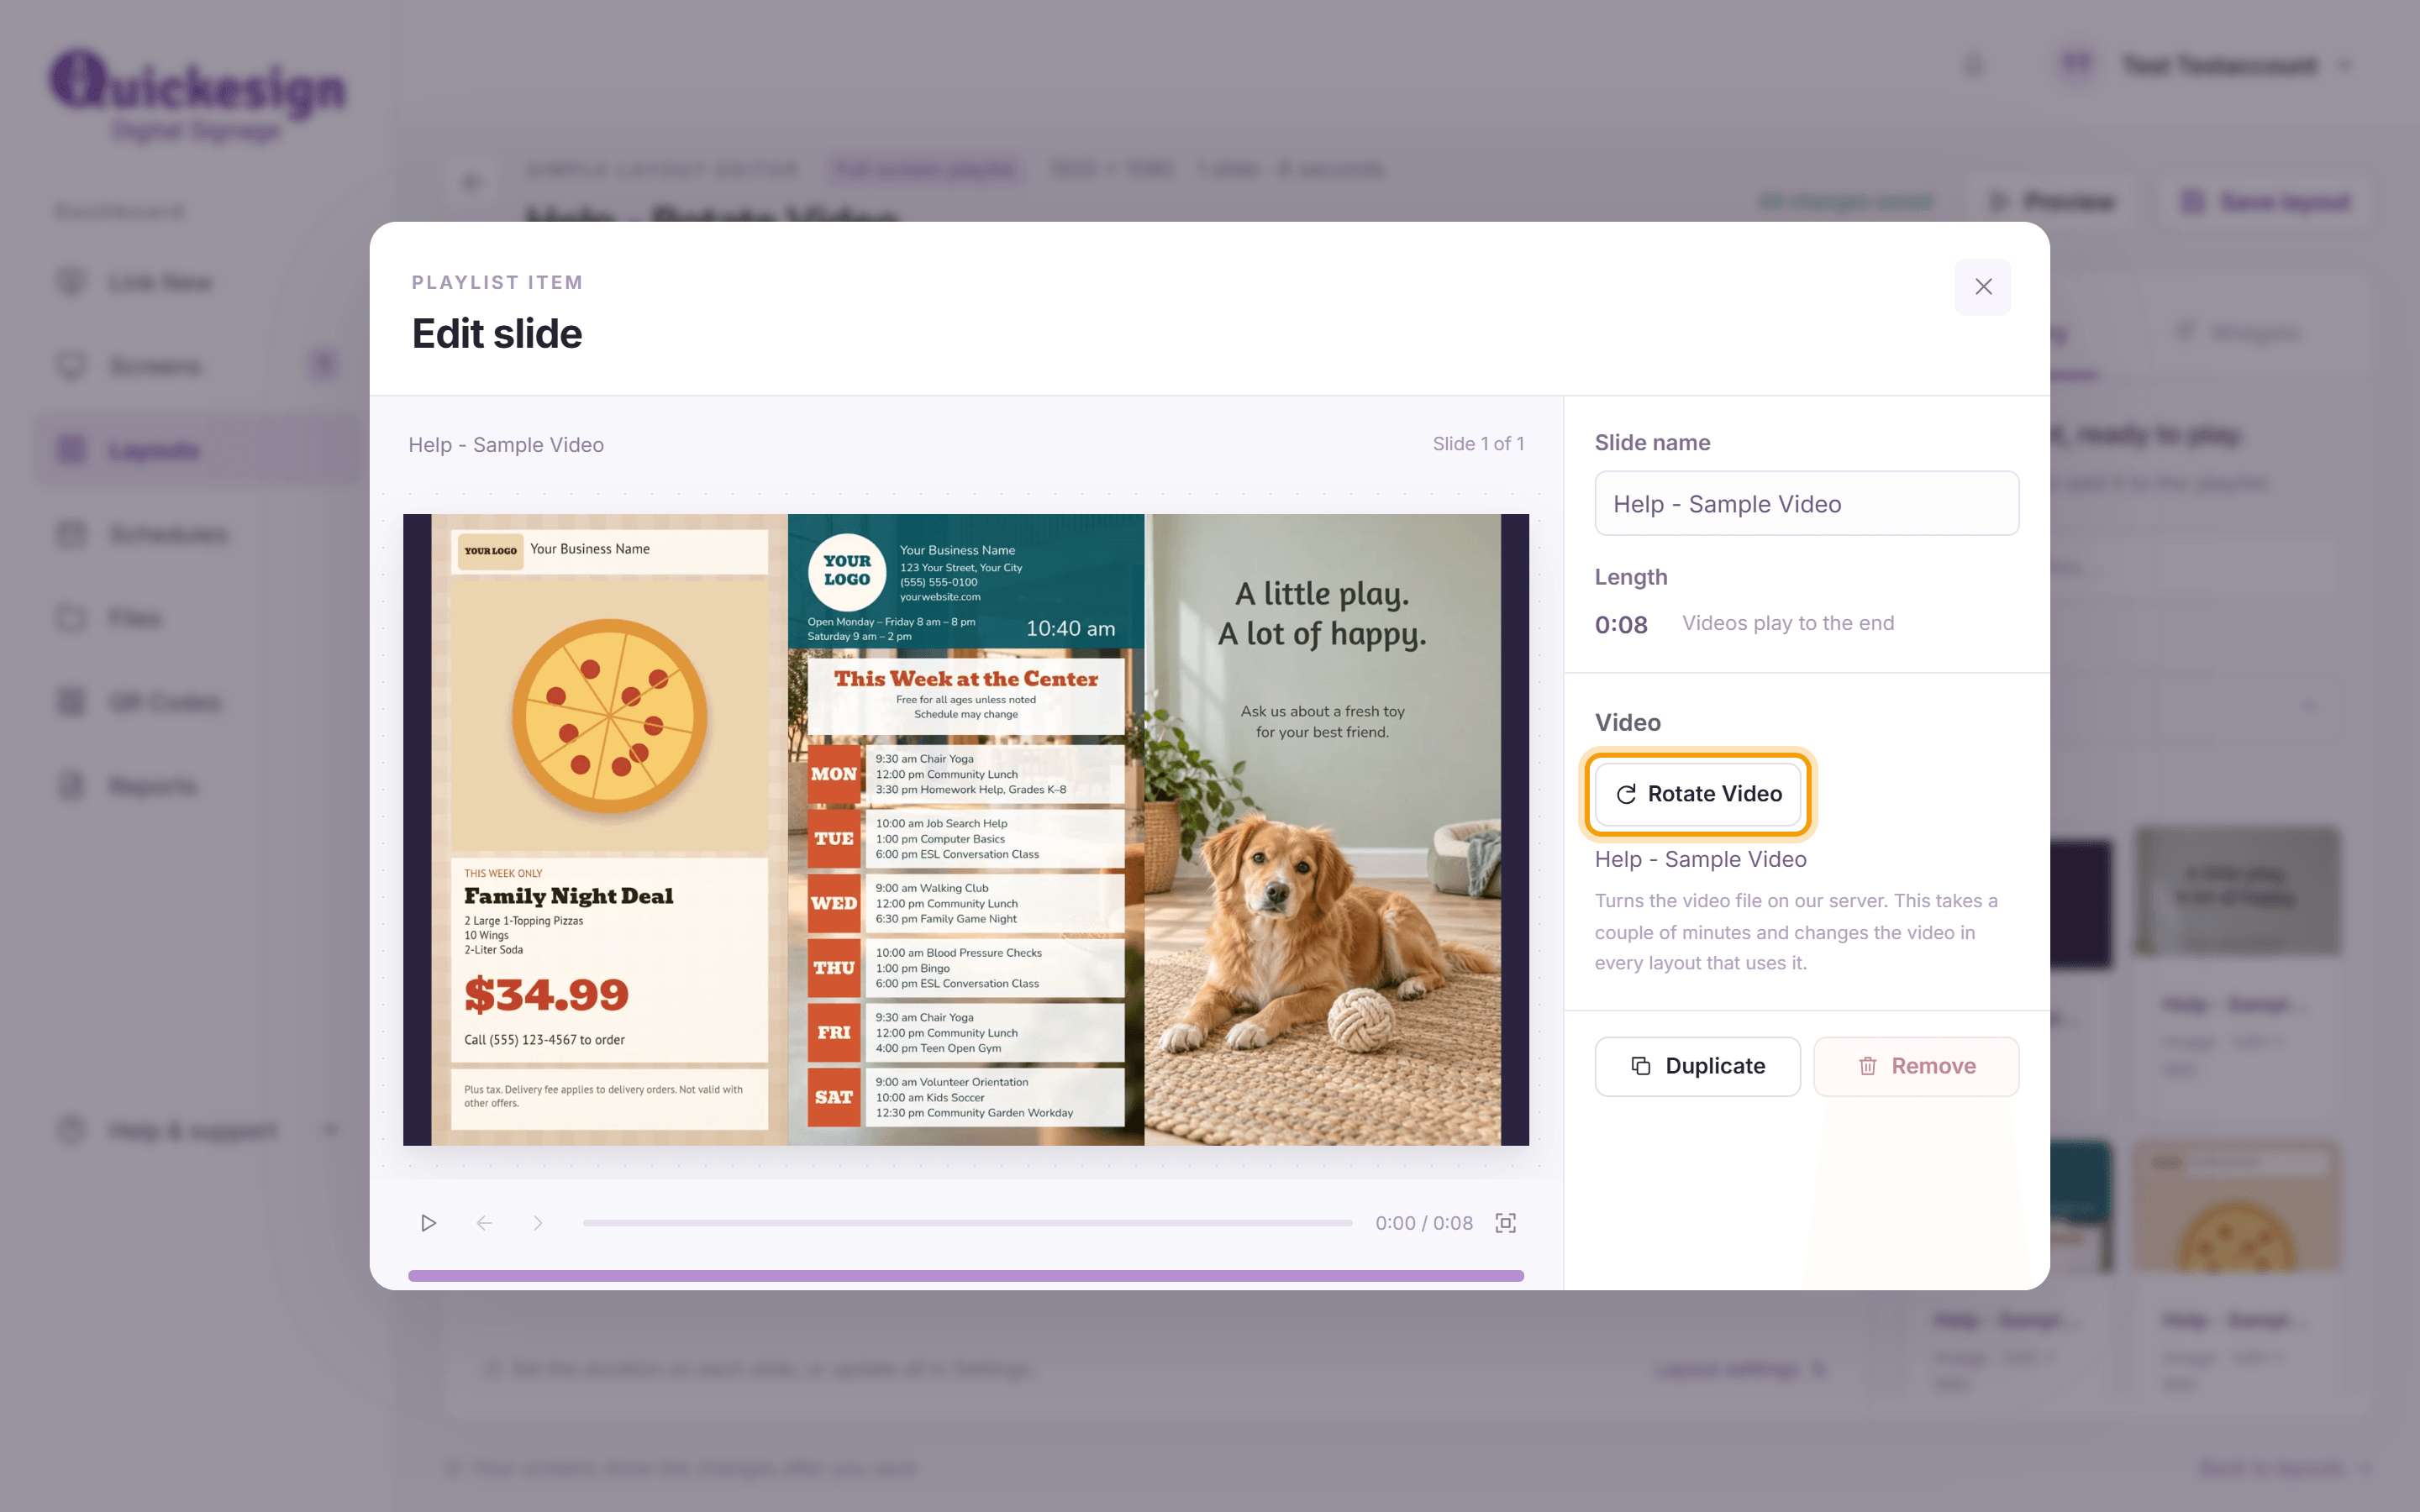
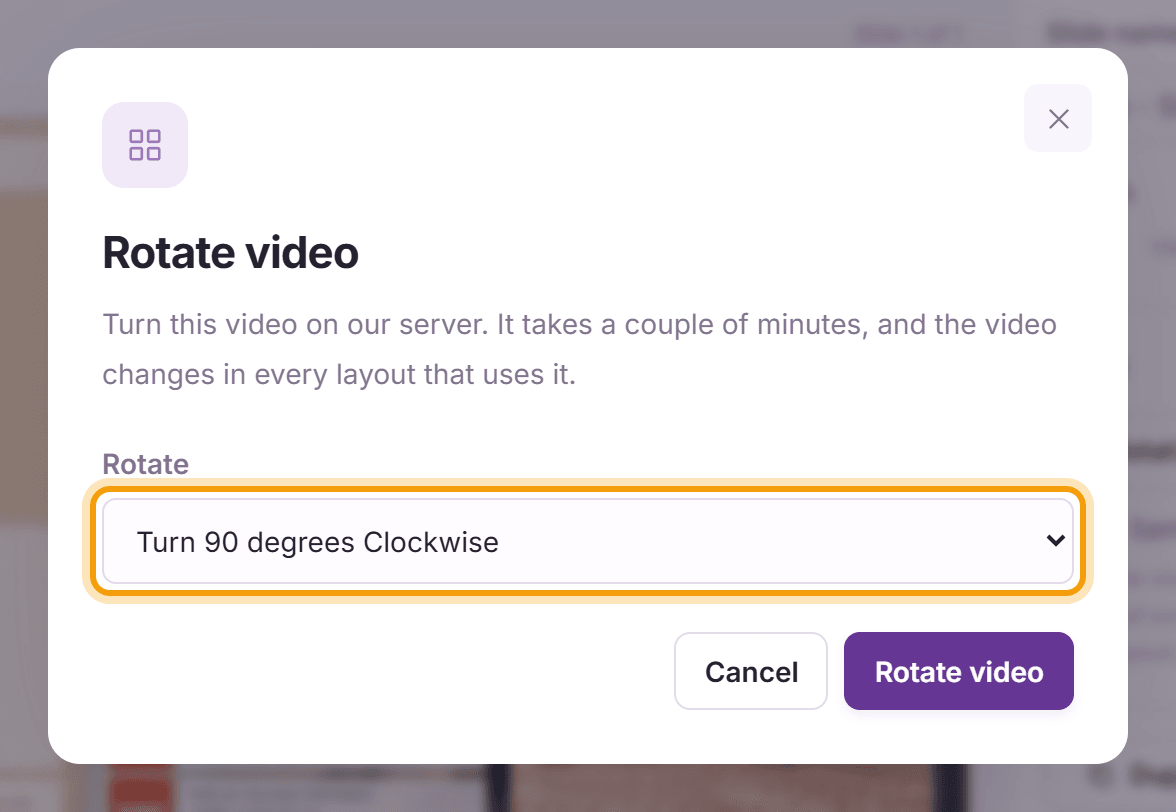
To turn an image, click its rotate button: each click turns it 90° clockwise, and the file is turned when you save the layout. To turn a video, click its rotate button, or click Edit slide and then Rotate Video.
Choose Turn 90 degrees Clockwise, Turn 180 degrees or Turn 270 degrees and click Rotate video. The video is turned on our server, which takes a couple of minutes; until it is ready the slide shows that it is being processed. Rotating an image or a video changes it in every layout that uses it.
-
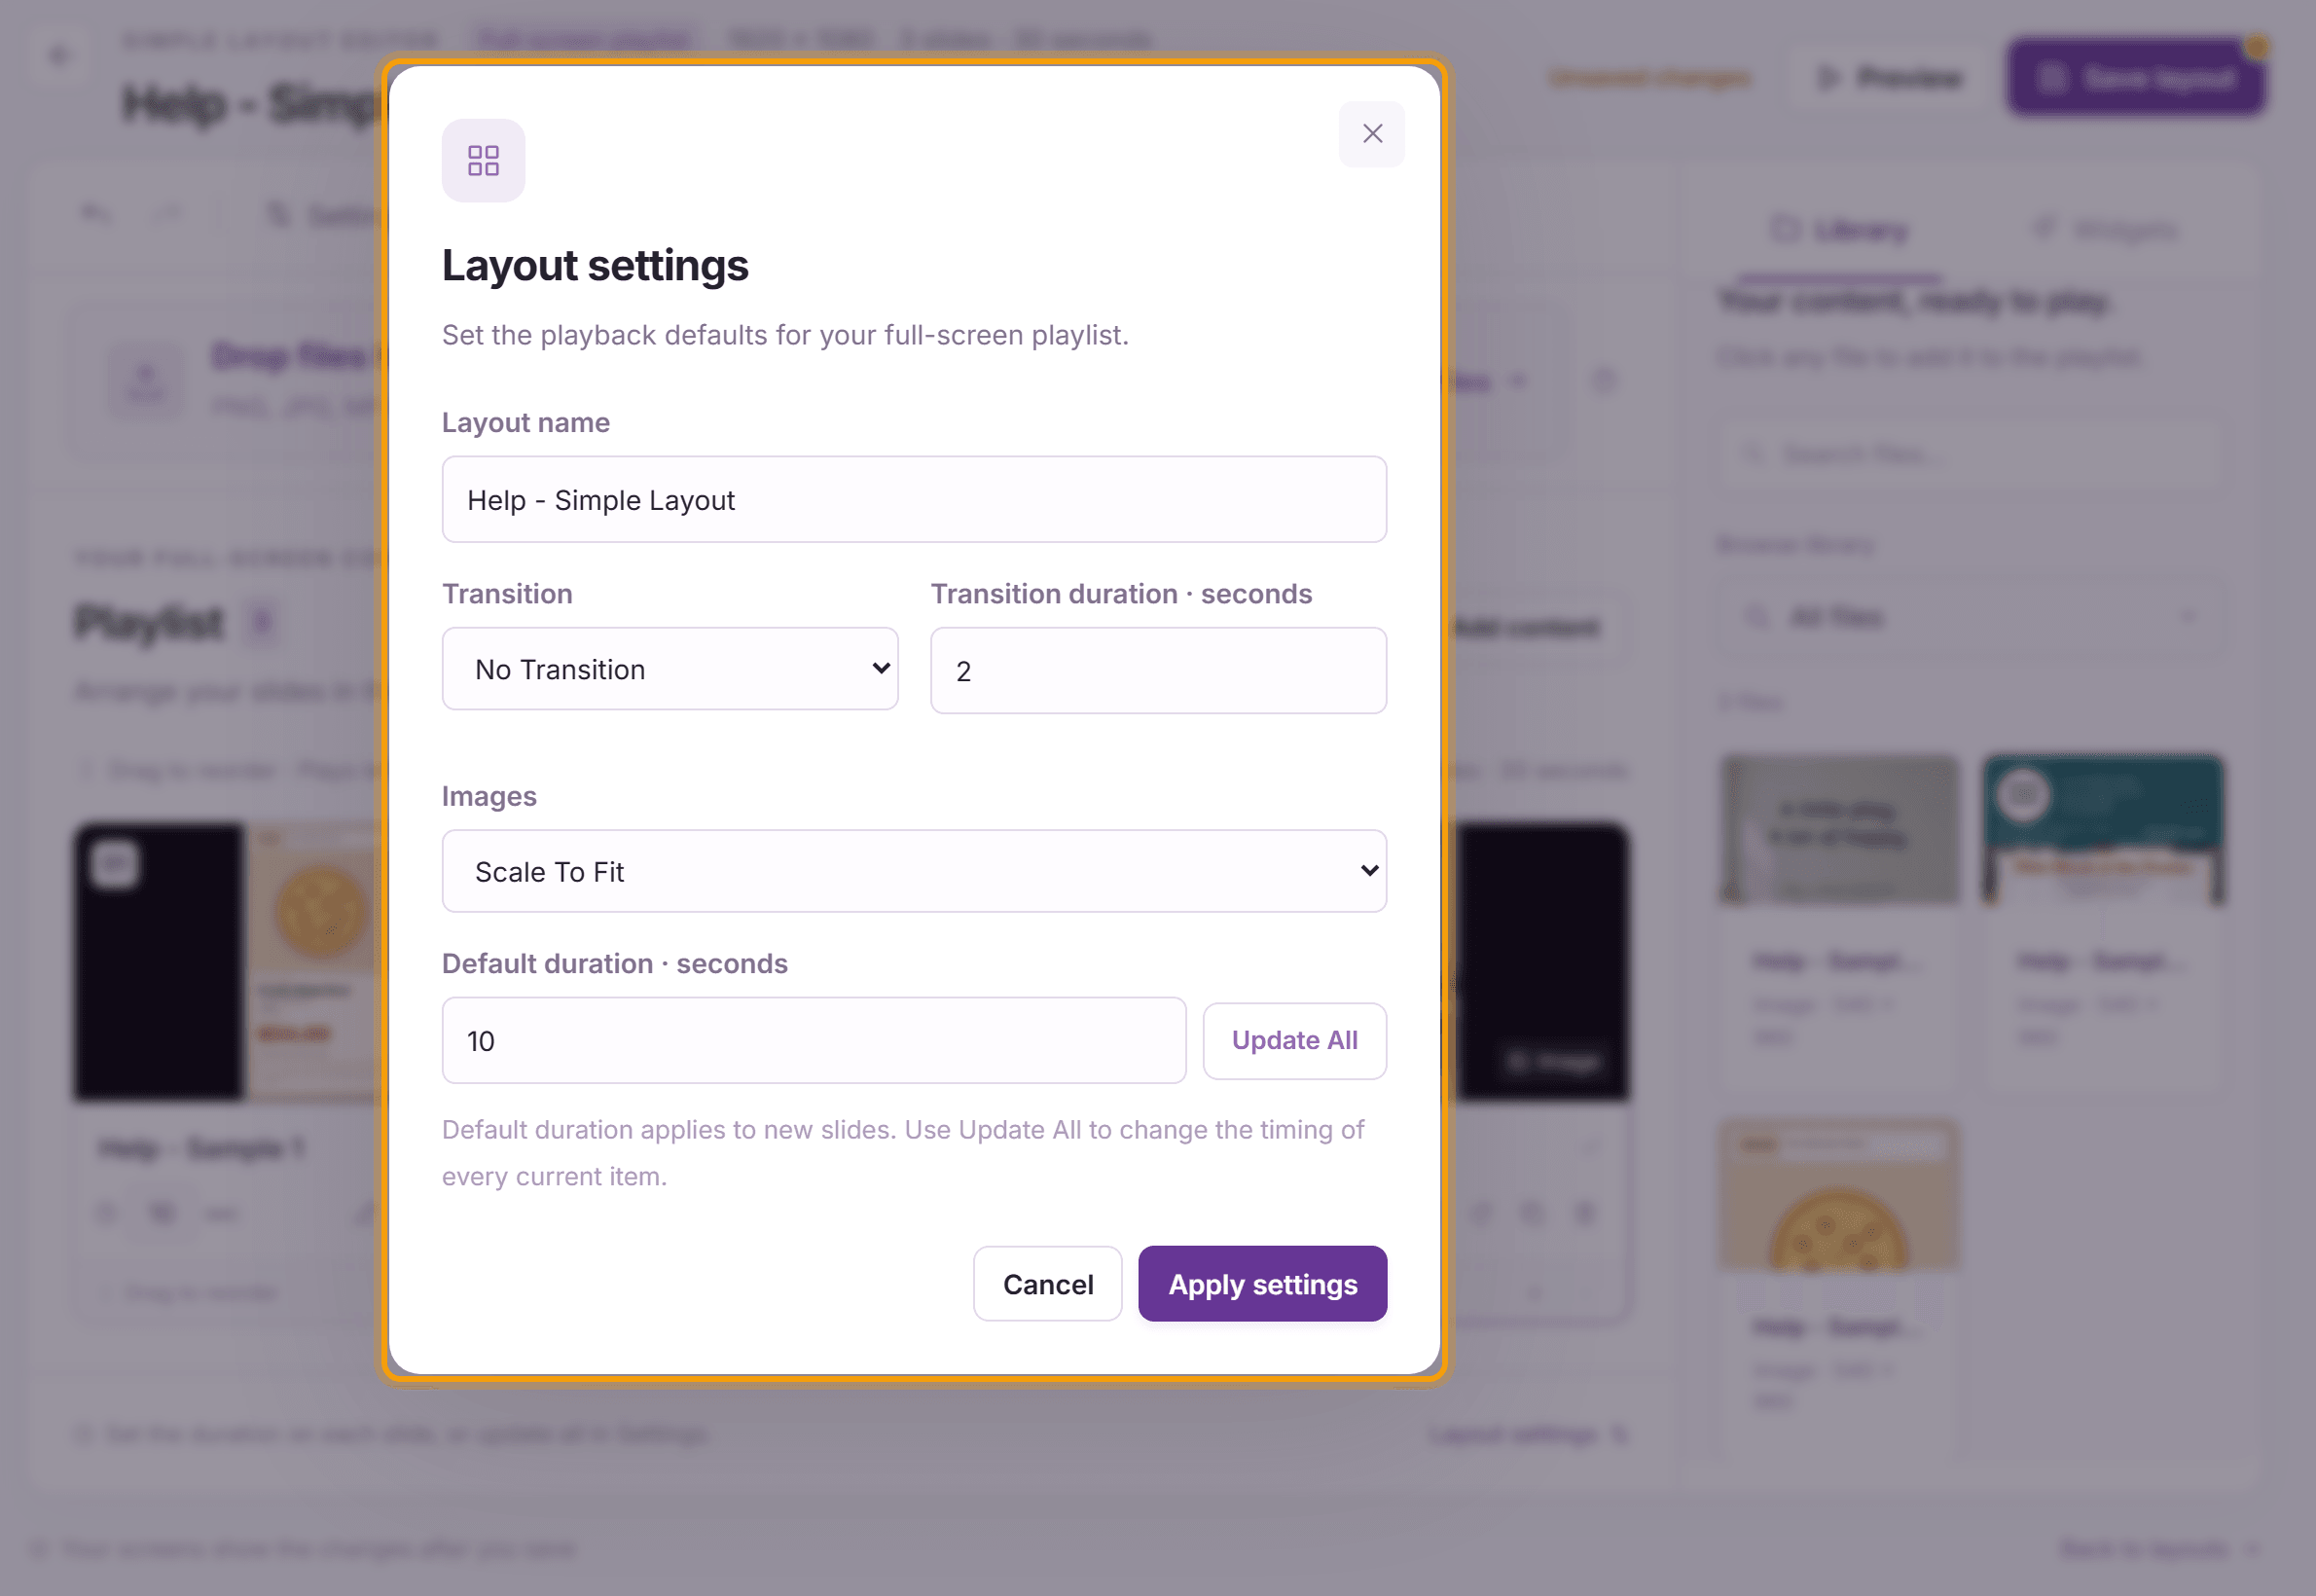
Click Settings for the Layout settings:
- Layout name: rename the layout.
- Transition and Transition duration: how one slide changes to the next, and how many seconds the change takes.
- Images: Scale To Fit (the default) shows the whole image as large as possible without stretching it. Scale To Fill, Scale To Zoom and No Scale are the other choices.
- Default duration: the seconds each new slide shows. Click Update All to use it for every slide already in the playlist. Videos always play to the end.
Click Apply settings. Background and Music in the toolbar set a background and add music to the layout.
-
Click Save layout. Use Preview to see the slideshow the way your screen will play it.


Tip: Uploaded files also appear on the Files page, where you can sort them into folders.
What’s next
Adding Layouts to the Screen’s Playlist: put your new layout on a screen.
Want weather, a clock or text next to your slides? See Multizone Layouts.